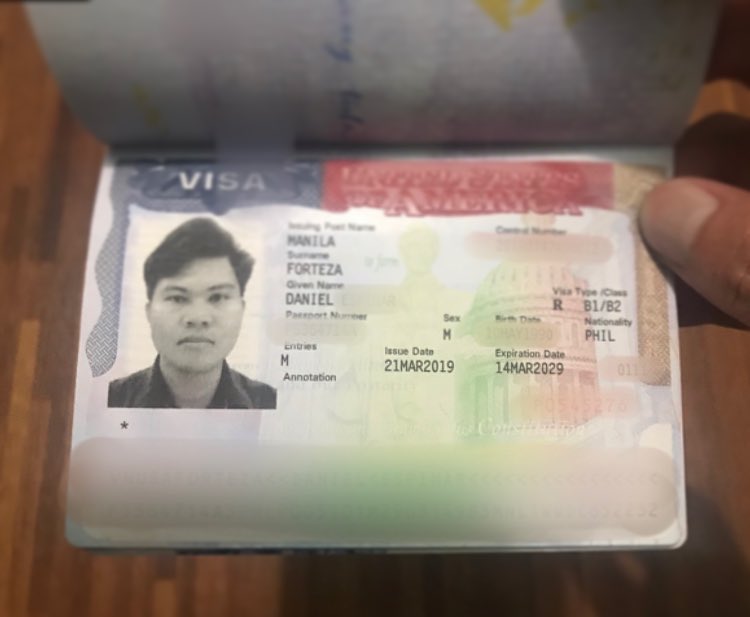
By Dan Forteza
How would you feel if an Instagram account so dear to you got disabled? If this recently happened to you, I’m sorry; I felt the same way when it happened to me. So if you’re here to find out how to get disabled Instagram account back, or you just simply want to know what I went through to have it back, then you’re in the right place. I’ll share everything you need to know in this blog.
But first, here is my Instagram (@iamdantravels) account that got disabled.

Through series of appeals to Instagram, I got it back in 15 days!
Yes, it took me 15 days!
If you’re now worried about your disabled account, don’t be! Your account will be back EVEN IF you really did something to violate Instagram’s terms and conditions. But the problem is we don’t know when it will be reactivated by Instagram. Time will tell.
So I will just ask you to wait patiently after following the appeal procedures! I can attest to this. And don’t you ever fall for hackers who claimed they can get it back. I’ll explain it later in the HELPFUL TIPS section.
JUST MY TWO CENTS: I feel like our disabled accounts are being held captive by Instagram and will be reactivated in due time depending on the gravity of our violations. Some say, in as quick as 24-hour, they got their accounts back. Most people got it back in 2 weeks’ time. If this is the first time your account got disabled, it is rare that you’ll have to wait for months to have it back.
So in case you got it back, don’t do anything stupid again haha. It would be harder to get it back the second or third time around.
If you really did NOTHING wrong and your account really was deactivated by mistake, then more reason to not worry. I believe it will be back in less than a week.
UPDATE: After a few days, I have another Instagram account that got disabled and this time around it was disabled REALLY by mistake. I was accused for “pretending to be someone else.” After I filled out the form to appeal my case, Facebook instantly (like 10 minutes after I sent the appeal form) sent me a message saying “my account was deactivated by mistake. You see? It’s that quick!
A BIT OF BACKSTORY:
Just like every millennial, I am also fond of sharing loads of content on my social media accounts, especially on Instagram. I mainly use Instagram to post travel-related content especially now that I am backpacking abroad and, hear this… during a pandemic! That being said, wouldn’t it be nice to have Instagram by your side to share what’s happening around you or simply vent out what you feel?
Read also: How COVID-19 had me stuck in Bangkok, Thailand.
So when my Instagram got disabled, my stress level was through the roof! It was both painful and heartbreaking.
Hear me out: I’ve been using Instagram since 2012. It’s my personal account. It is so dear to me as it contains a lot of memories in a span of almost 9 years. Those posts, stories, and messages are just too precious to let go. I know you would understand. In addition, it also had 6,000+ followers before it got disabled.
NOTE: You’ll know when your Instagram account is disabled when each time you log in a notification would pop up that says: “Your account has been disabled for violating our terms. Learn how you may be able to restore your account.”
Also, when your account is disabled, you are NOWHERE to be found on Instagram!
WHY WAS IT DISABLED?
There are different reasons why Instagram disables an account. Refer to this page from Instagram Help Center if you want to review their terms in full detail.
But in a nutshell, you violate the terms if you use Instagram for:
- impersonating someone;
- illegal activities;
- hate speech / fake news;
- nudity;
- graphic violence;
- collecting artificial likes or follows (or automating it);
- spams.
In my case, my account got disabled because I was using a third-party app to automate people to unfollow. In my defense, there are so many people on Instagram who follow you (in the hope that you follow them back), and then later on, they will unfollow you!
So I decided to download an app so I can automatically track and mass unfollow those people who unfollowed me. So yeah, because I prefer not seeing them on my timeline if they are no longer following me! You get me?
HOW TO GET DISABLED INSTAGRAM ACCOUNT BACK (STEP-BY-STEP with TIMELINE)
Day 0 (April 4, 2021):
So while using this automating app, I suddenly got kicked out of Instagram. When I try to open the app, it asked for my number to verify my identity. I put in my phone number and then Instagram texted me a 6-digit code. After keying in the code, I got this notification:
“Thanks for Providing Your Info. We’ll review your info and if we can confirm it, you’ll be able to access your account within approximately 24 hours.” (see also screenshot below)

If this happens to you, you need to worry a bit! Because most probably you’ll get your Instagram account disabled after 24 hours! I say 90% probability according to some blogs I’ve read.
Day 1 (April 5, 2021): THE APPEAL PROCEDURE
I couldn’t count how many times I logged in but ended up with the same “Thank you…” notification. Then exactly 24 hours had passed, my account is now DISABLED! It’s horrifying, I know. The pop-up notification now says:
“Your account has been disabled for violating our terms. Learn how you may be able to restore your account.” (see also screenshot below)

STEP1: When this appears, click ‘Learn More’ and it will lead you to another page specifying what kind of violation you did.
In my case it says:
“Some of the things we don’t allow include artificially collecting likes, followers or shares, posting repetitive content…” (refer to the snapshot below to see the full statement)

So this is why I got the impression that it has to do with the third-party app I was using to automate mass unfollow!
STEP 2: This is when we need to APPEAL to Instagram to get our account back. We’ll need to let them know that it was a mistake (even though your violation is slightly true? haha.) So click “let us know” and it will lead us to the appeal page!
The appeal page will ask you if your account is a business account, just choose “NO”. Then proceed filling up the form with your:
- full name;
- Instagram username;
- email address, and;
- country.
Remember, ALWAYS put that you’re in the US (they kind of prioritized your case if you’re in America.)
You can also access the same page on your computer. Let’s call this page FORM 1.
STEP 3: In a few minutes, you will receive an email asking you to take your photo holding a piece of paper with a 5-digit code in it including your full name and your Instagram username. Here is the screenshot of the email I received.

So do it right away!
Here is the photo I took. I look mad and frustrated. Haha!

It is rare that you will not receive this first email response. BUT in case you didn’t, there are other forms to fill up:
- FORM 2 – VERY similar to FORM 1, except it doesn’t ask which country you’re from. You also have to state the reason why Instagram should not permanently disable your account. Just simply say you didn’t do anything wrong or it might have been hacked and then eventually got disabled.
You’re basically talking to a “BOT” so don’t hurt yourself explaining too much!
- FORM 3 – You’ll need to submit your government-issued photo ID here.
- FORM 4 – VERY similar to FORM 2, the only difference is that it’s from Facebook Help Center. (Instagram is owned by Facebook in case you haven’t heard.)
Day 2-3 (April 6-7, 2021):
Our goal is to get that email (asking for our photo with a code) once a day until we receive a response from either Instagram or Facebook.
With that in mind, on the second day, I filled up FORM 2 and also receive the same email with a different code. The same thing I did on the 3rd day but I filled up FORM 3! I received the same email again with a new code.
So basically, I’ve been sending that photo with a code for 3 straight days!
Day 4-10 (April 8-14, 2021):
On the 4th day, I filled up FORM 4, but unfortunately, I didn’t receive the email. I also filled up FORM 1-3 one at a time but still, I am no longer receiving the same email!
I repeat filling up each of the forms per day from Day 5 to Day 10 but again, NO EMAIL! I have the feeling that Instagram max it to only 3 email responses per email address. I tried a different email add to fill out FORM 1and I finally received the same email response from Facebook! But of course, we wanted Instagram/ Facebook to know that the email in question is the email linked to our Instagram account. So I didn’t bother continuing the appeal process using a different email.
So from Day 5 to Day 10, I tried several other ways to contact Facebook and Instagram. I have listed those on the HELPFUL TIPS section below.
Day 11-14 (April 15-19, 2021):
On the 11th day, I almost gave up. I stopped filling up the forms.
I created a NEW Instagram account, too =(. I told myself: at least the posts on my Instagram have synced into my Facebook page. So somehow I still got the memories.
Basically, I just left it in the hands of GOD! If Instagram will give it back then I’d be very grateful. If not, then that’s fine. I already accepted the fact that it might not be recovered. Huhu!
On the 14th day, I received this email stating that my account is fixed?
The email message reads:
“We just investigated your report and it looks like this is NO longer an issue. If this comes up again, just reply to this message and let us know…” (refer to the screenshot below)

So I tried logging in BUT still the same “Your account has been disabled…” notification.
This email was a HUGE relief to me though! I believe Instagram is in the process of reactivating it. So I replied to the email asking them to help me since I am still getting the same error.
Day 15 (April 20, 2021):
FINALLY, on the 15th day, I received a new email from Facebook saying that my Instagram account has been reactivated.
AND IT WORKED!!!!

The first thing I did after recovering my account was to switch it to PRIVATE. I feel like from this time onwards, I am going to protect this personal account of mine and refrain from doing any sort of violations. Haha!
HELPFUL TIPS (OTHER WAYS):
When I stopped receiving those email responses from Facebook on the 4th day, I started looking for other workarounds to contact Facebook and Instagram.
Here are some of the useful tips I could give you! I’ll explain each as per my experience.
TIP 1: ACCESS THE FACEBOOK SUPPORT CHAT
You can access the Facebook live chat if you have a Facebook business account after running an ad in it. Since I already have a Facebook business account with ads in it, I can easily access it and get help regarding my Instagram account. BUT NO! I couldn’t find the live chat.
After watching a couple of YouTube videos, I learned that Facebook has temporarily stopped this kind of support somewhere in March 2021. Maybe it has to do with the pandemic? I’m not sure.
TIP 2: CALL FACEBOOK NUMBER
I came across another YouTube video claiming that calling the Facebook landline number had helped her in recovering her disabled Instagram account. The number is:
- 1-650-543-4800 (US landline number)
Since this number is in the US, I used my SKYPE Credit to call this number. Please note that you won’t be speaking with an actual person. Instead, you will have to explain everything as quick as you can probably in less than 40 seconds (as it will cut you off) AFTER THE TONE! Also, you’ll need to spell out your name, Instagram username, and email address.
TIP 3: MESSAGE ACTUAL FACEBOOK/INSTAGRAM EMPLOYEES
This is another option. What you’ll need to do is head to LinkedIn and find Instagram (see snapshot below). Then click “See all XX,XXX employees on LinkedIn.”

You’ll be able to find the list of real employees working on Instagram. You can also filter the employees by location, say for example employees in California. And with their names, find them on either Facebook or Instagram then message them! I messaged like 15 people! There are two people who responded but only advised me to check out the HELP Center instead. Not really the response I am looking for! But at least I tried.
You could do the same thing with Facebook employees on LinkedIn.
TIP 4: DON’T EVER FALL FOR CYBER HACKERS
Now this one is interesting. When I posted about my situation asking for help to Instagram on Twitter, a person who claimed he is a professional hacker messaged me. Apparently, this is common on Twitter wherein they would claim they can help you get your account back. There are a lot of these people on Twitter (and even in YouTube comment sections of most of the videos I’ve watched.)
Below is the message I received from Twitter:

Don’t listen to these people! Just trust the process!
As an example, I got this message from someone who hired a hacker to get her account back. Turns out, the hacker is scamming her for what else…her money!
Apparently, the hacker created a fake account of her into thinking they had the details.

I feel sorry for this gal. Hope she can still get her account back.
LET’S WRAP THIS UP:
I can understand your frustration and pain. Because I’ve personally experienced this myself.
But the good news is that it isn’t too complicated to get back your disabled account. The only frustrating part is we have to wait for God knows HOW LONG!
It might take a few days but that’s nothing compared to the months or years of photos and videos that you uploaded to your Instagram account!
So don’t lose all the hope. You will get it back! =)