How To Apply For An Egypt Tourist Visa in the Philippines (2026 Updates)

By Dan Forteza

This post may contain affiliate links which means if you purchase something through that link, I will make a small commission at no additional cost to you. Think of it as buying a cup of coffee for me on someone else. Thanks & enjoy!

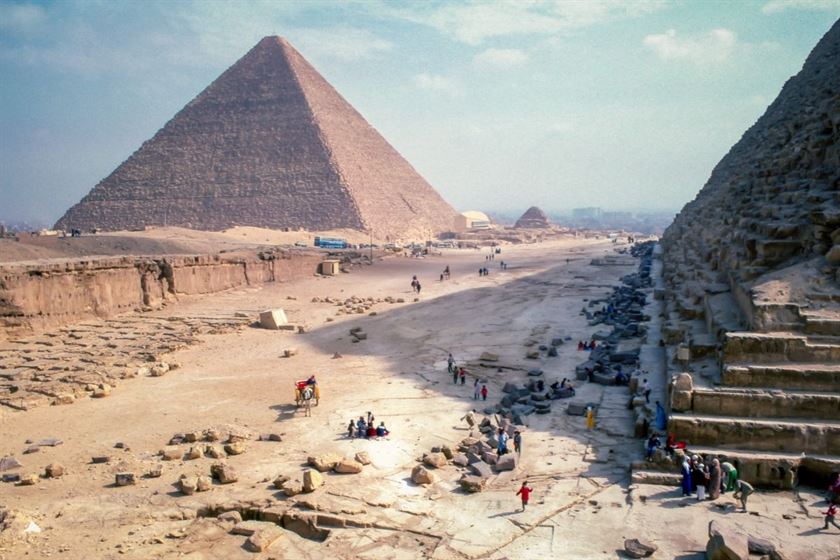
Visiting the Great Pyramids in Egypt is definitely one of my travel goals this year. That’s why as early as January, I have already been researching on how to get the Egypt tourist visa for Filipinos. And I successfully managed to get one at the Egyptian Embassy in Manila, Philippines!

Read also: my budget itinerary (with cost breakdown) and travel guide in Cairo, Egypt.

Photo by Les Anderson on Unsplash

In this blog post, I’ll be giving you the step-by-step guide, a list of the requirements, my experience throughout the whole application process, and other tips to help you get your Egypt tourist visa!

But again, just like in other visa application blogs I’ve written, no one can give you the guarantee of your Egyptian tourist visa’s approval – not me, not even a lawyer or a travel agent. If anyone does, is most likely a scammer!

As a travel blogger, what I can offer you here is just a guide with helpful tips to increase your chances of getting that Egypt tourist visa.

Anyway, enough of that and let’s get started!

REQUIREMENTS FOR EGYPT TOURIST VISA

  1. Duly filled-up Visa Application Form; You can download the application form here. (Note: This is the universal form accepted by the Manila Embassy).
  2. Two (2) pieces 2×2 size recent colored picture (with white background); I actually used only one (1) 2×2 photo which was pasted on my application form. But it wouldn’t hurt if you bring an extra photo.
  3. Valid Passport which must have remaining validity of more than six months; You might not be required to submit your passport on the day of your first visit to the Embassy. Most of the time, the Embassy will take and review your requirements without your passport. The review might take up to 15 days and the Embassy will let you know its decision via phone call.
  4. Bank Certificate, preferred to be one-week-old;
  5. Employment Certificate with compensation / Business Registration if applicable; I’ll be honest. I actually did not exactly provide this because I quit my job to travel long term. Thus, I provided an Employment certificate from the previous company I worked for.
  6. Travel Tour Itinerary; I can provide you a copy of mine if you like. It is a one-week long tour itinerary. Just leave a reply on the comment section below.
  7. Copy of Philippine residency/ visa / Immigration ID Card (for foreign national applicants only).
  8. Marriage Certificate / Birth Certificate, if traveling with family members.
  9. Add a cover letter stating the purpose of your trip even if it’s not a requirement I think this should be a must especially if you have a case like mine that one requirement is not fully met. Thus, I prepared myself a visa cover letter personally explaining my situation, my capacities, and my hunger to travel.
  1. Plane Tickets. This is NOT required but I submitted this anyway because I already have this. I had a plane ticket from Manila to Dubai and I intend to book my next flight from Dubai to Cairo (in Egypt) if my visa is approved. I suggest you check Kayak (use the widget below) as they usually offer cheap fare rates compared to other booking sites.

WHEN AND WHERE TO APPLY

WHEN: Application should be made at least one month prior to your intended departure. Please note that there is a waiting time (up to 15 days) in case the embassy needs to fully review the requirements you submitted.

💡 DAN’S PRO-TIP: CHECKING YOUR STATUS
If you haven’t heard back after 10 working days, don’t hesitate to send a polite follow-up email to embassy.manila@mfa.gov.eg. Include your Full Name and Submission Date in the subject line to help the secretary find your records quickly!

📅 HOLIDAY NOTICE: The Embassy observes both Philippine and Egyptian holidays. If you are applying around this time, expect potential closures and factor in extra processing days!

WHERE: Visa application must be submitted personally to the Embassy during consular working hours from Monday – Wednesday from 9:00 A.M. till 12:00 P.M. except holidays. Please take note of the Egyptian holidays, too.

Egyptian Embassy – Manila
7th-floor G.C. Corporate Plaza, 150 Legaspi St., Legaspi Village, Makati
Tel: (+63) 2 8843 9220 / 8843 9232
Email: embassy.manila@mfa.gov.eg / egyptmanila@gmail.com

For more information, please contact the above.

GET YOUR EGYPT TOURIST VISA IN 4 EASY STEPS

STEP 1: PREPARE & SUBMIT THE REQUIREMENTS

Prepare ALL the abovementioned requirements. Proceed to the Embassy of the Arab Republic of Egypt in the Philippines at 7th Floor, G.C Corporate Plaza Bldg., 150 Legaspi St., Legaspi Village, Makati City to submit these documents.

STEP 2: WAIT FOR THE EMBASSY’S CALL

Once submitted, wait for the call with the Embassy’s decision. If your visa is approved, then they will contact you to submit your passport (for the visa sticker) and payment.

You can also do a follow up by calling their contact number I indicated above. No worries, the Filipino Secretary (I think her name is Marian) is very accommodating and friendly.

💡 HOW TO GET “INSTANT” APPROVAL: While the standard wait is 15 days, I managed to get mine the same day! The secret? A rock-solid cover letter explaining my travel history and status as a digital nomad. It pays to be honest and detailed!

STEP 3. SUBMIT YOUR PASSPORT & PAY THE VISA FEE

What I like about this Embassy is they do not charge the visa processing fee unless and until your visa is approved. Yes, you heard it right! There is absolutely no risk in getting this visa! If your visa is approved, submit your passport and pay the visa fee.

The Egypt tourist visa fee costs 1,500 PHP. Then, the Secretary will give your receipt with date of when to claim your passport with visa.

⚠️ IMPORTANT UPDATE (2026): According to recent traveler reports, the Egypt tourist visa fee at the Manila Embassy has increased from 1,500 PHP to approximately 4,000 PHP. It is highly recommended to bring extra cash to your appointment as fees are subject to change without prior notice.

STEP 4. CLAIM YOUR PASSPORT WITH VISA STICKER

Finally, pick up your passport with visa sticker and congratulations on successfully getting your Egypt tourist visa!
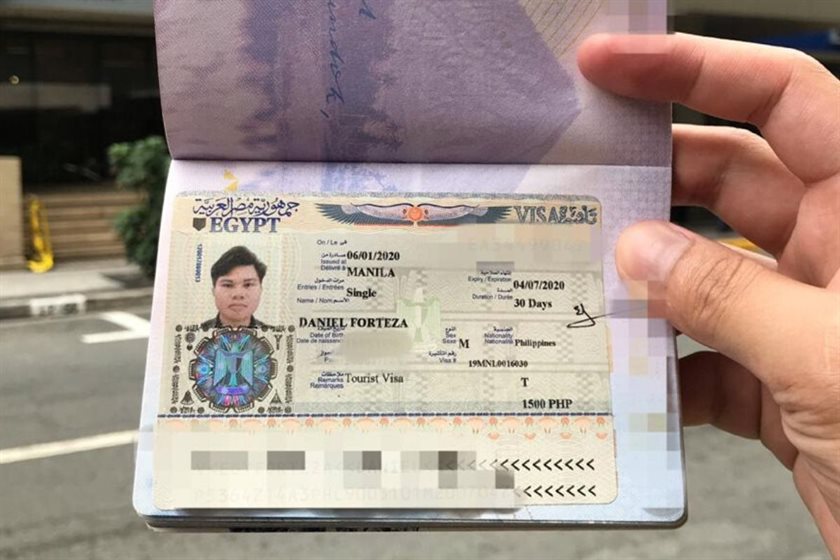
My Egypt Tourist Visa

VISA SUMMARY

  • Type: Tourist Visa
  • Visa Validity: 6 months from the day of approval
  • Maximum Stay: 30 days within validity
  • No. of Entry: Single Entry
  • Visa Fee: 1,500 PHP (30 USD)
  • Visa Fee: 1,500 PHP (30 USD)
    • UPDATE (2026): The fee is now around 4,000 PHP

MY EXPERIENCE

When I arrived at the Embassy at around 10:00 AM, there were already 6 to 8 people in the waiting room. Some of them are still filling up the visa application form.

From that, I can tell that the Egyptian Embassy is informal and chill. You just need to turn off your mobile phone before entering the office.

Remember: Prior to entering the building, your bags will be checked and will require you to leave one government valid ID at the lobby, so bring one!

The Secretary then collected our documents and left the room. She probably handed it over to the Egyptian Consul (in another room) to review the documents.

She went back to the waiting room and announced those people who can now pay the visa fee. Please note that if you pay the visa fee, it means your visa is approved.

I was lucky that steps 1-3 all happened in one day! So I submitted my passport and paid the visa fee, all in 30 minutes! I saved one Makati trip. I met other applicants in the room who has to go and wait up to 15 days for approval and went back to the Embassy 3 times.

They did not tell me the reason why my visa was approved instantly, but I have a strong feeling it has to do with my travel history, capacity to travel, and my very personalized cover letter. I even mentioned in my cover letter about quitting my day job just to travel long term. As they say, honesty is the best policy =)

NOTE that I applied Monday and claimed my passport (with visa) Friday of the same week. So it only took four (days)! I was just so happy to save the step where you have to wait up to 15 days for the Embassy’s decision.

Now that your visa is (hopefully) on its way, here are a few essentials I recommend packing for your Egyptian adventure:

🇪🇬 QUICK EGYPT PACKING LIST:
Modest Clothing: Respectful attire (covering shoulders and knees) for visiting mosques and local areas.
Sun Protection: A wide-brimmed hat, high-SPF sunscreen, and quality sunglasses—the desert sun is no joke!
Universal Power Adapter: Egypt uses Type C and Type E wall plugs.
Comfortable Walking Shoes: You’ll be doing a lot of walking around the Giza plateau and ancient temples!

RECOMMENDED PACKAGE TOURS

In case you’re also looking for package tours to justify your tourism activity in Egypt for visa purposes, I highly recommend booking tours through Viator which is perfect for your Egypt itinerary. See tours and packages I personally handpicked for you:

(you may choose one or more tours that suit your travel needs)

BOOKING ESSENTIALS

  • Hotel / Hostel: Booking.com. I usually book my hostel accommodation here as they have free cancellation or pay-at-the-hotel options.
  • Airbnb: Try Airbnb for comfy and cozy rooms! I have used it on many trips and loved it.
  • Flights: KAYAK. All of my flight bookings are from KAYAK. It’s a great travel search engine that compares hundreds of sites.

I suggest you check Kayak (click HERE) as they usually offer cheap fare rates compared to other booking sites.

Top 15 Budget Travel Tips That Every Traveler & Backpacker Should Know

By Dan Forteza

This post may contain affiliate links which means if you purchase something through that link, I will make a small commission at no additional cost to you. Think of it as buying a cup of coffee for me on someone else. Thanks & enjoy!

If you will be traveling abroad on a small budget and looking for great tips in order to avoid spending too much, then this blog is perfect for you! Whether you’re a frequent traveler or a newbie in backpacking, I’m sure you’ll find these 15 budget travel tips helpful for making your saving cash easy breezy!

Hi there! First of all, I am Daniel – a solo backpacker from the Philippines. If you don’t know my story yet, feel free to read this article where I talked about how I quit my job in order to travel. This article was also featured on TripZilla Philippines.

Batu Cave in Kuala Lumpur
At Batu Cave, Malaysia. My first ever solo backpacking trip | Dantravels.org

15 PROVEN BUDGET TRAVEL TIPS

1. Book your flights / accommodation in advance.
I use many different search engines, but hands down, Kayak is one the best for scooping up deals. Read also: My 14-day South America cost breakdown.

2. Pre-book your main attraction tickets.
Don’t wait until the last minute for places like Machu Picchu. I use Viator or GetYourGuide to book with confidence.

3. Don’t take too much luggage.
Airlines charge heavy fees for big bags. I stick to a 55-L Backpack and a small laptop bag to keep things mobile and avoid check-in fees.

4. Stay connected.
Googling is a lifesaver for navigation! If you don’t buy a local SIM, use Maps.me for offline navigation.

5. Mind your currency abroad.
Avoid airport exchange booths! Withdraw from local ATMs for better rates, and always keep some emergency USD hidden in your bag.

6. Get travel insurance before you leave.
It’s imperative for lost luggage or injuries. I recommend World Nomads for the best value.

7. Go Couchsurfing.
Couchsurfing lets you stay with locals for FREE. It’s an eye-opening way to make friends, just be sure to check references first!

8. Try hostels for cheap stays.
Hostels are way cheaper than hotels. I use Booking.com, Agoda, and Hostelworld to find the best spots. Read also: My 1-day Chiang Rai itinerary.

9. Bring a water bottle.
Sodas and bottled water add up! That extra money could pay for another night in a hostel every week.

10. Avoid eating near touristy restaurants.
Go down a few blocks and eat where the locals do. It’s cheaper and usually tastes much better!

11. Ask for local advice.
Don’t be shy! Ask hostel staff or locals what things should *normally* cost to avoid “tourist prices.”

12. Walk and minimize transportation costs.
Walk as much as you can. For long distances, use subways or buses and look for “day passes.” Read also: My 4-day Russia itinerary.

13. Take free walking tours.
It’s the best way to learn about a city. Just remember to tip your guide at the end!

14. Cross the border by land.
Buses and trains are often cheaper than planes, and the scenery is a bonus! Use Rome2Rio to compare costs.

15. Minimize your souvenirs.
Postcards and photos are the best souvenirs. Don’t weigh your backpack down with things you don’t need!

Kuala Lumpur City Gallery
At Kuala Lumpur City Gallery Sign | Dantravels.org

Which travel budget tip is your favorite? If I missed anything, share it in the comments below! Let’s show the world that traveling doesn’t have to be expensive.

✈️ BUDGET TRAVEL CHEAT SHEET

Screenshot this quick summary for your next adventure!

PRO-TIPKEY ACTION
1. Flights & StaysBook 2–4 months in advance. Use Kayak or Skyscanner.
2. AttractionsPre-book main tickets online via Viator or GetYourGuide.
3. LuggageTravel light! Stick to carry-on limits to avoid bag fees.
4. ConnectivityGet a local SIM for navigation; use Maps.me for offline use.
5. MoneyWithdraw cash from local ATMs (avoid airport exchange!).
6. InsuranceCrucial! Don’t leave home without World Nomads.
7. AccommodationTry Couchsurfing for FREE stays, or book hostels via Booking.
8. FoodCarry a water bottle and avoid eating in touristy areas.
9. TransportWalk! Use public transport and free walking tours. Avoid taxis.
10. SouvenirsMinimize! Opt for postcards or just your own photos.

How To Apply For A US Tourist Visa With Your Philippine Passport

By Dan Forteza

This post may contain affiliate links which means if you purchase something through that link, I will make a small commission at no additional cost to you. Think of it as buying a cup of coffee for me on someone else. Thanks & enjoy!

Get your US Tourist B1/B2 Visa ready because you’re going to see what the United States has to offer! Though I understand US visa is probably one of the hardest visas in the world to get but it is all worth it. In this post, I’ll be giving you a step-by-step guide, a list of the requirements, my experience throughout the whole application process, interview questions, and other tips to help you get your US tourist visa!

Photo by Patrick Tomasso on Unsplash | Dantravels.org

Read also: My US Visa Interview And How I Answered The Questions

But again, just like in other visa application blogs I’ve written, no one can give you the guarantee of your US tourist visa’s approval – not me, not even a lawyer or a travel agent. If anyone does, is most likely a scammer!

I know you must have heard tons of horror stories from people regarding their denied US visa applications. Because of the huge number of Filipino illegal immigrants, the US Government is very strict about its immigration laws.

It’s alright to feel nervous. I was nervous, too! But for now, let’s set aside those negative thoughts. Let’s be positive so that that positive energy will radiate to the people around you.. even to the interviewer! =)

Anyway, enough of that and let’s get started!

US VISA B1/B2 FOR TOURISTS

The B1/B2 visitors visa is for people traveling to the United States temporarily for business (B1) or for pleasure or medical treatment (B2)

  • B1 visa is for attending business conventions and educational conferences
  • B2 visa is for tourism, visiting friends or relatives, medical treatment

To be granted a US tourist visa, you must be able to prove that:

  • your visit is only temporary
  • you have enough money to cover all your expenses during your stay
  • you have binding ties that ensure your return to your country

WHEN AND WHERE TO APPLY

WHEN: Application shall be made at least 2 months prior to your intended departure. But since I was on a hurry, I did it all in a month! =) Here is my application timeline:

  • Day 1: Read Blogs
  • Day 5: Book Hostel Accommodations (I need this information prior to submitting the Application form online).
  • Day 6: Get myself an ID picture both digital and hardcopy
  • Day 8: Pay for the Visa Fee
  • Day 9: Submit Application Form Online (I am rushing, I know!)
  • Day 9: Schedule Interview Appointment. Note that I chose the earliest available date which is 21 days away!
  • Day 30: Day of Interview. On this day, you’ll immediately know whether you’re approved or not.

WHERE: Application and personal appearance interview will take place at the U.S. Embassy in the Philippines at 1201 Roxas Boulevard Manila, Philippines 1000. Please be at the Embassy gate 30 minutes prior to your interview

GET YOUR US TOURIST VISA IN 5 EASY STEPS

STEP 1: PAY THE VISA FEE

There are 2 ways to pay US Visa Application Fee:

  • Online via BPI website or Bancnet website
  • Directly at the BPI Bank Branches

In my case, I chose to pay it directly to the BPI Bank Branches.

  • Go to the visa info page of the US Embassy website. As of April 2019, the visa fee is USD160. This is the costliest visa fee I’ve ever paid!
  • Then go to this page. Download and print your $160-deposit slip. Or click HERE to download directly the slip.
US Tourist Visa Bank Option Payment
US Tourist Visa Cash at Bank Payment Option | Dantravels.org

NOTE: There is an expiration date on the deposit slip. Ensure that you pay it before it expires!

US Tourist Visa Bank Deposit Slip
US Tourist Visa Bank Deposit Slip | Dantravels.org

NOTE: Visa Fee are non-refundable & non-transferable. After you have paid the visa application fee, keep the BANK receipt for your records. It cannot be replaced if it is lost. You will not be able to schedule an appointment without your receipt number.

STEP 2: FILL UP THE VISA APPLICATION (DS-160) FORM

If you are a solo backpacker like me, you need to book first your room accommodation. You will need this information to answer the form of where you’ll be staying.

TIP: I usually book my hostel accommodation at booking.com. Thus, I recommend you guys trying it as well. Room accommodation ranges from cheap hostels to luxury hotels. Book hostels through booking.com as they have free cancellation or pay-at-the-hotel option.

Use my link to book your hostel and you’ll get 10% of your booking back after your stay. Click this link to get that discount.

Or try Airbnb in finding comfy and cozy rooms! I have used Airbnb on some of my other trips and I loved it!

Have you tried Airbnb? Sign up with my link and you will get up to 42 USD (2,200 Php) off your first stay. Click this link to get that discount.

To start filling up your own form, click this link (DS-160 Form). You can access a DS-160 form sample in this link as your reference.

NOTE: Prepare also your 2″x2″ digital photo. This will be uploaded on your application form.

US Tourist Visa DS-160 Form | Dantravels.org

TIP: Be brutally honest when filling up the application form. The interviewer will base his/her questions on your filled up form. So when he/she caught you lying from something that you wrote in the form, you’re dead! =(

The confirmation number generated after filling up the form is needed to set up appointment. Shown below is my confirmation page, please print this as you’ll be needing this during the day of your appointment.

Confirmation Page | Dantravels.org

STEP 3. SCHEDULE APPOINTMENT

After making payment (step 1) and completing the DS-160 Form (step 2), you can now schedule your appointment. Prepare these 3 info: Passport Number, Paid Receipt Number, and Confirmation Number. Go to this SITE to schedule your appointment.

US Visa Appointment Site | Dantravels.org

Once done, save and print you appointment letter. The appointment letter should look like this – see below.

US Tourist Visa Appointment Letter

STEP 4. PREPARE OTHER SUPPORTING DOCUMENTS

Once you’re done setting up your appointment online and while waiting for your appointment day, you need to prepare supporting documents. In order to support your answer during the interview, the interviewer will most likely ask for proof of documents. Here are the set of documents I’ve prepared:

  • Old Passport – To prove your travel history. Your travel history will most likely be asked during your interview like ‘Have you traveled before?, Where and When?’.
  • Hostel Booking – I usually book my hostel accommodation at booking.com. They have free cancellation options.

Have you tried Airbnb? Sign up with my link and you will get up to 42 USD (2,200 PHP) off your first stay. Click this link to get that discount.

  • Itinerary of planned tourism activities

I can provide you a copy of mine if you like. Just leave a reply on the comment section below.

  • Latest Income Tax Return (ITR), Certificate of Employment, Payslips, Bank Passbook / Bank Certificate.
  • Travel Insurance – I highly recommend getting travel insurance from World Nomads.

STEP 5: GO TO THE EMBASSY AND KILL THE INTERVIEW!

Visit the U.S. Embassy on the date and time of your interview. Bring a printed copy of your Appointment confirmation, DS-160 confirmation page, One recent 2″x2″ photo ID, and all passports. NOTE: Applications without all of these items will not be accepted.

There are also things NOT allowed inside the Embassy such as mobile phones. Interview proper is next. I created a separated blog post from experience during the interview. Click HERE to read.

After the interview, you’ll know immediately if your visa is approved or denied. By the way, I was approved and got my 10-year multiple entry US visa after 3 days! So I wish you all the best! =)

My US Visa | Dantravels.org

SUMMARY:

  • Visa Type: B1/B2 (Business/Tourism)
  • Visa Validity: 10 Years
  • Entry type: Multiple Entry
  • Visa Fee: USD160.00

RECOMMENDED PACKAGE TOURS

I highly recommend booking tours through Viator which is perfect for your U.S. itinerary:

BOOKING ESSENTIALS

  • Hotel / Hostel: Booking.com – ranges from cheap hostels to luxury hotels.
  • Airbnb: Sign up with my link to get up to 42 USD off your first stay.
  • Flights: KAYAK – usually offers cheap fare rates compared to other booking sites.

Indian e-Visa for Filipinos: Step-by-Step Guide (2026 Update)

By Dan Forteza

This post may contain affiliate links which means if you purchase something through that link, I will make a small commission at no additional cost to you. Think of it as buying a cup of coffee for me on someone else. Thanks & enjoy!

India is so much more than just the Taj Mahal. India to me is a mix of everything. It is astonishing and fascinating; it is loud and crowded. It is INCREDIBLE and always calls for an adventure! Now, if you’re planning to visit India and looking for a guide on how to apply for an Indian e Visa (or Indian Tourist Visa), then you’re in the right place.

Red Fort in Delhi
Red Fort in Delhi | Dantravels.org

In this guide, I’ll walk you through how to get the Indian e-Visa (formerly called ETA). This is the best visa option if your purpose is tourism, visiting friends/family, or short-term stays.

The term “ETA” is now rarely used. The system is officially called “e-Visa”.

WHAT IS THE INDIAN E-VISA?

The Indian e-Visa was introduced in 2014 and has expanded significantly over the years. It now includes categories such as e-Tourist, e-Business, e-Medical, and e-Conference visas.

As of 2026, most travelers (including Filipinos) apply under the e-Tourist Visa, which is available in 30-day, 1-year, and 5-year validity options.

Getting an e-Visa is fast and straightforward. In many cases, approval comes within a few days.

Processing usually takes up to 72 hours, but it’s best to apply at least 4–7 days before your travel date.

But just like any visa application, approval is never guaranteed. Be careful of anyone claiming guaranteed approval—it’s most likely a scam.

ELIGIBILITY REQUIREMENTS

You are eligible for an Indian e-Visa if:

  • Your purpose is tourism, visiting friends/family, short yoga programs, or short-term business/medical visits.
  • You have a passport valid for at least 6 months from your arrival date.
  • You have a return or onward ticket.
  • You have sufficient funds for your stay.

Activities such as employment, journalism, or long-term study are NOT allowed under e-Visa.

You must also enter India through designated airports or seaports.

The list of entry points is regularly updated, so always verify from the official e-Visa website before your trip.

If you meet all requirements, then you’re good to proceed!

HOW TO APPLY FOR INDIAN E-VISA (STEP-BY-STEP)

STEP 1: PREPARE YOUR DOCUMENTS

  • Passport (Bio Page) – Save as PDF (recommended under 300KB–500KB)
  • Recent Photo – White background, JPEG format (under 1MB)
  • Accommodation Details – Hotel or hostel booking

Blurry photos or incorrect sizes are one of the most common reasons for delays or rejection.

TIP: You can scan documents using mobile apps like CamScanner, Adobe Scan, or Microsoft Lens.

You can book your accommodation via Booking.com — from budget hostels to luxury hotels.

STEP 2: APPLY ONLINE

Go to the official Indian e-Visa website and fill out the application form.

⚠️ IMPORTANT: Only apply through the official Indian government website. Many fake websites charge extra fees.

Fill in your personal details, travel info, and upload your documents.

STEP 3: PAY THE VISA FEE

After completing the form, you will be asked to pay the visa fee online using a debit or credit card.

As of 2026, Filipino travelers can avail a FREE 30-day Indian e-Tourist Visa (valid for double entry) until July 31, 2026. After this period, regular visa fees will apply depending on the visa type (1-year and 5-year visas are NOT free).

STEP 4: RECEIVE YOUR E-VISA

Once approved, your e-Visa will be sent to your email. Print a copy and bring it with you when traveling.

Always bring a printed copy and keep a digital copy on your phone for backup.

FINAL TIPS

  • Apply at least one week before your trip
  • Double-check all uploaded documents
  • Avoid third-party visa websites
  • Keep copies of all documents

And that’s it! The process is simple, fast, and very doable even for first-time travelers. India is truly an unforgettable destination—hope this guide helps you get there!

South Korea Visa for Filipinos (2026 Update): Requirements, Fees & Application Process

This post may contain affiliate links which means if you purchase something through that link, I will make a small commission at no additional cost to you. Think of it as buying a cup of coffee for me on someone else. Thanks & enjoy!

UPDATE 2026: This guide has been updated to reflect the latest South Korean tourist visa application process for Filipinos, including stricter requirements, longer processing times, and updated embassy policies.

South Korea is no country like others. I’m sure that a majority of us Filipinos have been influenced by Korean media at some point of our lives, may it be K-Pop or Koreanovelas. So for those of you dying to see what Korea has more to offer. This is it! A first step to make that a reality is getting a Korean Tourist Visa.

Busan Train Terminal in South Korea - South Korean Tourist Visa
Busan Train Station in South Korea | Dantravels.org

If you’re here looking for a guide on how to apply for your South Korean Tourist Visa, then you’re in the right place.

But before I give you the details, I’d like to start off by saying that no one can give you the guarantee of your visa’s approval – not me, not even a lawyer or a travel agent. If anyone does, is most likely a scammer.

As a travel blogger, what I can offer you here is just a guide with helpful tips to increase your chances of getting that tourist visa. =)

UPDATE 2026: The application process is still done through accredited travel agencies, but most now require appointments or pre-screening. Walk-ins at the embassy are generally no longer allowed for tourist visa applications.

But no worries, the application process for Korean tourist visa is so simple and starting this 2018, the Korean Embassy is coursing applications through travel agencies. If you’re familiar with the Japan Visa application process, it works pretty much the same. Click HERE to read my blog on getting a Japanese Tourist Visa.

WHEN TO APPLY YOUR KOREAN TOURIST VISA

You can apply as early as 2-3 months prior to your departure date. For single entry, the Korean visa is 3-month valid and you can enter Korea at any time within the next 3 months of the issue date.

UPDATE 2026: It is highly recommended to apply at least 1–2 months in advance due to longer processing times and higher application volume.

Say, for example, if your intended flight is May 1, then you can apply as early as March 1. If it got approved March 4, then you are can now enter Korea from March 4 – June 4 (3-month period).

In addition, a single-entry Korean tourist visa is only permitted to stay in South Korea for a maximum period of 59 days.

UPDATE 2026: Visa validity and allowed stay (59 days) remain the same, but approval is now stricter compared to previous years.

GET YOUR KOREAN TOURIST VISA IN 3 EASY STEPS!

STEP 1: PREPARE THE REQUIRED DOCUMENTS

MAJOR REQUIREMENTS

  1. Duly Accomplished Application Form
  • Please download HERE the application form for Korean tourist visa
  • Must be typewritten, NOT handwritten. Recommended font size is 13 – 14.
  • Signature is still manually done on the page 4.
  • Must be filled out completely and correctly
  • Must be printed in A4-sized paper

UPDATE 2026: Typed application forms are still strongly recommended, but some agencies may accept neatly handwritten forms. Always confirm with your chosen travel agency.

Key points in filling up the form

  • Leave items 1.2, 1.7 blanks.
  • Leave 1.9 blank if you are not Dual citizen
  • For questions that are not applicable for you, kindly leave it blank

Example = Spouse name if you are single(4.2)

  • If you do not have a Korean Sponsor, leave question 8 blank
  • If you will pay for your tour, answer question number 9 in this manner

9.1 = 1,000

9.2 a) = Your Name (If you will pay your expenses)

9.2 b) = “Myself”

9.2 c) = “All Expenses”

9.2 d) = (Your Contact Number)

NOTE: On section 7 of the form, you’ll be asked to put your address and contact number in Korea. If you intend to stay in a hostel like I did (since I’m solo backpacking), I use the address and contact number of my hostel in South Korea.

UPDATE 2026: Providing confirmed accommodation details (hotel/hostel/Airbnb) is now more important and may be checked more strictly.

  1. One Passport-Sized ID Photo
  • Must be with white background
  • Must be glued on the designated area of the Application Form
  1. Original Passport
  • Must be at least 6 months valid from your intended flight
  1. Photocopy of Passport’s Bio page
  2. Photocopy of all OECD Visa
  • If you have visas to any member of Organization for Economic Co-operation and Development (OECD), you will need to submit the original copy and photocopy including arrival stamps to OECD member countries for the past 5 years

UPDATE 2026: OECD visas still help strengthen your application, but they no longer guarantee faster processing or approval.

  1. If invited by Korean
  • An Invitation Letter
  • A Copy of Inviter’s Passport

UPDATE 2026: Travel history (Japan, US, Schengen visas) is now a major factor in approval. Applicants with strong travel history have higher chances.

ADDITIONAL REQUIREMENTS FOR EMPLOYEES

  1. Original Certificate of Employment
    • Must include applicant’s position, date hired, compensation, office address, HR landline number (cell-phone number is not allowed)
  2. Original Personal Bank Certificate
    • Must include account type, current balance, account opening date, ADB
  3. Bank Statement
    • Must be original or certified true copy of bank statements/passbook for the last 3 months
  4. Photocopy of ITR (Income Tax Return) or Form 2316
  5. Copy of PRC Card or IBP Card (If applicable only)

UPDATE 2026: Financial documents are now reviewed more strictly. Sudden large deposits or inconsistent cash flow in your bank statement may negatively affect your application.

ADDITIONAL REQUIREMENTS FOR SELF-EMPLOYED

  1. Photocopy of Business Registration from SEC or DTI
  2. Photocopy of Business Permit or Mayor’s Permit
  3. Photocopy of ITR (Income Tax Return) or Form 2316
  4. Original Personal Bank Certificate
    • Must include account type, current balance, account opening date, ADB
  5. Bank Statement
    • Must be original or certified true copy of bank statements/passbook for the last 3 months
  6. Copy of PRC Card or IBP Card (If applicable only)

UPDATE 2026: Self-employed applicants may be asked for additional proof of business operations (e.g., invoices, receipts, or business transactions) depending on the agency.

ADDITIONAL REQUIREMENTS FOR STUDENTS

  1. Original School Certificate
  2. Photocopy of School ID
  3. Copy of Birth Certificate
  4. If parents are employed
    • Parents’ Original Certificate of Employment (must include employer details, landline, email, position, and compensation)
    • Copy of ITR (Income Tax Return) or Form 2316 Copy
  5. If parents are self-employed
    • Copy of parents’ Business Registration from SEC or DTI
    • Copy of parents’ Business Permit or Mayor’s Permit
    • Photocopy of parents’ ITR (Income Tax Return) or Form 2316
  6. Parents’ Original Bank Certificate
    • Must include account type, current balance, account opening date, ADB
  7. Parents’ Bank Statement
    • Original or certified true copy of bank statements/passbook for the last 3 months
  8. Copy of parents’ marriage certificate

UPDATE 2026: Sponsors (parents or guardians) must show strong financial capacity and stable income. Applications with weak financial proof are more likely to be denied.

If, however, you have a different situation or purpose of visit, it’s best that you visit the South Korea Embassy for more information and for the complete requirements.

UPDATE 2026: Always check the official embassy website or your chosen travel agency for the most updated requirements, as policies may change without prior notice.

STEP 2: SUBMIT YOUR DOCUMENTS TO YOUR CHOSEN TRAVEL AGENCY

The Korean Embassy accredited travel agencies where you can lodge your application.

The good news is, many of these travel agencies have branches all around the country, which means it’s easier for applicants in the provinces to apply.

UPDATE 2026: Applications are strictly processed through accredited travel agencies. Most agencies now require appointment booking or pre-screening before submission.

VISA FEE: A South Korea Visa is FREE of charge as long as you are only going to stay 59 days or less; however, these travel agencies charge for the service that they offer of processing/sending your application.

UPDATE 2026: Agency processing fees now typically range from Php 1,000 to Php 2,500 depending on the agency.

For stays spanning from 60 to 90 days, the embassy charges a fee of about Php 1,800.

UPDATE 2026: Most tourist applicants apply for short-term stay (59 days or less), which remains free of embassy charge.

To date, below are the accredited travel agencies, as listed below:

UPDATE 2026: The list of accredited travel agencies may change over time. It is recommended to check the official embassy website for the most updated list before applying.

  • ABOEX Travel and Tours
  • Adventure International
  • Ark Travel Express Inc.
  • Blue Horizons Travel and Tours Inc.
  • Budget Travel and Tours Inc.
  • Casto Travel Philippines Inc.
  • City Travel & Tours Corporation
  • COME ON PHILS. Golf and Travel Agency Inc.
  • Constellation Travels, Inc.
  • First United Travel Inc.
  • Getaway Tours International Inc.
  • Grand Hope Travel, Inc.
  • Hanatour Manila Inc.
  • H.I.S. (PHILIPPINES) Travel Corp
  • HANKOOKCEB Corp.
  • Horizon Travel & Tours, Inc.
  • International Journeys Inc.
  • Island Resort Club Tour Services, Inc.
  • JTB Asia Pacific Phil. Corp.
  • KP JOEUN Consultancy Inc.
  • Las Palmas Tours and Travel Agency, Inc.
  • Marsman Drysdale Travel Inc.
  • MNK Travel & Tours Corp.
  • North Star International Travel, Inc.
  • Pan Pacific Travel Corporation
  • Party-on Travel and Tour Community, Inc.
  • Rajah Travel Corporation
  • Rakso Air Travel and Tours Inc.
  • Reli Tours and Travel Company
  • Sharp Travel Service (Phils.) Inc
  • Swire Travel Phils, Inc.
  • The Baron Travel Corporation
  • Travel Pros
  • Travelservices, Inc.
  • Uni-Orient Travel, Inc.

IMPORTANT NOTE: The consulate in Cebu still accepts direct applications, and for your information only, below are the address details of Korea’s embassies in the Philippines:

UPDATE 2026: Most applicants are now required to apply through accredited travel agencies. Direct applications (including Cebu) may be limited or subject to specific conditions. It’s best to confirm first before going directly.

Korean Embassy in Manila
122 Upper McKinley Road, McKinley Town Center, Fort Bonifacio, Taguig
Email Address: ph04@mofa.go.kr
Telephone: (63-2) 856-9210

Korean Consulate in Cebu
12th Floor Chinabank Corporate Center, Lot 2, Samar Loop Cor. Road 5, Cebu Business Park, Cebu
Email Address: phi_cebu2015@mofa.go.kr
Contact No.: (63-32) 231-1516(-9)

UPDATE 2026: Contact details may change. Always verify through the official Korean Embassy website before visiting.

Now if you asked me –

‘WHAT IS YOUR RECOMMENDED TRAVEL AGENCY TO GET A BETTER CHANCE OF APPROVAL?’

I couldn’t really answer that as there is no best travel agency when it comes to visa approval. They, too, have no control whatsoever over that matter. these accredited travel agencies simply ensure that the documents you are going to give are complete. After which, they just pass it to the embassy who makes the analyzation and final decision.

UPDATE 2026: Approval rates depend more on your financial capacity, travel history, and document consistency rather than the agency you choose.

In my experience, however, I chose Reli Tours and Travels in Southmall Las Pinas just simply because they’re close to where I live. They are also the agency I applied for in my Japanese visa application which later got also approved =)

Reli Tours and Travels SM Southmall - South Korean Tourist Visa
Reli Tours and Travel at SM Southmall | Dantravels.org

PROCESSING TIME: 7 Working Days

Per Korean Embassy, their processing time is:

3 working days – Manila applications with OECD visas within the past 5 years
5 working days – Manila applications without OECD visas
7 working days – Cebu applications with or without OECD visas

But since this will now be handled by the agency, it is safe to add a day or two. Some can take shorter, some longer, depending on your case, but it is safe to say 7 working days.

UPDATE 2026: Processing time is now typically 5–10 working days, but may take longer during peak seasons (e.g., cherry blossom or autumn). Delays are common.

If you don’t have that much time, you can avail of the RUSH PROCESSING OPTION, which will expedite the of visa to only 2 days. But it comes with a USD20 express fee.

UPDATE 2026: Rush/express processing is generally no longer available for tourist visas.

STEP 3. CLAIM YOUR PASSPORT WITH VISA (HOPEFULLY!)

Pick up your passport (hopefully with a visa sticker attached) when you are informed by your travel agency. Agency will normally send a text message to you once you’re passport is ready for pick up.

UPDATE 2026: Some agencies now also offer courier delivery of passports for an additional fee.

By the way, here is what a Korean Visa look like.

My South Korean Visa Sticker | Dantravels.org

UPDATE 2026: Some visas are now issued electronically (no sticker), but many applicants still receive a visa sticker. This depends on the embassy’s current system.

I believe that as long as you have completed the requirements and your intention is purely tourism then most likely your visa will be approved. =)

UPDATE 2026: Approval is not guaranteed even with complete documents. Strong financial proof, stable employment, and clear travel intent are key factors.

If you have questions, feel free to leave a reply on the comment section below and I promise to get back to you as soon as I can.

Good luck and all the best on your Korean tourist visa application!

SUMMARY:

Visa Type: Tourist Visa
Visa Validity: 3 Months
Entry type: Single Entry
Visa Fee: FREE (Handling Fee Php 700.00 by Reli Tours & Travel)

UPDATE 2026: Handling fees now typically range from Php 1,000 to Php 2,500 depending on the agency.

BOOKING ESSENTIALS

  • Hotel / Hostel
    • Booking.com. I usually book my hostel accommodation at booking.com. Thus, I recommend you guys trying it as well. Room accommodation ranges from cheap hostels to luxury hotels. Book hostels through booking.com as they have free cancellation or pay-at-the-hotel option.

Use my link to book your hostel and you’ll get 10% of your booking back after your stay. Click this link to get that discount.

    • Airbnb. Try Airbnb in finding comfy and cozy rooms! I have used Airbnb on some of my other trips and I loved it!

Have you tried Airbnb? Sign up with my link and you will get up to 42 USD (2,200 Php) off your first stay. Click this link to get that discount.

  • Flights
    • KAYAK. All of my flight bookings are all from KAYAK. Kayak is one of the world’s leading travel search engines and searches hundreds of travel sites.

I suggest you check Kayak (click HERE) as they usually offer cheap fare rates compared to other booking sites.

  • Travel Insurance
    • World Nomads. If you don’t have travel insurance when times get tough, basically you are screwed. Traveling always comes with inherent risks attached. Whether you are trekking in the Seoraksan mountains or wandering the streets of Seoul, unforeseen events can suddenly upend your world. Generally speaking, travel insurance covers you for the following: Medical Costs, Property Loss, and Travel Issues. Thus, I highly recommend you guys getting a travel insurance.

Go to this link to get your travel insurance.

UPDATE 2026: Travel insurance is not mandatory for visa application, but highly recommended for your trip.

Japan Visa for Filipinos (2026 Update): Requirements, Steps & Approval Tips

By Dan Forteza

This post may contain affiliate links which means if you purchase something through that link, I will make a small commission at no additional cost to you. Think of it as buying a cup of coffee for me on someone else. Thanks & enjoy!

To visit Japan has always been a dream of many Filipinos, including myself. I mean, who doesn’t? But for us Pinoys, it is always a struggle to get that ‘visa’ approved. Now in this blog post, I’ll show you the step-by-step procedure on how to file your Japanese tourist visa application and also I would be happy to share how I quickly got my visa approved.

UPDATE (2026): This guide has been updated to reflect the latest Japan visa application process for Filipinos, including updated requirements, photo size, and application channels.

Meiji Shrine japanese tourist visa how to apply
Somewhere in the Meiji Shrine | Dantravels.org

Read also: My actual 5-day itinerary in Tokyo, Japan with best places to see in Tokyo!

UPDATE (2026): Removed inline styling for cleaner code and better theme compatibility.

But first, I’d like to start off by saying that no one can give you the guarantee of your Japanese visa’s approval – not me, not even a lawyer or a travel agent. If anyone does, is most likely a scammer.

As a travel blogger, what I can offer you here is just a guide with helpful tips to increase your chances of getting that Japan Visa.

NOW WITHOUT FURTHER ADO, let’s start with the step-by-step process on how to apply for your Japanese visa!

GET YOUR JAPANESE TOURIST VISA IN 4 EASY STEPS

STEP 1: IDENTIFY THE TYPE OF JAPANESE VISA YOU’RE APPLYING FOR

Yes, there are different type of Japanese visas – tourist visa, transit visa, visa for spouse of Japanese national, visa for commercial purposes…yep! There are heaps of different kinds.

For this particular blog, I will only be focusing on the tourist visa which I have personally applied for.

If, however, you have a different situation or purpose of visit, it’s best that you contact the Japanese Embassy for more information and for the complete requirements.

UPDATE (2026): Most applicants are now required to apply through accredited travel agencies or the Japan Visa Application Center (JVAC). Direct applications to the embassy are only allowed in special cases.

STEP 2: PREPARE THE REQUIRED DOCUMENTS

Please take note that there are two (2) types of Japanese Tourist Visa – the one with guarantor/sponsor and the other one without guarantor/sponsor. During my application, what I applied for is ‘without guarantor’ because I’ll be funding the trip by myself. Yes, I was doing solo backpacking!

A. Requirements for Tourist Visa without Guarantor:

(1) Passport – Make sure that your passport is valid for 6 months prior to your intended travel date.

(2) A duly accomplished Japanese Application form – Please print it in A4 size. You can download this form here. You can also download the sample filled-out form here with the guide on how it should be filled out. Ensure that you have completely filled it out, put N/A if the information is not applicable to you.

(3) Recent 2″ x 2″ photo – The photo should have a white background. You’ll need this photo pasted on the application form.

UPDATE (2026): Japan visa photo size is now strictly 45mm x 35mm (not 2×2). Make sure to follow the official size to avoid rejection or delays.

(4) Original NSO Birth Certificate – You can request an original copy of this through online via PSA website. I got my mine which was home-delivered after three (3) working days. Click here for the link

UPDATE (2026): NSO has already been replaced by PSA. Submit a PSA Birth Certificate instead.

(5) NSO Marriage Certificate – This only applies if you’re married. In my case, this is not applicable. But you can request this also via online here, e-services are just hassle-free I think.

UPDATE (2026): Submit a PSA Marriage Certificate (not NSO).

(6) Day-to-day Itinerary in Japan – You can download this form by going to this link. Just fill it out as completely as you can. This doesn’t need to be detailed, the embassy just needs to see this to have an idea of your tourism activities while you’re in Japan.

I can provide you a copy of this that I used when I applied, just leave a reply in the comment section so I can forward it to you. =)

You will be asked here to provide your day-to-day activity as well as your hotel or hostel accommodation. By the way, I booked all my hostel accommodation at booking.com.

UPDATE (2026): Affiliate tracking links were simplified for cleaner SEO and better user trust.

Book hostels through booking.com as they have free cancellation or pay-at-the-hotel option.

Use my link to book your hostel and you’ll get 10% of your booking back after your stay. Click this link to get that discount.

UPDATE (2026): Cashback or referral discounts may no longer be available depending on region. Always verify current promos.

Or try Airbnb in finding comfy and cozy rooms! I have used Airbnb on some of my other trips and I love it!

Have you tried Airbnb? Sign up with my link and you will get up to 42 USD (2,200 Php) off your first stay. Click this link to get that discount.

UPDATE (2026): Airbnb referral credits like this have already been discontinued. This promo may no longer work.

(7) Bank Certificate – This should be an original copy issued by the bank. I got my bank certificate from PSBank for Php100. Note that the Japanese embassy did not mention the minimum balance in an applicant’s bank account. A lot of people are asking me about this. Well, when I applied, I have Php100,000+ in my bank account for a 9-day trip in Japan which I am confident would suffice the requirement. But I have read in some other blogs that others are granted with only Php50,000 balance for a 5-day trip. Also, just make sure you don’t deposit a sudden amount of money in order to assist your application, it would smell fishy!

UPDATE (2026): There is still no official minimum bank balance required. Your financial capacity should reasonably match your travel duration and expenses.

(8) Proof of Income – If you’re employed, just submit your Income Tax Return (ITR) and Certificate of Employment (COE) from your employer. I actually did not submit my COE because this was not required by Reli Tours which was my chosen travel agency for applying for the Japanese visa, only the ITR. If you’re unemployed, it would be best that you have a guarantor/sponsor for your trip.

UPDATE (2026): Requirements may vary slightly depending on the agency or JVAC, but ITR is still commonly required. Some applicants may also be asked for additional financial documents.

B. Requirements for Tourist Visa with Guarantor:

*If your guarantor is not a Japanese National and living outside Japan (e.g. this could be you mom, dad, boyfriend, or girlfriend that is sponsoring your trip). You need to submit all those documents under section “A. Requirements for Tourist Visa without Guarantor” except for (7) Bank Certificate and (8) Proof of Income. These two documents shall come from your guarantor. In addition to that, you need to submit a (9) Guarantee Letter (click here to download the template), (10) Photocopy of your guarantor’s Passport, and (11) Proof of Relationship document. This can simply be NSO Birth Certificate or Marriage Certificate if the guarantor is a family member.

UPDATE (2026): NSO documents should now be PSA-issued documents. Ensure all civil documents are from PSA.

*If your guarantor is not a Japanese National but living inside Japan (this could be a family member or a friend of yours living and working in Japan). You need to submit the documents under section “A. Requirements for Tourist Visa without Guarantor” – (1) to (6) requirements only. In addition to that, you need to submit a (7) Guarantee Letter (click here to download the template); (8) Photocopy of your guarantor’s Passport; (9) Your guarantor’s proof of income, these are Income Certificate (Shotoku Shomeisho), Tax Return Certificate (Nouzeishomeisho: Form2), Kakuteishinkokusho Hikae or Bank Certificate (Yokin Zandaka Shomeisho); (10) Foreign Registration Certificate of your guarantor; (11) Photocopy of Residence Card of your Guarantor.

UPDATE (2026): The “Foreign Registration Certificate” is now replaced by the Residence Card (Zairyu Card). Ensure copies are clear and valid.

If your Guarantor is a Japanese national, I will cover them soon as I came across with that situation. The reason is that most Filipinos I’ve talked to before only have Filipino guarantors (either living inside Japan or outside Japan).

UPDATE (2026): Requirements for Japanese national guarantors are already available on the embassy website. You may check there for the complete and updated list.

STEP 3: FIND AND CHOOSE AN ACCREDITED TRAVEL AGENCY

Please take note that the Japanese Embassy is no longer accepting direct visa application. Thus, you need to file your application through a travel agency accredited by the Japanese Embassy. The travel agency will process your application for you. Here are some of them:

  • Reli Travel and Tours (click website here)
  • Attic Tours (click website here)
  • Discovery Tours (click website here)
  • Universal Holidays (click website here)
  • Friendship Tours and Resorts Corporation (click website here)

UPDATE (2026): Applications are now commonly processed via Japan Visa Application Centers (JVAC) in partnership with accredited agencies. Some agencies may require appointments.

Application is actually free but the travel agency charges a handling fee of around 900-1200 (depending on your type of visa). More payment details are on their website linked above.

UPDATE (2026): Processing fees may now range higher (around PHP 1,000–1,500+) depending on the agency and service type.

In my opinion, there is no best travel agency to file your application. I personally preferred applying at Reli Travel and Tours in SM Southmall, Las Pinas because it is near where I live.

STEP 4: ONCE SUBMITTED, WAIT FOR THE RESULTS!

I was told by Reli Tours to wait for 7-10 business working days for my visa results, but to my surprise I got a text from them to get my passport after just 3 working days.

UPDATE (2026): Processing time is usually 5–10 working days, but may take longer during peak travel seasons (e.g., cherry blossom or holidays).

japanese tourist visa how to apply
My Application documents in front of RELI TRAVEL and TOURS at SM Southmall | Dantravels.org

UPDATE (2026): Image source converted to HTTPS for better security and SEO.

MY PERSONAL EXPERIENCE:

In my experience, applying for Japanese Tourist Visa is not that difficult as long as you have completed the requirements specific for the visa type you’re applying. Mine is a Tourist Visa (no guarantor).

I applied at ‘Reli Tours and Travels’ situated at SM Southmall, Las Piñas City. Please note that you can only apply for the tourist visa through an accredited travel agency and one of those is Reli Tours as mentioned. The experience was really hassle-free. The agency has reviewed and filed it, and it took only like 10 minutes. (Note: The one who reviews it corrected the number of days of my stay, I counted it 8 and he corrected it to 9. So rest assured that the agency also checks it completeness.)

UPDATE (2026): Some agencies now require prior appointment or online pre-submission before visiting. Walk-ins may still be accepted but depend on the branch.

I was told by the agency that the tentative release date of passport (with approved visa hopefully!) is 7-10 working days. The agency will text you once your passport is ready for pick up.

UPDATE (2026): Processing time is typically 5–10 working days but may take longer during peak seasons.

Japanese Visa is free by the way! but the travel agency collects handling fee of P950.00 (tourist visa no guarantor). Please take note that the handling fee varies by the type of visa.

UPDATE (2026): Handling fees may now range around PHP 1,000–1,500+ depending on the agency.

So here is the quick ran through of the Japanese Tourist Visa Requirements via Reli Tours:

1. Passport.

2. Filled Up Application Form (you can also get the form through your travel agency’s website). Click here to get the application form from ReliTours.

3. Filled Up Detailed Itinerary Form (you can also get the form through your travel agency’s website). You will be asked here to provide your day-to-day activity as well as your hotel or hostel accommodation. I suggest you tentatively book your hostel at booking.com, then if ever your visa got denied (but hopefully NOT!), you can cancel these bookings with no cancellation fees. But anyway, I booked all my hostel accommodation at Booking.com.

In addition, you can click here to get the Itinerary form from ReliTours.

4. Latest Income Tax Return (BIR Form 2316)

5. Bank Certificate – I get mine from PSBank for 100Php. Now I get asked a lot if how much money the bank account has to have. Well, with mine, I have savings of 100K pesos but from other blogs I read – as long as you have 50USD per day and you have, of course, the main source of income, you’ll be fine.

UPDATE (2026): There is still no fixed required amount, but your funds should match your itinerary and travel duration.

6. Original NSO Birth Certificate

UPDATE (2026): Submit PSA Birth Certificate instead of NSO.

7. Recent 2″x2″ Photo

UPDATE (2026): Required photo size is now 45mm x 35mm.

That’s it!

After only 3 working days, I received a SMS text from Reli Tours that my passport is ready for pick-up. And it’s visa approved!

Japanese Visa Sticker on my Passport | Dantravels.org

UPDATE (2026): Image source converted to HTTPS for better security and SEO.

SUMMARY:

Visa Type: Tourist Visa; Temporary Visitor (Category V)

Visa Validity: 15 Days

Entry type: Single Entry

Visa Fee: Free but handling fee from ReliTours is PHP900.00

UPDATE (2026): Visa validity and entry type depend on the embassy’s assessment. Some applicants may now be granted multiple-entry visas.

BOOKING ESSENTIALS

  • Hotel / Hostel
    • Booking.com. I usually book my hostel accommodation at booking.com. Thus, I recommend you guys trying it as well. Room accommodation ranges from cheap hostels to luxury hotels. Book hostels through booking.com as they have free cancellation or pay-at-the-hotel option.

Use my link to book your hostel and you’ll get 10% of your booking back after your stay. Click this link to get that discount.

UPDATE (2026): Cashback/referral promos may no longer be available depending on region.

    • Airbnb. Try Airbnb in finding comfy and cozy rooms! I have used Airbnb on some of my other trips and I loved it!

Have you tried Airbnb? Sign up with my link and you will get up to 42 USD (2,200 Php) off your first stay. Click this link to get that discount.

UPDATE (2026): Airbnb referral credits like this have already been discontinued.

  • Flights
    • KAYAK. All of my flight bookings are all from KAYAK. Kayak is one of the world’s leading travel search engines and searches hundreds of travel sites.

I suggest you check Kayak (click HERE) as they usually offer cheap fare rates compared to other booking sites.

  • Travel Insurance
    • World Nomads. If you don’t have travel insurance when times get tough, basically you are screwed. Traveling always comes with inherent risks attached. Whether you are trekking in the Akaishi mountains or wandering the streets of Tokyo, unforeseen events can suddenly upend your world. Generally speaking, travel insurance covers you for the following: Medical Costs – hospital visits, emergencies, evacuations; Property Loss – luggage and their contents; Travel Issues – accommodation and transportation expenses. Thus, I highly recommend you guys getting a travel insurance. I bought one from the World Nomads (available in 130+ countries) where most travelers get their travel insurances.

Go to this link to get to your World Nomads travel insurance.

UPDATE (2026): Travel insurance is not mandatory for Japan visa, but highly recommended for safety and peace of mind.