👉 You need to follow instructions carefully, or your work may be rejected.
💰 How Much Can You Earn on SproutGigs?
Here’s the honest truth:
$0.05
$0.10
$0.20
👉 Some higher-paying tasks exist, but are less common.
💡 Real example from my experience:
I earned small amounts by completing simple tasks daily.
👉 It’s not a full-time income, but it’s a good starting point for beginners.
🌍 If you live in a country where the US dollar has higher value, these small earnings can go further.
👉 It can help cover basic expenses like food, mobile data, or daily needs.
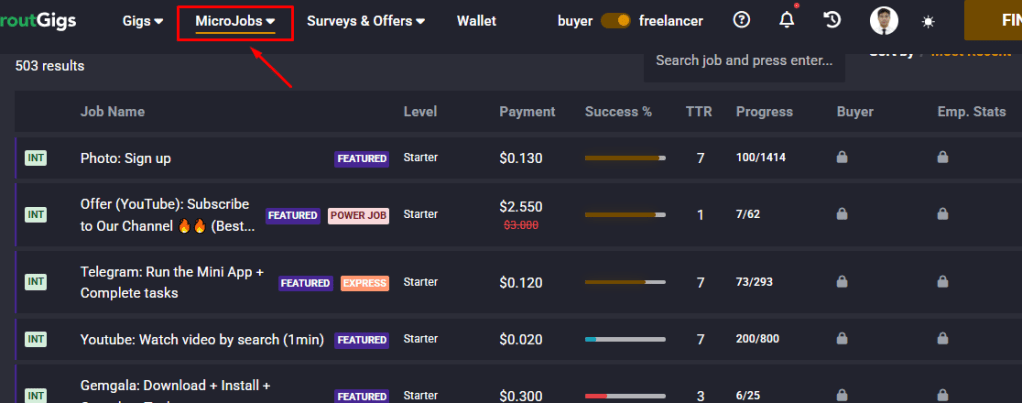
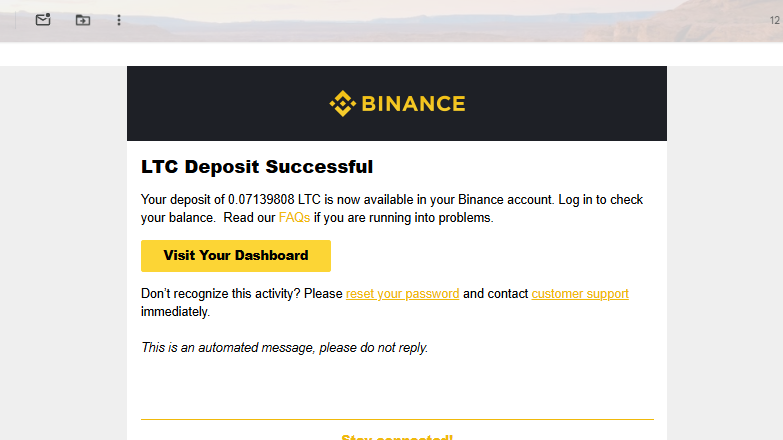
Available MicroJobs at SproutGigs (formerly Picoworkers)My first earning at Picoworkers (now SproutGigs) way back 2019. I no longer access PayPal at the momentMy recent Crytocoin withdrawal this year (via Binance App)
👉 This showed me that even simple online work can generate income.
💸 Payment Methods (My Experience)
SproutGigs offers several payout methods such as:
Payoneer
PayPal
Cryptocurrency (e.g., Litecoin)
Availability depends on your country and account.
In my experience:
Before (Picoworkers): I used PayPal
Now (SproutGigs): PayPal not available
Currently: I use crypto
👉 Some methods require KYC verification and extra setup.
⚠️ Honest insight:
Withdrawing can take more effort than earning — especially for beginners.
🧠 Pros and Cons of SproutGigs
👍 Pros
Beginner-friendly
No experience required
Easy tasks
Many available jobs
Responsive customer support
👎 Cons
Low pay per task
Task rejections happen
Time-consuming
Withdrawal can be inconsistent
👉 In my experience, support tickets were answered relatively fast compared to similar platforms.
🧭 My Experience Using SproutGigs
When I started:
No expectations
Just testing if it works
👉 I completed tasks daily
👉 Some approved, some rejected
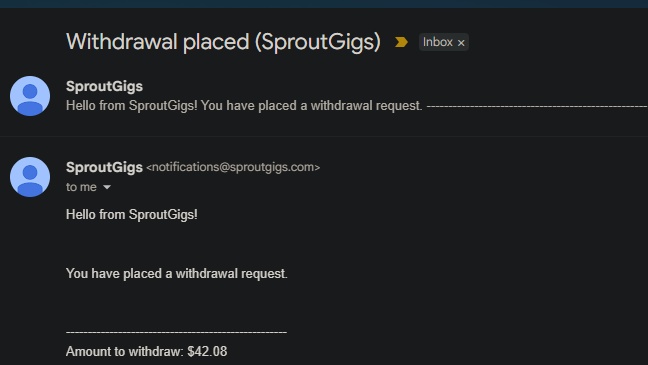
My success rate is 95% at SproutGigs since 2019Another Withdrawal from SproutGigs this year!
The earnings are small — but consistent if you keep doing tasks.
I have been traveling abroad for the past four years and have met some incredible people through penpal and language exchange sites. In fact, I started making international friends online long before I ever set foot outside my home country.
In this blog, I’m sharing the best free penpal and language exchange platforms that have worked for me!
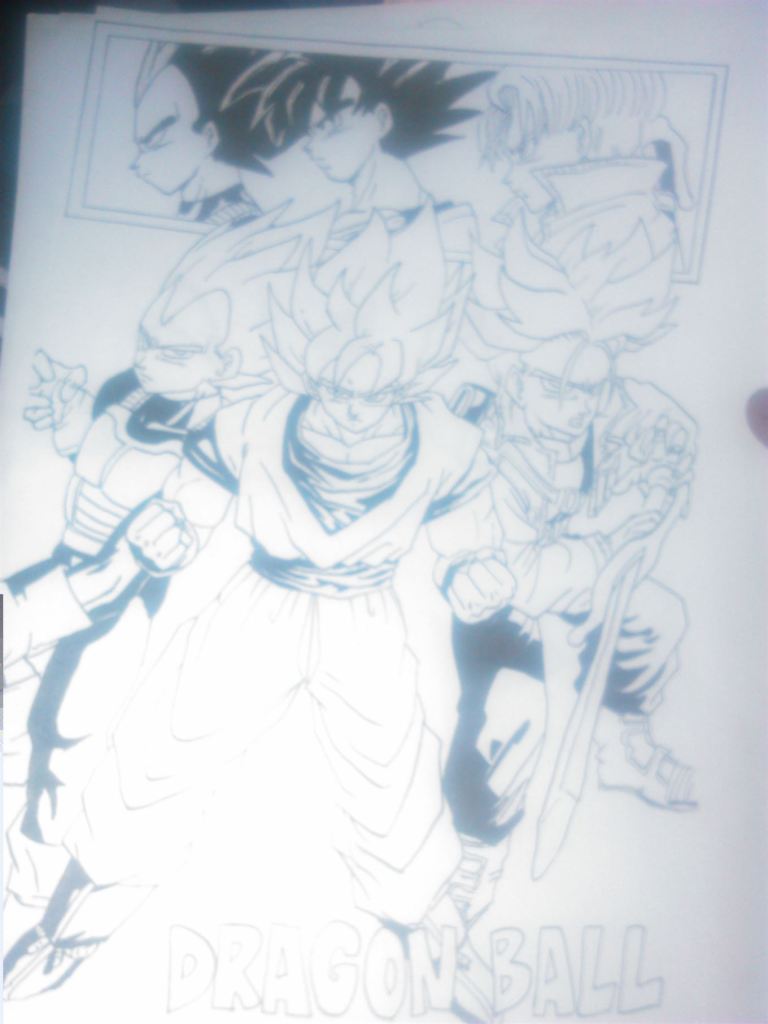
I remember back in 2013, my first penpal was Chisako from Fukuoka, Japan. She even sent me some of her beautifully sketched anime drawings!
From my Japanese Penpal way back in 2015.My Japanese penpal sent me her hand-drawn sketches!
I’ve had several “snail mail” penpals over the years. Snail mail means corresponding through handwritten letters, stamps, and the post office. There’s something so exciting about finding a physical letter in your mailbox!
If you’re looking for something more modern to learn about new cultures, languages, and traditions, these five websites and apps are the best free options available today.
TOP 5 FREE PENPAL & LANGUAGE EXCHANGE SITES
1. SLOWLY (The Digital Snail Mail)
Slowly is perfect for those who find instant messaging too overwhelming. It brings the traditional penpal experience to your smartphone. The “letters” take time to arrive depending on how far away your penpal lives! It’s a great way to have meaningful, long-form conversations.
2. INTERPALS
Interpals is one of the oldest and largest communities on the web. It’s fantastic for finding travel buddies or locals who can show you around their city. Meeting someone from another country gives you a unique perspective on their culture through the eyes of a friend.
Interpals is the site where my Japanese penpal and I first chatted.
3. PENPAL WORLD
PenPal World is highly focused on safety and privacy. All initial interactions happen through their internal messaging system, so your personal information stays hidden until you’re ready to share it. It’s a very clean, straightforward site for finding international matches.
4. MY LANGUAGE EXCHANGE
If your goal is specifically to practice a new language, My Language Exchange is the go-to. You can search for partners by city and country, allowing you to find a native speaker of the language you’re learning while helping them with yours in return.
5. GLOBAL PENFRIENDS
Global Penfriends is excellent for both email and traditional snail mail. They have a family-friendly environment and a “virtual smile” feature to break the ice. It’s a very active community with members of all ages.
A QUICK SAFETY TIP
While meeting people online is a great way to prepare for travel, please stay cautious. I’ve mostly used Interpals and PenPal World, and occasionally you’ll run into “fake” profiles. Never share sensitive financial information or your home address until you have built a solid foundation of trust.
Good luck finding your new friends! If there’s a site I missed that you think belongs in the Top 5, let me know in the comments below!
This post may contain affiliate links which means if you purchase something through that link, I will make a small commission at no additional cost to you. Think of it as buying a cup of coffee for me on someone else. Thanks & enjoy!
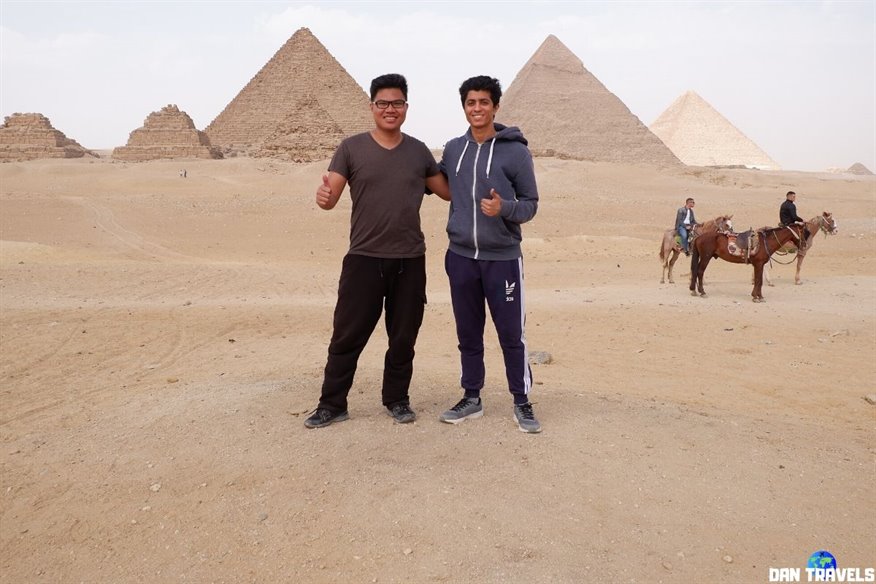
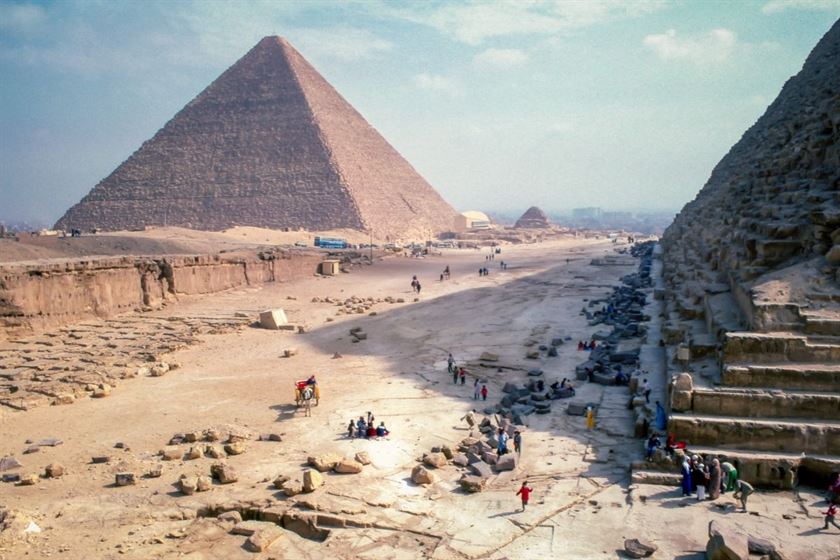
No trip to Egypt is complete without a stay in its capital city of Cairo. While the Pyramids are on every traveler’s bucket list, those are just one of Cairo’s many stunners, and I finally got a chance to see them in person this year! Thus, allow me to share my 4-day Cairo, Egypt itinerary with you complete with my actual day-to-day expenses in this blog.
So get yourself ready! =)
Ebrahim and I went together to Giza Pyramids!
Hi there! First of all, I am Daniel – a solo backpacker from the Philippines. If you don’t know my story yet, feel free to read this article where I talked about how I quit my job in order to travel. This article was also featured on TripZilla Philippines.
But honestly, it’s not just really because of the Great Pyramids of Giza why I wanted to visit Egypt this year. If you’ve been following me for quite a while, you know I am a geek when it comes to Geography.
Personally, visiting Egypt officially marks the fifth continent I set foot into: Africa. There are seven of them in the world. And that would mean I only have two more continents to go: North America and Antarctica.
It is my ULTIMATE travel goal to conquer all seven!
Don’t get me wrong though, seeing beforehand the Great Pyramid of Khufu–the sole surviving ancient wonder of the world has always been in my big travel bucket list. I mean who doesn’t?
DO YOU NEED A VISA?
First things first–do you need a visa to travel to Egypt?
If you’re also a Philippine Passport holder, you need to secure an Egyptian tourist visa first.
If you’re from another country, you might want to check first the visa policy of Egypt to verify whether you need a visa or not.
EGYPT 🇪🇬
Language: Arabic (Egyptian dialect) Capital City: Cairo Currency: Egyptian Pounds (EGP) Int’l Airports in this trip: CAI Preferred mode of transportation: Subway / Bus Time Zone: GMT +2
HOW I GOT TO EGYPT
Finding a cheap flight ticket going to Egypt from the Asia-Pacific region is easy when using Trip.com flight search engine. I got my economy flight tickets from Manila via Cebu Pacific + Flynas going to Cairo (self-transfer in Dubai.) Then I returned to Southeast Asia (in Bangkok) via EgyptAir.
NOTE: For Philippine Passport holders who will go through flight transfer at Dubai International airport (DXB), you DO NOT need any sort of UAE visa as long as you stay within the airside area of the airport. Even if your next flight is on another terminal, you can transfer with ease using DXB’s terminal-to-terminal transport buses.
Here were my flight itineraries with costs:
Manila (Philippines) – Dubai (UAE) [$65.51]
Dubai (UAE) – Cairo (Egypt) [$143.08]
Cairo (Egypt) – Bangkok (Thailand) [$331.92]
Subtotal: $540.51
If you’re also coming from the Philippines (or wherever in the world actually), I suggest you check Trip.com as they usually offer cheap fare rates compared to other booking sites. Per my experience, they’re the best!
HOW TO GET AROUND CAIRO?
Subways / Metro
Subway or Metro is the best way to get around Cairo especially for first-time travelers. Inexpensive and efficient.
Signages are both in Arabic and English.
Tickets cost between 3 to 5 EGP ($0.2 to $0.32) depending on the distance.
Buses / Minivans
Another cheap transport network serving the metropolis.
Signages are in Arabic only, so don’t be shy to ask locals where the bus is going!
Airport to metro station: 4 EGP ($0.25).
Downtown Cairo to Giza: 2.5 EGP ($0.16).
Uber Taxi
Operates in Cairo and is often much cheaper than standard taxis.
Hostel to airport: 100 EGP ($6.35).
Other Transport Travel Tips
Use offline map apps like Google Maps or Maps.me.
Remember to walk a little more! As I mentioned in my budget travel tips blog—“walk as much as you can!”
NOTE: I have only listed the transport services I used per my experience during my Egypt itinerary travel.
You can book a room through Agoda or Booking.com. I usually use Booking.com as they have free cancellation or pay-at-the-hotel options. If a hotel isn’t to your liking, try Airbnb for a more local feel!
If you’re new to AirBnB, then you can get up to $43 USD free travel credit by signing up via this link.
My 4-day trip to Cairo happens one week before things get crazy on the coronavirus outbreak. I actually intend to travel and see more of Egypt but I ended up taking another week in Cairo just basically staying at my hostel in the hope that the virus will just die out.
However, day by day it was getting worse. I ended up canceling my flight to Morocco and instead I booked a flight to Bangkok, Thailand. I don’t want to be stuck in northern Africa while countries are closing borders and declaring lockdowns. So I decided to seek my refuge in Thailand until the situation improves.
I left Egypt one day before the Egyptian authorities suspend all international flights in and out of the country. So I guess I was lucky that I was even able to get back to Southeast Asia!
Anyway…enough of that! Let’s get back to my detailed day-to-day Egypt itinerary. See below:)
DAY 0: ARRIVAL at CAIRO AIRPORT
Day 0: I arrived at Cairo Airport at around 8:00 AM
EGP 4 – Bus: Bus terminal to El Shams Club station, see note 1
EGP 7 – Metro: El Shames station to Attaba station
EGP 88 – Hostel (Nile Plaza Hostel): 1-Night stay
EGP 45.5 – Food: McDonald’s Meal
Subtotal: EGP 144.5 [$9.17]
NOTES:
1 – A guy named Ahmed (in the photo above) helped me with directions. He even paid for my bus fare because the bus conductor didn’t have change for my 200-EGP banknote!
DAY 1: DOWNTOWN & COPTIC CAIRO
Day 1: The beautiful architecture of downtown Cairo
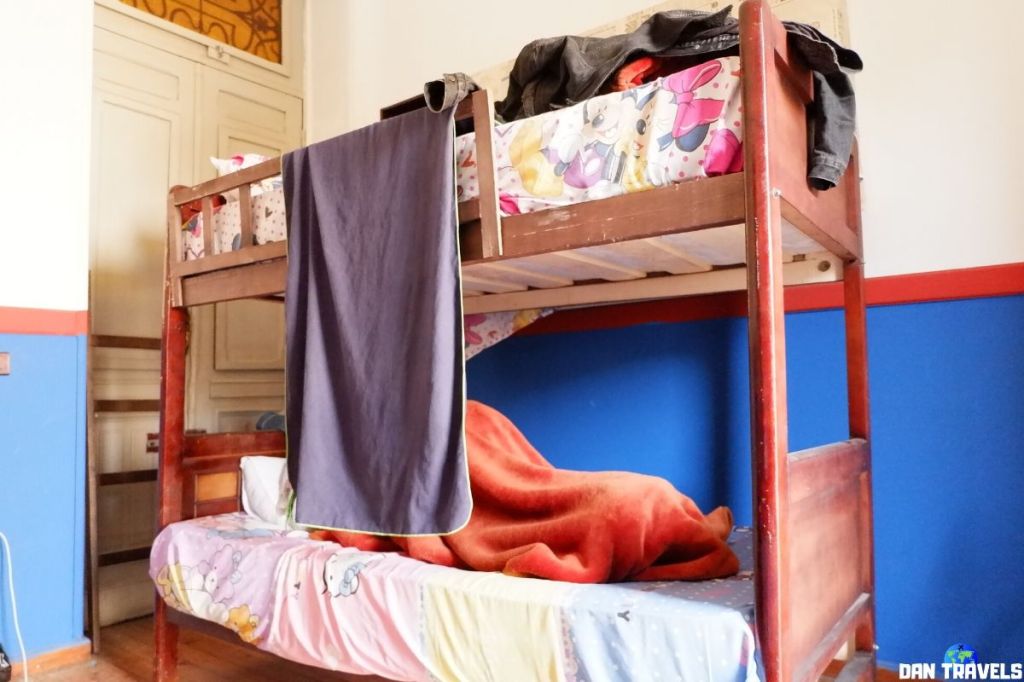
USD 21.39 – Hostel (Bella Casa Hostel): 4-Night stay
EGP 3 – Metro: Opera station to Mar Girgis station
EGP 10 – Food: Sandwich Bread
EGP 10 – Softdrink Miranda
EGP 5 – Metro: Mar Girgis station to Mohamed Naguib station
EGP 12 – Food: 4x Instant Noodles
Subtotal: EGP 377 [$23.9]
NOTES:
Old Cairo (Coptic Cairo) is easily reachable through metro at Mar Girgis station. Mohamed Naguib or Sadat station are the nearest metro stops for Bella Casa Hostel.
DAY 2: MOSQUES OF IBN TULUN & SULTAN HASSAN, AND CAIRO’S CITADEL & MUSEUM
Day 2: Ibn Tulun Mosque is the largest mosque in Cairo in terms of land area.
EGP 12.75 – Food: 3x Croissant Bread
EGP 9.25 – Food: 1-kg Rice
EGP 9 – Softdrink: Miranda
EGP 4 – Bus: El Sayeda Aysha terminal to El Tahrir Square
EGP 200 – Entrance Fee: Egyptian Museum of Antiquities
EGP 80 – Top-up internet 3 GB data
Subtotal: EGP 347 [$22]
NOTES:
I walked almost 3 km to reach Ibn Tulun Mosque from my hostel. Later that night, I met Ebrahim (who I met via a language exchange site); he let me use a spare SIM card, which was a huge help for data!
DAY 3: MOSQUES OF SULTAN AL MU’AYYAD, AL AZHAR, & CAIRO’S AL-MUIZZ LI-DIN ALLAH ST.
Day 3: Zuwayla Gate
EGP 16 – Food: Bread and Coffee
EGP 5 – Metro: El Geish station to Mohamed Naguib station
EGP 6 – Food: 4x Eggs
EGP 20 – Food: Koshary (the national dish!)
Subtotal: EGP 56 [$3.56]
NOTES:
Cairo’s Al-Muizz li-Din Allah Street is oozing with fine medieval buildings. It’s free to enter many of these mosques, though be wary of anyone trying to charge you an “entrance fee” while you’re already inside—I had a funny run-in with someone at Sultan al Mu’ayyad and just walked away! Haha.
AL-MUIZZ LI-DIN ALLAH STREET GALLERY
Mausoleum of As-Saleh
DAY 4: THE GREAT PYRAMIDS
Day 4: This was Ebrahim asking for the minivan route to the Pyramids
EGP 20 – Food: Koshary
EGP 2.5 – Minivan: Charles De Gaulle St to downtown Giza
EGP 5 – Minivan: Downtown Giza to Pyramids entrance
EGP 200 – Pyramids Entrance Ticket (Main gate)
EGP 33 – Food: Koshary (again!)
EGP 9 – Return Minivans to downtown Giza and Cairo
EGP 13 – Food: Canned Tuna
Subtotal: EGP 282.5 [$17.94]
NOTES:
Visiting Hours are typically 8:00 AM – 4:00 PM. I didn’t use a horse or camel; I walked the whole complex! The best view is from ‘the Panorama’ dunes. If you walk, just be mindful of scammers—ask if something is free before agreeing to a photo, as typically nothing is free there! Haha.
And there you have it! Including the flight costs, here is the overall total of my expenses in Egypt for 4 days:
TOTAL: $540.5 (flights) + $76.6 (on the ground costs)
OVERALL TOTAL: $617.10
RECOMMENDED TOUR PACKAGES
If you have more days to spend in Egypt, you might consider these cool package tours:
This post may contain affiliate links which means if you purchase something through that link, I will make a small commission at no additional cost to you. Think of it as buying a cup of coffee for me. Thanks & enjoy!
If you ask me what’s my favorite country out of the growing list of countries I visited, it would be hard to answer honestly. But definitely Peru would always pop into my head alongside Japan as my reply.
Personally, visiting Peru’s Machu Picchu has always been a dream of mine ever since I was in high school and got fascinated with world geography.
That’s why in this blog, I decided to share a more detailed budget travel guide of Peru taken from my two-week South American travel blog article.
Thus, expect that I’ll be sharing my 7-day Peru itinerary when I visited this amazing South American country last December, complete with a trip to the glorious Machu Picchu and Rainbow Mountain.
If you’re a budget traveler like me, this blog is without a doubt for you.
NOTE: Before you set foot in Peru or other South American countries, be sure to get your yellow fever vaccination first. If you’re somewhere around Manila in the Philippines, you can get it at the Bureau of Quarantine.
Hi there! First of all, I am Daniel – a solo backpacker from the Philippines. If you don’t know my story yet, feel free to read this article where I talked about how I quit my job in order to travel. This article was also featured on TripZilla Philippines .
DO YOU NEED A VISA?
If you’re also a Philippine passport holder, you can enter and travel around Peru up to 90 days without a visa. This is also true for other South American countries where Filipinos can enter visa-free! I was lucky enough to visit Brazil, Colombia, and Ecuador in South America which are visa-free countries for Filipinos.
If you’re from another country, you might want to check first the visa policy of Peru to verify whether you need a visa or not.
PERU 🇵🇪
Language: Spanish Capital City: Lima Currency: Peruvian Soles (PEN) Int’l Airports in this trip: LIM, CUZ Preferred mode of transportation: Uber Taxi Time Zone: GMT -5
HOW I GOT TO PERU?
Finding a cheap flight ticket to Peru from the Asia-Pacific region is a bit difficult. They’re way more expensive in comparison to flights within Southeast Asia!
In my case, I utilized different airlines to jump from one country to another within South America. This is also to maximize my travel itinerary while only in a two-week vacation and to take advantage of being halfway around the world.
Here were my flight itineraries with costs:
Manila (Philippines) – Sao Paolo (Brazil) [$927.80 Round Trip]
Sao Paolo (Brazil) – Rio De Janeiro (Brazil) [$92.18]
Rio De Janeiro (Brazil) – Lima (Peru) [$301.40]
Lima (Peru) – Cusco (Peru) [$58.84]
Cusco (Peru) – Lima (Peru) [$70.33]
Lima (Peru) – Bogota (Colombia) [$94.25]
Bogota (Colombia) – Quito (Ecuador) [$314.90]
Quito (Ecuador) – Sao Paolo (Brazil) [$313.50]
Sao Paolo (Brazil) – Manila (Philippines) [Included in RT]
NOTE: Manila to Sao Paolo route (and vice versa) was via Ethiopian Airlines and has two layovers at Hong Kong and Addis Ababa airports. No transit visa needed.
Timeline (of when I purchased them) and flight details are found here .
If you’re also coming from the Philippines (or wherever in the world actually), I suggest you check Kayak as they usually offer cheap fare rates compared to other booking sites. Per my experience, they’re the best!
HOW TO GET AROUND PERU?
Intercity Flight
Flying is the quickest way you can travel from one city to another (e.g., Lima to Cusco). As mentioned above, you can book using Kayak to get the best flight deals available.
Taxi – Cities of Lima and Cusco
Uber Taxi – Hailing an Uber taxi is the most convenient way of getting around big cities in Peru. Uber is also widely used in Brazil, Colombia, and Ecuador.
TIP: You should integrate your credit/debit card as your primary payment method when using the Uber app so you won’t have to worry about paying in cash. Your Uber app will also adapt to the local currency of your location.
Train – Cusco to Machu Picchu Pueblo (Aguas Calientes)
Incarail.com – Book your train ticket in advance online to avoid hassle. Incarail is the site I used to book my transport ticket from Cusco City to Machu Picchu.
The transport consists of two services (called Bimodal):
NOTE: I have only listed the transport services I used during my 7-day Peru itinerary travel. If you have more time, you can also use public transport such as buses, mototaxis, and shared taxis called Collectivos.
WHERE DID I STAY IN PERU?
You can book a room at any hotel in Peru through Agoda or Booking.com. I usually book my accommodations through Booking.com. Room options range from cheap hostels to luxury hotels. Booking.com also offers free cancellation or pay-at-the-hotel options.
If hotels aren’t to your liking, try Airbnb. Airbnbs are immersed in neighborhoods, condos, and townhomes, giving you a more local experience. Since it is someone’s home, there is a certain pride you feel while staying there. I have used Airbnb on some of my other trips and loved it!
If you’re new to Airbnb, you can get up to $43 free travel credit by signing up through this link.
Name: Pirwa & Waca Machu Picchu (now Illapa Inn Machupicchu)
Room type: Bed in 4-Bed Dormitory
Cost per night: $6.30 ($12.60 for 2 nights)
Subtotal: $76.96
Lima: Airbnb private room | Dantravels.orgCusco: Private room at La Casa Ingrid Hostel | Dantravels.orgMachu Picchu Pueblo: Shared room at Pirwa & Waca Machu Picchu | Dantravels.org
ANY OTHER TICKETS TO BUY IN ADVANCE?
I highly suggest booking your Machu Picchu ticket in advance to avoid running out of slots on the day you plan to visit.
If you also want to hike Waynu Picchu (the famous mountain behind Machu Picchu), you really need to book early because only about 200 hikers per day are allowed. I recommend booking at least 3–6 months in advance.
You will choose whether to add the Waynu Picchu hike when booking your ticket online and select your preferred schedule. I chose the 10:00–11:00 AM slot. Visit the official site here.
If you’re curious what the ticket looks like, here is mine.
TIP: My credit card was not accepted when booking the ticket online. I solved this by booking my hostel in Cusco early and asking the hostel owner to help me purchase the ticket locally.
You can also book Machu Picchu tickets easily through Viator:
Day 1: Plaza de Armas (Lima Square) | Dantravels.orgDay 1: Plaza de Armas (Lima Square) | Dantravels.orgDay 1: My favorite Chaufa con Pollo & Potato | Dantravels.org
PEN 195 – SIM Card with Internet (Lima Airport)
PEN 37.5 – Uber Taxi: Lima Airport to Airbnb
PEN 2 – Bread
PEN 1.5 – Bottled Juice
PEN 12.5 – Uber Taxi to Lima Square
PEN 16 – Lunch: Chaufa con Pollo
PEN 16 – Dinner: Chaufa con Pollo
PEN 2 – Bottled Water
PEN 9.5 – Uber Taxi back to apartment
Subtotal: PEN 292
NOTE: You will notice many “Chaufa con Pollo” meals in my expenses list. It means fried rice with chicken. As an Asian, I love rice, so whenever I was unsure about local dishes, I usually chose anything with rice!
DAY 2: EXPLORING LIMA CITY (2)
Day 2: Somewhere in Lima with a good friend | Dantravels.orgDay 2: Cirquito Magico Del Agua in Lima | Dantravels.orgDay 2: Cirquito Magico Del Agua in Lima | Dantravels.org
NOTE: Yep, I did the laundry that day. My Airbnb host was very kind to assist me with my laundry needs.
I also met my Peruvian friend Ciprian, who took me to the Magic Water Circuit Show.
DAY 3: EXPLORING CUSCO CITY
Day 3: The famous Coca Tea of Peru at my hostel – La Casa De Ingrid | Dantravels.orgDay 3: Cusco Cathedral at Plaza Mayor in Cusco | Dantravels.orgDay 3: Our tour guide during the Cusco city tour | Dantravels.orgDay 3: Cusco sightseeing bus tour | Dantravels.orgDay 3: Cusco sightseeing bus tourDay 3: The statue of Cristo Blanco | Dantravels.org
PEN 25 – Taxi: Cusco (CUZ) Airport to La Casa De Ingrid Hostel
PEN 5.05 – Uber Taxi: Hostel to Plaza Mayor
PEN 20 – Cusco city sightseeing bus tour
PEN 0.2 – Toilet fee
PEN 1 – Bread
PEN 7 – Food (Chicken, rice, potato)
Subtotal: PEN 101.75
NOTE: I saw many tour agents around Plaza Mayor offering city tours. I decided to take the chance and experience the Cusco sightseeing bus tour.
DAY 4: EN ROUTE TO MACHU PICCHU PUEBLO
Day 4: Our minibus ride from Cusco City to Ollantaybo | Dantravels.orgDay 4: Voyager train from Ollantaybo to Machu Picchu Pueblo | Dantravels.orgDay 4: Inside the Voyager train | Dantravels.org
PEN 4.92 – Uber Taxi: Hostel to Plaza de Armas
PEN 25 – Food (Chaufa con Pollo) with bottled water at Machu Picchu Pueblo
Subtotal: PEN 29.92
NOTE: I was in transit to Machu Picchu Pueblo (also known as Aguas Calientes) this day. Fortunately, the train ticket included lunch and snacks.
Departure: 09:00 AM (estimated) Arrival: 02:00 PM (estimated)
DAY 5: EXPLORING MACHU PICCHU RUINS
Day 5: Our tour guide explaining the history of Machu Picchu | Dantravels.orgDay 5: The glorious Machu Picchu | Dantravels.orgDay 5: Machu Picchu ruins | Dantravels.orgDay 5: More of the ruins of Machu Picchu up close | Dantravels.orgDay 5: Hiking up to Waynu Picchu | Dantravels.orgDay 5: Reaching the summit of Waynu Picchu | Dantravels.orgDay 5: View of Machu Picchu from the top of Waynu Picchu | Dantravels.org
PEN 3 – Bottled water
PEN 40 – Bus ticket: Pueblo to Machu Picchu ruins
PEN 50 – Tour guide fee
PEN 2 – Toilet fee
PEN 40 – Bus ticket: Machu Picchu ruins to Pueblo
PEN 6 – Bottled water
PEN 25 – Hamburger
PEN 48 – Food (Chaufa con Pollo)
Subtotal: PEN 214
NOTE: Machu Picchu can be reached either by hiking or by bus from Aguas Calientes. Hiking takes around 2–3 hours. My advice: just take the bus!
ANOTHER NOTE: I originally planned to explore Machu Picchu on my own. However, someone invited me to join their tour group for only 15 USD (50 PEN). It turned out to be one of the best tours I had.
TIP: Food is very expensive in Machu Picchu Pueblo. Bring or pack some food if you’re traveling on a tight budget.
DAY 6: BACK TO CUSCO CITY
Day 6: Exploring Machu Picchu (Aguas Calientes) before heading back to CuscoDay 6: Exploring Machu Picchu (Aguas Calientes) before heading back to CuscoDay 6: My room at La Casa De Ingrid in Cusco
PEN 22 – Food (Chaufa con pollo)
PEN 21 – Food (Chaufa con pollo)
PEN 4.14 – Uber Taxi: Cusco drop-off to La Casa De Ingrid Hostel
Subtotal: PEN 47.14
NOTE: Later that day, I was in transit from Machu Picchu Pueblo back to my hostel in Cusco City.
Day 7: This is probably one of the hardest hikes I ever experiencedDay 7: Some prefer to ride with horsesDay 7: Nevertheless, reaching the summit is all worth it
PEN 1 – Toilet fee at Rainbow mountain
PEN 3 – Coffee at Rainbow mountain
PEN 6 – Photo Op with natives at the Rainbow Mountain summit
PEN 1 – Toilet fee at Rainbow mountain
Subtotal: PEN 11
NOTE: Breakfast and Lunch were included in the Rainbow Mountain Tour.
Rainbow Mountain Tour details:
Pick up time: 3:30 – 4:00 AM
Pick up location: My hostel
Tour duration: One (1) whole day
DAY 8 (LAST DAY): TO BOGOTA, COLOMBIA
PEN 3.4 – Bottled Water and Doritos
PEN 16.59 – Uber Taxi to Cusco (CUZ) Airport
PEN 839.5 (USD 250) – Flight from Cusco to Lima (due to canceled flight)
PEN 16.5 – Coke and Doritos Snacks
Subtotal: PEN 876
NOTE: My flight Cusco-Lima via LC Peru Airlines was canceled. Basically, all LC Peru Airlines were canceled on that day. I just knew when I arrived at the airport. So then I booked a new flight Cusco-Lima via LATAM Airlines and in order to catch another flight Lima-Bogota via VivaAir. You have no idea how frustrated I was.
And there you have it!
Excluding the flight costs, here is the overall total of my expenses in Peru:
Because things happen, it is worth noting to set aside an emergency fund for unwanted expenses abroad. Nevertheless, I really enjoyed exploring Peru! I’m sure you would, too.
RECOMMENDED TOUR PACKAGES
If you have more days to spend in Peru, you might consider these cool package tours:
Booking.com – I usually book my hostel accommodation here. They offer options ranging from cheap hostels to luxury hotels, often with free cancellation.
Airbnb – Great for finding comfy and cozy rooms. I have used Airbnb on many trips and highly recommend it for a more local experience.
Have you tried Airbnb? Sign up with my link and you will get up to 43 USD off your first stay. Click here to get that discount.
Flights
KAYAK – All of my flight bookings are through KAYAK. It searches hundreds of travel sites to find the best rates.
I suggest you check Kayak (HERE) as they usually offer cheaper fare rates compared to other booking sites.
I was in a constant lookout for any home-based job I could find after quitting my 9-to-5 day job in the pursuit of long-term travel. In June 2019, I signed up for Remotasks after hearing great things about it.
The best part? Remotasks offers FREE training in the Philippines. They call this the Remotasks Boot Camp, and it happens biweekly in major cities across the country. I was lucky enough to join a 10-day training in Quezon City, which helped me dig deeper into how the platform works.
Hi there! I am Daniel – a solo backpacker from the Philippines. If you don’t know my story yet, feel free to read this article where I talk about how I quit my job to travel. This story was also featured on TripZilla Philippines.
IS REMOTASKS LEGIT?
Remotasks is a LEGIT opportunity to work as a freelancer and start making money quickly. It’s popular because you don’t need special degrees—just a good command of English and the patience to pass exams to unlock tasks.
Try this too: You can also check out SproutGigs (previously Picoworkers) for simpler tasks like surveys or website testing. I’ve earned $0.02 to $1.00 per task there.
HOW TO JOIN REMOTASKS
Simply visit the Sign Up page here and join using your Facebook account. Once in, you can start taking courses at Remotasks University to unlock earning opportunities immediately.
TYPES OF TASKS
Classic Tasks: Includes image annotation (drawing boxes), categorization, and image/audio transcription.
LiDAR Tasks: This involves Light Detection and Ranging technology used for self-driving cars. These are the highest-paying tasks on the platform.
HOW MUCH CAN YOU EARN?
Task Type
Pay Rate (USD)
Duration
Image Annotation
$0.05 – $0.20
< 4 minutes
Categorization
$0.01 – $0.02
< 3 minutes
LiDAR
$5.00 – $80.00
3 – 6 hours
IN-PERSON TRAINING BOOT CAMP
For those in the Philippines, the 10-day Boot Camp is a game-changer. Not only is it free, but you get paid for tasks completed during training and a bonus upon graduation. Training is available in cities like Manila, Cebu, Davao, and Quezon City.
My co-trainees at Remotasks Boot Camp in Quezon City
Note: LiDAR tasks require a decent computer. Make sure you have at least 4GB of RAM (8GB is better!) to work smoothly from home.
PROS AND CONS
✅ Pros
Quick sign-up and weekly PayPal payouts.
No minimum payout requirement.
Complete flexibility of time and location.
❌ Cons
Tasks can be repetitive and tedious.
Consistently low accuracy can lead to bans.
Requires a good PC for high-paying LiDAR tasks.
MY FINAL SAY
Is Remotasks worth it? If you live in a country where the USD is strong and you don’t mind repetitive work, then yes, go for it! It’s a reliable way to build a consistent income from home while you plan your next travel adventure.
What are your thoughts? Have you tried working on Remotasks before? Let me know in the comments!
Getting a Yellow Fever Vaccine Card was one of the precautions I took before going to South America a year ago.
This year, I will be visiting Africa and will be armed with the same vaccine I had since its validity is LIFETIME. Yep, you read it right. So if you also intend to visit the continents of South America and Africa, most likely you’ll be needing a Yellow Fever Vaccine.
Hi there! First of all, I am Daniel – a solo backpacker from the Philippines. If you don’t know my story yet, feel free to read this article where I talked about how I quit my job in order to travel. This article was also featured on TripZilla Philippines.
Also known as the International Certificate of Vaccination or Prophylaxis, the Yellow Fever Vaccine card is secured to protect both individual travelers and from the risk of importing or spreading the yellow fever virus.
My Yellow Fever Vaccine card | Dantravels.org
WHAT IS A YELLOW FEVER?
Mosquitoes are the primary carrier of this tropical viral disease. The “yellow” in the name refers to the jaundice that affects some patients. Symptoms of yellow fever include fever, headache, jaundice, muscle pain, nausea, vomiting, and fatigue.
The yellow fever virus is endemic in tropical areas of Africa and Central and South America. You can check the official WHO list of countries for current requirements.
From the snapshot above, the World Health Organization (WHO) recommends getting a Yellow Fever Vaccine certificate prior to visiting Colombia.
WHO NEEDS THE YELLOW FEVER VACCINE?
Travelers going to countries with risk for Yellow Fever Transmission
Seafarers required by their company to have the vaccination
NOTE: The yellow fever vaccine is said to be safe for people as young as 9 months of age.
WHERE CAN I GET THE YELLOW VACCINE?
One can get this vaccine including its yellow card (or Carte Jaune) in various Bureau of Quarantine Offices across the country. For Filipinos living within NCR, you can obtain this at the Bureau of Quarantine in Manila.
Schedule: Monday to Friday (except holidays), 8:00 AM – 3:00 PM
HOW TO GET YOUR YELLOW FEVER VACCINE
Log in and Fill out Forms: Upon arrival, approach the guard to log in. You will receive a Data Form, Yellow Fever Questionnaire, and Waiver form.
Interview: Proceed to the clinic for a short health interview with a quarantine officer.
Vaccination: Submit your forms and receive the shot. You’ll be asked to wait for 5 minutes to check for any immediate allergic reactions.
Payment: Pay at the cashier. The cost is 1,500 PHP.
Verification: Verify your personal details before the card is printed.
Claim Card: Receive your card signed by the Medical Officer.
Note: The whole process usually takes 10 – 30 minutes. Sweet!
MY FINAL SAY
As Desiderius Erasmus said, “Prevention is better than cure.” Getting protected before you travel ensures you don’t run into issues at immigration or, more importantly, with your health. Let me know in the comments how your experience went!
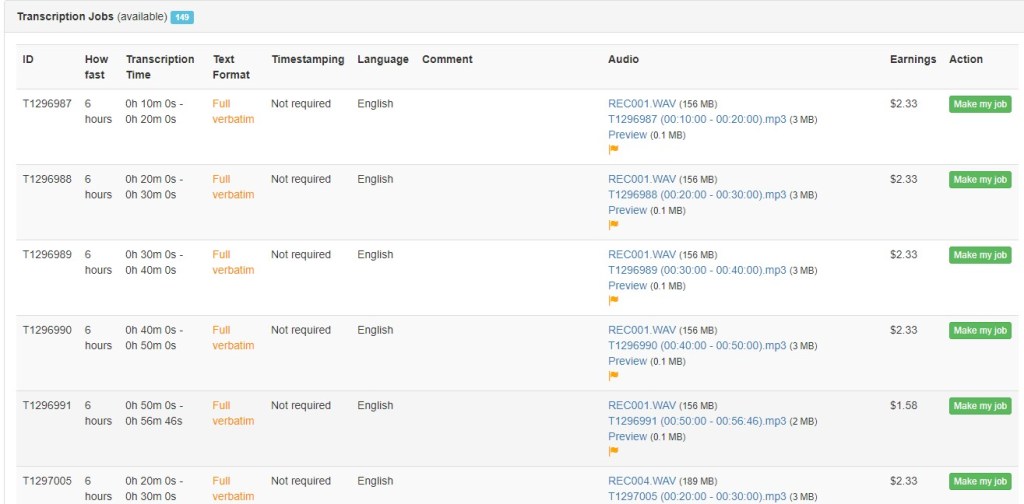
At the moment, English transcription may be limited — but many applicants don’t realize you can apply using other languages where competition is lower.
Click “Apply as a Transcriber” 👉 You may also click “Apply as a Translator” depending on availability
Fill out the application form
Take the transcription test
Wait for results
The test is the most important part — follow the guidelines carefully.
🧭 My Experience as a Beginner Transcriber
I had no experience
I was just looking for ways to earn online
When I first applied:
The test was challenging, but manageable.
Once accepted:
I started taking small transcription jobs
It took me time to get used to the workflow
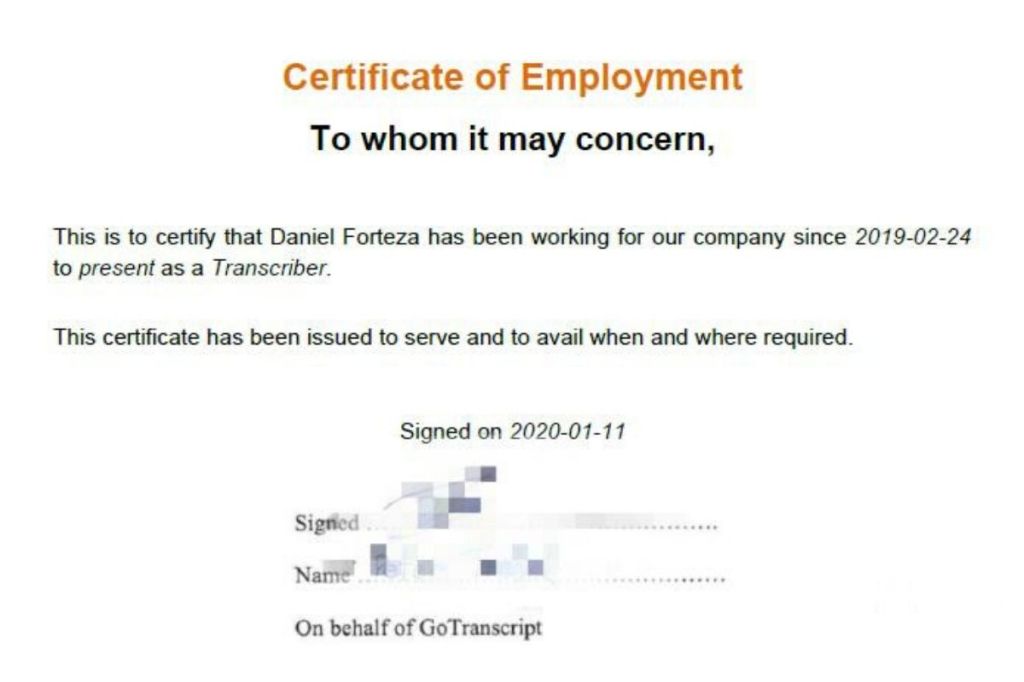
My GoTranscript worker certificate
👉 At first, I was slow.
👉 Over time, I improved — but the pay didn’t increase much.
💻 Is GoTranscript Worth It?
👉 Yes — if you are a beginner
👉 No — if you’re looking for high income
Use it as a starting point and move to better opportunities later.
🧠 Final Verdict
GoTranscript is legit, beginner-friendly, but low-paying.
It’s a great starting point — but not a long-term income source.
This post may contain affiliate links which means if you purchase something through that link, I will make a small commission at no additional cost to you. Think of it as buying a cup of coffee for me on someone else. Thanks & enjoy!
Visiting the Great Pyramids in Egypt is definitely one of my travel goals this year. That’s why as early as January, I have already been researching on how to get the Egypt tourist visa for Filipinos. And I successfully managed to get one at the Egyptian Embassy in Manila, Philippines!
In this blog post, I’ll be giving you the step-by-step guide, a list of the requirements, my experience throughout the whole application process, and other tips to help you get your Egypt tourist visa!
But again, just like in other visa application blogs I’ve written, no one can give you the guarantee of your Egyptian tourist visa’s approval – not me, not even a lawyer or a travel agent. If anyone does, is most likely a scammer!
As a travel blogger, what I can offer you here is just a guide with helpful tips to increase your chances of getting that Egypt tourist visa.
Anyway, enough of that and let’s get started!
REQUIREMENTS FOR EGYPT TOURIST VISA
Duly filled-up Visa Application Form; You can download the application form here. (Note: This is the universal form accepted by the Manila Embassy).
Two (2) pieces 2×2 size recent colored picture (with white background); I actually used only one (1) 2×2 photo which was pasted on my application form. But it wouldn’t hurt if you bring an extra photo.
Valid Passport which must have remaining validity of more than six months; You might not be required to submit your passport on the day of your first visit to the Embassy. Most of the time, the Embassy will take and review your requirements without your passport. The review might take up to 15 days and the Embassy will let you know its decision via phone call.
Bank Certificate, preferred to be one-week-old;
Employment Certificate with compensation / Business Registration if applicable; I’ll be honest. I actually did not exactly provide this because I quit my job to travel long term. Thus, I provided an Employment certificate from the previous company I worked for.
Travel Tour Itinerary; I can provide you a copy of mine if you like. It is a one-week long tour itinerary. Just leave a reply on the comment section below.
Copy of Philippine residency/ visa / Immigration ID Card (for foreign national applicants only).
Marriage Certificate / Birth Certificate, if traveling with family members.
Add a cover letter stating the purpose of your trip even if it’s not a requirement I think this should be a must especially if you have a case like mine that one requirement is not fully met. Thus, I prepared myself a visa cover letter personally explaining my situation, my capacities, and my hunger to travel.
Plane Tickets. This is NOT required but I submitted this anyway because I already have this. I had a plane ticket from Manila to Dubai and I intend to book my next flight from Dubai to Cairo (in Egypt) if my visa is approved. I suggest you check Kayak (use the widget below) as they usually offer cheap fare rates compared to other booking sites.
WHEN AND WHERE TO APPLY
WHEN: Application should be made at least one month prior to your intended departure. Please note that there is a waiting time (up to 15 days) in case the embassy needs to fully review the requirements you submitted.
💡 DAN’S PRO-TIP: CHECKING YOUR STATUS If you haven’t heard back after 10 working days, don’t hesitate to send a polite follow-up email to embassy.manila@mfa.gov.eg. Include your Full Name and Submission Date in the subject line to help the secretary find your records quickly!
📅 HOLIDAY NOTICE: The Embassy observes both Philippine and Egyptian holidays. If you are applying around this time, expect potential closures and factor in extra processing days!
WHERE: Visa application must be submitted personally to the Embassy during consular working hours from Monday – Wednesday from 9:00 A.M. till 12:00 P.M. except holidays. Please take note of the Egyptian holidays, too.
Prepare ALL the abovementioned requirements. Proceed to the Embassy of the Arab Republic of Egypt in the Philippines at 7th Floor, G.C Corporate Plaza Bldg., 150 Legaspi St., Legaspi Village, Makati City to submit these documents.
STEP 2: WAIT FOR THE EMBASSY’S CALL
Once submitted, wait for the call with the Embassy’s decision. If your visa is approved, then they will contact you to submit your passport (for the visa sticker) and payment.
You can also do a follow up by calling their contact number I indicated above. No worries, the Filipino Secretary (I think her name is Marian) is very accommodating and friendly.
💡 HOW TO GET “INSTANT” APPROVAL: While the standard wait is 15 days, I managed to get mine the same day! The secret? A rock-solid cover letter explaining my travel history and status as a digital nomad. It pays to be honest and detailed!
STEP 3. SUBMIT YOUR PASSPORT & PAY THE VISA FEE
What I like about this Embassy is they do not charge the visa processing fee unless and until your visa is approved. Yes, you heard it right! There is absolutely no risk in getting this visa! If your visa is approved, submit your passport and pay the visa fee.
The Egypt tourist visa fee costs 1,500 PHP. Then, the Secretary will give your receipt with date of when to claim your passport with visa.
⚠️ IMPORTANT UPDATE (2026): According to recent traveler reports, the Egypt tourist visa fee at the Manila Embassy has increased from 1,500 PHP to approximately 4,000 PHP. It is highly recommended to bring extra cash to your appointment as fees are subject to change without prior notice.
STEP 4. CLAIM YOUR PASSPORT WITH VISA STICKER
Finally, pick up your passport with visa sticker and congratulations on successfully getting your Egypt tourist visa!
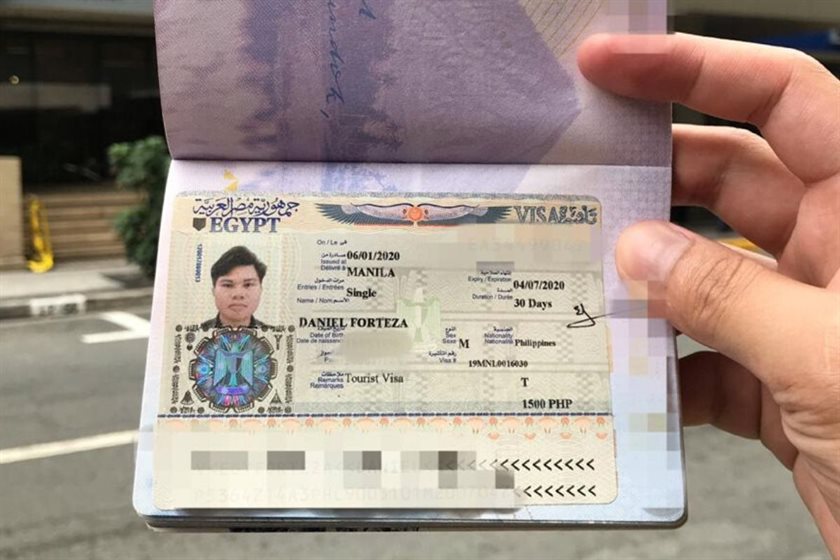
My Egypt Tourist Visa
VISA SUMMARY
Type: Tourist Visa
Visa Validity: 6 months from the day of approval
Maximum Stay: 30 days within validity
No. of Entry: Single Entry
Visa Fee: 1,500 PHP (30 USD)
Visa Fee: 1,500 PHP (30 USD)
UPDATE (2026): The fee is now around 4,000 PHP
MY EXPERIENCE
When I arrived at the Embassy at around 10:00 AM, there were already 6 to 8 people in the waiting room. Some of them are still filling up the visa application form.
From that, I can tell that the Egyptian Embassy is informal and chill. You just need to turn off your mobile phone before entering the office.
Remember: Prior to entering the building, your bags will be checked and will require you to leave one government valid ID at the lobby, so bring one!
The Secretary then collected our documents and left the room. She probably handed it over to the Egyptian Consul (in another room) to review the documents.
She went back to the waiting room and announced those people who can now pay the visa fee. Please note that if you pay the visa fee, it means your visa is approved.
I was lucky that steps 1-3 all happened in one day! So I submitted my passport and paid the visa fee, all in 30 minutes! I saved one Makati trip. I met other applicants in the room who has to go and wait up to 15 days for approval and went back to the Embassy 3 times.
They did not tell me the reason why my visa was approved instantly, but I have a strong feeling it has to do with my travel history, capacity to travel, and my very personalized cover letter. I even mentioned in my cover letter about quitting my day job just to travel long term. As they say, honesty is the best policy =)
NOTE that I applied Monday and claimed my passport (with visa) Friday of the same week. So it only took four (days)! I was just so happy to save the step where you have to wait up to 15 days for the Embassy’s decision.
Now that your visa is (hopefully) on its way, here are a few essentials I recommend packing for your Egyptian adventure:
🇪🇬 QUICK EGYPT PACKING LIST: • Modest Clothing: Respectful attire (covering shoulders and knees) for visiting mosques and local areas. • Sun Protection: A wide-brimmed hat, high-SPF sunscreen, and quality sunglasses—the desert sun is no joke! • Universal Power Adapter: Egypt uses Type C and Type E wall plugs. • Comfortable Walking Shoes: You’ll be doing a lot of walking around the Giza plateau and ancient temples!
RECOMMENDED PACKAGE TOURS
In case you’re also looking for package tours to justify your tourism activity in Egypt for visa purposes, I highly recommend booking tours through Viator which is perfect for your Egypt itinerary. See tours and packages I personally handpicked for you:
This post may contain affiliate links which means if you purchase something through that link, I will make a small commission at no additional cost to you. Think of it as buying a cup of coffee for me on someone else. Thanks & enjoy!
If you will be traveling abroad on a small budget and looking for great tips in order to avoid spending too much, then this blog is perfect for you! Whether you’re a frequent traveler or a newbie in backpacking, I’m sure you’ll find these 15 budget travel tips helpful for making your saving cash easy breezy!
Hi there! First of all, I am Daniel – a solo backpacker from the Philippines. If you don’t know my story yet, feel free to read this article where I talked about how I quit my job in order to travel. This article was also featured on TripZilla Philippines.
At Batu Cave, Malaysia. My first ever solo backpacking trip | Dantravels.org
15 PROVEN BUDGET TRAVEL TIPS
1. Book your flights / accommodation in advance. I use many different search engines, but hands down, Kayak is one the best for scooping up deals. Read also: My 14-day South America cost breakdown.
2. Pre-book your main attraction tickets. Don’t wait until the last minute for places like Machu Picchu. I use Viator or GetYourGuide to book with confidence.
3. Don’t take too much luggage. Airlines charge heavy fees for big bags. I stick to a 55-L Backpack and a small laptop bag to keep things mobile and avoid check-in fees.
4. Stay connected. Googling is a lifesaver for navigation! If you don’t buy a local SIM, use Maps.me for offline navigation.
5. Mind your currency abroad. Avoid airport exchange booths! Withdraw from local ATMs for better rates, and always keep some emergency USD hidden in your bag.
6. Get travel insurance before you leave. It’s imperative for lost luggage or injuries. I recommend World Nomads for the best value.
7. Go Couchsurfing. Couchsurfing lets you stay with locals for FREE. It’s an eye-opening way to make friends, just be sure to check references first!
9. Bring a water bottle. Sodas and bottled water add up! That extra money could pay for another night in a hostel every week.
10. Avoid eating near touristy restaurants. Go down a few blocks and eat where the locals do. It’s cheaper and usually tastes much better!
11. Ask for local advice. Don’t be shy! Ask hostel staff or locals what things should *normally* cost to avoid “tourist prices.”
12. Walk and minimize transportation costs. Walk as much as you can. For long distances, use subways or buses and look for “day passes.” Read also: My 4-day Russia itinerary.
13. Take free walking tours. It’s the best way to learn about a city. Just remember to tip your guide at the end!
14. Cross the border by land. Buses and trains are often cheaper than planes, and the scenery is a bonus! Use Rome2Rio to compare costs.
15. Minimize your souvenirs. Postcards and photos are the best souvenirs. Don’t weigh your backpack down with things you don’t need!
At Kuala Lumpur City Gallery Sign | Dantravels.org
Which travel budget tip is your favorite? If I missed anything, share it in the comments below! Let’s show the world that traveling doesn’t have to be expensive.
✈️ BUDGET TRAVEL CHEAT SHEET
Screenshot this quick summary for your next adventure!
PRO-TIP
KEY ACTION
1. Flights & Stays
Book 2–4 months in advance. Use Kayak or Skyscanner.
2. Attractions
Pre-book main tickets online via Viator or GetYourGuide.
3. Luggage
Travel light! Stick to carry-on limits to avoid bag fees.
4. Connectivity
Get a local SIM for navigation; use Maps.me for offline use.
5. Money
Withdraw cash from local ATMs (avoid airport exchange!).
This post may contain affiliate links which means if you purchase something through that link, I will make a small commission at no additional cost to you. Think of it as buying a cup of coffee for me. Thanks & enjoy!
“Isn’t it expensive to go to South America?” — you probably are asking yourself this question now. To simply answer it: yes, it is. I find it very expensive, but it doesn’t mean you can’t save money before or during your trip. If you plan in advance, you will definitely save a lot!
In this blog, I’ll show you the breakdown of my expenses before and during my trip to South America, particularly in four countries I visited — Brazil, Peru, Colombia, and Ecuador. You may use this as a guide to gauge your finances for your own South America trip.
A person like me who got fascinated with geography and languages at such a young age always dreamed of setting foot on every continent. South America has always been my favorite continent among the seven. I always dreamed of traveling there even though it is halfway around the world from where I live.
Hi there! First of all, I am Daniel — a solo backpacker from the Philippines. If you don’t know my story yet, feel free to read this article where I talked about how I quit my job in order to travel. This article was also featured on TripZilla Philippines.
So how did I plan it? How did I manage to visit 4 countries in only 14 days? Yep — only 14 days! That was my 2-week Christmas holiday break, and it became the grandest solo backpacking adventure of my life (so far).
NOTE: For Philippine passport holders, visiting Brazil, Peru, Colombia, and Ecuador does not require a visa. These countries are visa-free for Filipinos!
Ruins of Machu Picchu in Peru
BEFORE THE TRIP: TIMELINE WITH COST BREAKDOWN
1. FLIGHTS
NOTE: For flights, I often use Trip.com and Kayak to search for cheap flights in South America.
March 31, 2018 – 927.80 USD Booked a round-trip flight from Manila to São Paulo via Ethiopian Airlines (seat sale).
April 19, 2018 – 301.40 USD Flight from Rio de Janeiro to Lima via Avianca.
May 31, 2018 – 94.25 USD Flight from Lima to Bogotá via VivaAir.
SUBTOTAL: 2,173.60 USD
2. FINAL ROUTES IN SOUTH AMERICA
December 22, 2018 to January 5, 2019 (actual travel date)
Manila – Sao Paulo (Layover at Hong Kong and Addis Ababa)
Sao Paulo – Rio De Janeiro
Rio De Janeiro – Lima
Lima – Cusco
Cusco – Lima
Lima – Bogota
Bogota – Quito
Quito – Sao Paulo
Sao Paulo – Manila (Layover at Addis Ababa and Hong Kong)
3. HOSTEL / ROOM ACCOMMODATIONS
April 19, 2018
18.90 USD – 2 Nights in Cusco, Peru. Booked via Booking.com.
TIP: If you intend to visit Machu Picchu and hike Huayna Picchu, book your ticket 3–6 months in advance since only 200 hikers are allowed daily. My credit card wasn’t accepted on the official website, so I asked my Cusco hostel owner to help purchase my ticket.
November 20, 2018
24.33 USD – 2 Nights in Sao Paulo, Brazil (Airbnb)
November 21, 2018
36.40 USD – 2 Nights in Rio De Janeiro, Brazil (Airbnb)
28.36 USD – 2 Nights in Lima, Peru (Airbnb)
12.00 USD – 1 Night in Cusco, Peru (Booking.com)
12.60 USD – 2 Nights in Machu Picchu Pueblo (Aguas Calientes), Peru (Booking.com)
December 12, 2018
18.92 USD – 1 Night in Bogota, Colombia (Booking.com)
SUBTOTAL: 151.51 USD
4. TRAIN TICKETS
November 20, 2018
79.00 USD – Train ticket from Cusco to Machu Picchu Pueblo via IncaRail.
December 4, 2018
76.00 USD – Train ticket from Machu Picchu Pueblo back to Cusco.
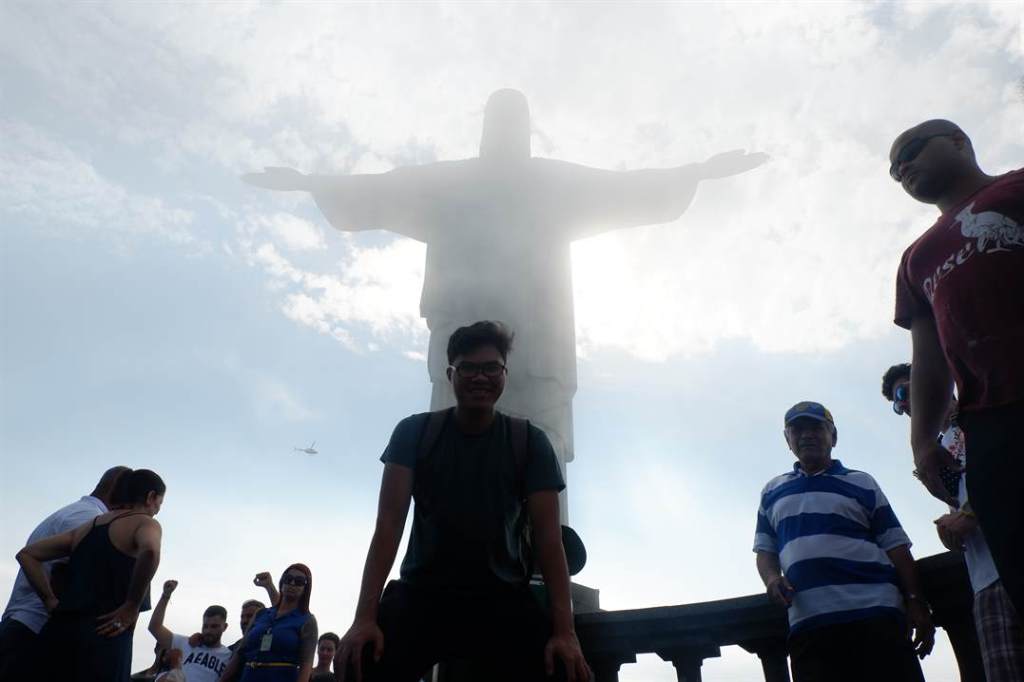
Day 1: Paulista Avenue in Sao PauloDay 2: My room via AirBnB in Rio De JaneiroDay 2: Copacabana Beach in Rio De JaneiroDay 2: Cristo Redentor in Rio De JaneiroDay 3: Pedra do Telegrafo near Rio De JaneiroDay 3: Haha! Figure it out how this happened in Pedra do TelegrafoDay 3: Lunch with my hiking buddy from Brazil
DAY 1:
BRL 156 – Regular Taxi: Guarulhos (GRU) Airport to Paulista Avenue, Sao Paulo
BRL 64 – Uber Taxi: Paulista Avenue to GRU Airport
TIP: You should integrate your credit/debit card as your primary payment method when using the Uber app so you won’t have to worry about paying in cash. Your Uber app will also adapt to the local currency of your location.
NOTE: My flight from Manila to Addis Ababa got delayed. As a result, I arrived in Sao Paulo with a one-day delay. I even canceled my 2-night room accommodation in SP. Also, I wasn’t feeling well the day I arrived in SP, so I didn’t do much except roam around Paulista Avenue.
DAY 2:
BRL 16 – Fried Chicken & French fries at KFC (GRU Airport)
BRL 7 – Cup of Choco at Baked Potato (GRU Airport)
BRL 50 – Sim card (GRU Airport)
BRL 10 – Top up for Internet use (GRU Airport)
BRL 52 – Uber Taxi: Rio De Janeiro (GIG) Airport to Copacabana (Airbnb apartment)
BRL 42 – Uber Taxi: Apartment to Cristo Redentor Entrance Building
BRL 43 – Entrance fee at Cristo Redentor Monument
BRL 10 – Van from Cristo Redentor to Bus stop
BRL 13 – Bus from Bus stop to Copacabana (Airbnb apartment)
BRL 19 – Food (Chicken, Rice, Fries)
DAY 3:
BRL 32.4 – Food (Chicken, Rice, Salad, Fries)
BRL 25 – Share of Gas (Car with a friend to Pedra do Telegrafo)
NOTE: A Brazilian friend took me to Pedra do Telegrafo this day. It was an awesome hike!
Day 4: Plaza de Armas (Lima Square) in LimaDay 4: My favorite Chaufa con Pollo & PotatoDay 4: My room in Lima via AirbnbDay 5: Somewhere in Lima with a good friendDay 6: Cusco Cathedral at Plaza Mayor in Cusco
DAY 4:
PEN 195 – Sim Card with Internet (Lima Airport)
PEN 37.5 – Uber Taxi: Jorge Chavez (LIM) Airport to Airbnb Apartment in Lima
PEN 2 – Bread
PEN 1.5 – Bottled Juice
PEN 12.5 – Uber Taxi from Apartment to Lima Square
PEN 9.5 – Uber Taxi somewhere in Lima to Apartment
NOTE: You probably will notice that I had been eating ‘Chaufa con Pollo‘ in my stay in South America. It means Fried Rice with Chicken. Well, as an Asian, I love rice! Since I am not so familiar with their food or how it tastes, I prefer going for anything with RICE.
PEN 25 – Regular Taxi: Cusco (CUZ) Airport to La Casa De Ingrid Hostel
PEN 5.05 – Uber Taxi: Hostel to Plaza Mayor
PEN 20 – Sightseeing bus tour around Cusco City
PEN 0.2 – Toilet fee
PEN 1 – Bread
PEN 7 – Food (Chicken, Rice, Potato)
DAY 7:
PEN 4.92 – Uber Taxi: Hostel to Plaza de Armas (then walk to Incarail office)
PEN 25 – Food (Chaufa con Pollo) with Bottled water at Machu Picchu Pueblo
NOTE: I was in transit to Machu Picchu Pueblo (a.k.a. Aguas Calientes) this day. Good thing the train ticket includes food for lunch and snacks for passengers.
DAY 8:
PEN 3 – Bottled water
PEN 40 – Bus ticket: Pueblo to Machu Picchu ruins
PEN 50 – Tour guide fee
PEN 2 – Toilet fee
PEN 40 – Bus ticket: Machu Picchu ruins to Pueblo
PEN 6 – Bottled Water
PEN 25 – Some Hamburger
PEN 48 – Food (Chaufa con Pollo)
TIP: Food is very expensive in Machu Picchu Pueblo. I recommend bringing or packing food if you’re on a tight budget.
DAY 9:
PEN 22 – Food (Chaufa con pollo)
PEN 21 – Food (Chaufa con pollo)
PEN 4.14 – Uber Taxi: Cusco drop-off to La Casa De Ingrid Hostel
NOTE: Later that day, I was in transit from Machu Picchu Pueblo back to my hostel in Cusco City.
DAY 10:
PEN 1 – Toilet fee at Rainbow Mountain
PEN 3 – Coffee at Rainbow Mountain
PEN 6 – Photo Op with natives at the Rainbow Mountain summit
PEN 1 – Toilet fee at Rainbow Mountain
NOTE: Breakfast and lunch were included in the Rainbow Mountain Tour.
DAY 11:
PEN 3.4 – Bottled Water and Doritos
PEN 16.59 – Uber Taxi to Cusco (CUZ) Airport
PEN 839.5 (USD 250) – Flight from Cusco to Lima (due to canceled flight)
PEN 16.5 – Coke and Doritos Snacks
NOTE: My flight Cusco–Lima via LC Peru Airlines was canceled. I only discovered this when I arrived at the airport (I suspected it earlier because I couldn’t complete web check-in). I had to book a new flight via LATAM Airlines to catch my Lima–Bogota flight via VivaAir.
TIP: For VivaAir flights, print your boarding pass between 72 to 2 hours before departure; otherwise there will be an extra airport check-in fee. More details HERE.
Day 11: Flight from Lima to BogotaDay 11: Hotel accommodation at Hotel San Francisco in BogotaDay 12: Simon Bolivar monument near the Bolivar MuseumDay 12: Hike at Monserrati in BogotaDay 12: Having some “Tamal” food with my Colombian friend at Monserrate, BogotaDay 12: My funny friend who toured me in the city of BogotaDay 12: At Plaza de Bolivar in BogotaDay 12: Somewhere in the district of La Candelaria in Bogota
DAY 11:
COP 25,498 – Uber Taxi: El Dorado (BOG) Airport to Hotel San Francisco de Asis
DAY 12:
COP 50,000 – Extra fee for room extension until 8:00 PM
COP 6,000 – Ticket fee at Bolivar Museum
COP 6,000 – Bottled Water
COP 6,000 – Food: Tamal (share with a friend)
COP 11,100 – Taxi: Somewhere near Monserrate to Plaza Bolivar
COP 2,600 – Bottled water
COP 26,400 – Uber Taxi: Hotel to BOG Airport
SUBTOTAL: COP 133,598 = USD 41.13
ECUADOR 🇪🇨
Language: Spanish Currency: US Dollars (USD) Prefer mode of transportation: Uber Taxi Int’l Airport: UIO
Day 13: Mitad del Mundo in QuitoDay 13: The monument of Mitad del Mundo (Middle of the World) in QuitoDay 13: Basilica del Voto Nacional in QuitoDay 13: Plaza Grande in Quito
DAY 13:
USD 27 – Uber Taxi: Mariscal Sucre (UIO) Airport to Mitad Del Mundo
USD 3.5 – Food (Arroz con Pollo)
USD 0.75 – Soda Apple Drink
USD 5 – Entrance fee at Mitad Del Mundo monument
USD 0.75 – Soda drink
USD 13.51 – Taxi to Hostel
USD 12.8 – Booking fee for my Hostel in Quito
USD 2.25 – Food (Arroz con Pollo) with soup
USD 1 – Doritos snack and Water
USD 26.6 – Uber Taxi: Hostel to UIO Airport
USD 2.5 – Bottled Juice at UIO Airport
USD 4 – Food (Empanada con Pollo) at UIO Airport
NOTE: I ended up booking a room in Quito as carrying bags all day would be very tiring (I was already very tired and lacking sleep).
SUBTOTAL: USD 99.66
BRAZIL 🇧🇷
Language: Portuguese Currency: Brazilian Real (BRL) Exchange rate: 1 USD = 3.9030 BRL Prefer mode of transportation: Uber Taxi
Day 14: Getting ready to go home! Always the saddest part.Day 14: My roommate in Hostel Vitoria who drove me to GRU Airport for free. In exchange, I gave him a Philippine keychain.
BRL 0 – Taxi: Hostel to GRU Airport (free c/o my hostel roommate!)
BRL 17 – Starbucks Frap Caramel (for wifi haha)
BRL 18 – Starbucks Frap Caramel (for wifi again)
NOTE: I booked a hostel near GRU Airport just to get some good rest prior to leaving Brazil.
SUBTOTAL: BRL 126.49 = USD 32.41
And here is my overall expenses! Drum roll please!!!
TOTAL: USD 3,369.16
Phew!!! There you have it! I thought I couldn’t finish it today!
Though I went beyond my travel budget, for me it was totally worth it. The experience was PRICELESS! The next time I visit South America, I will definitely take it slow (I know, I felt like I was rushing the whole 14-day trip).
I hope that by the guide and tips I’ve laid out, you’d find them informative. If you have any questions, feel free to leave a comment below. I’d be happy to answer your queries to the best of my knowledge.