This post may contain affiliate links which means if you purchase something through that link, I will make a small commission at no additional cost to you. Think of it as buying a cup of coffee for me on someone else. Thanks & enjoy!
If you will be traveling abroad on a small budget and looking for great tips in order to avoid spending too much, then this blog is perfect for you! Whether you’re a frequent traveler or a newbie in backpacking, I’m sure you’ll find these 15 budget travel tips helpful for making your saving cash easy breezy!
Hi there! First of all, I am Daniel – a solo backpacker from the Philippines. If you don’t know my story yet, feel free to read this article where I talked about how I quit my job in order to travel. This article was also featured on TripZilla Philippines.
At Batu Cave, Malaysia. My first ever solo backpacking trip | Dantravels.org
15 PROVEN BUDGET TRAVEL TIPS
1. Book your flights / accommodation in advance. I use many different search engines, but hands down, Kayak is one the best for scooping up deals. Read also: My 14-day South America cost breakdown.
2. Pre-book your main attraction tickets. Don’t wait until the last minute for places like Machu Picchu. I use Viator or GetYourGuide to book with confidence.
3. Don’t take too much luggage. Airlines charge heavy fees for big bags. I stick to a 55-L Backpack and a small laptop bag to keep things mobile and avoid check-in fees.
4. Stay connected. Googling is a lifesaver for navigation! If you don’t buy a local SIM, use Maps.me for offline navigation.
5. Mind your currency abroad. Avoid airport exchange booths! Withdraw from local ATMs for better rates, and always keep some emergency USD hidden in your bag.
6. Get travel insurance before you leave. It’s imperative for lost luggage or injuries. I recommend World Nomads for the best value.
7. Go Couchsurfing. Couchsurfing lets you stay with locals for FREE. It’s an eye-opening way to make friends, just be sure to check references first!
9. Bring a water bottle. Sodas and bottled water add up! That extra money could pay for another night in a hostel every week.
10. Avoid eating near touristy restaurants. Go down a few blocks and eat where the locals do. It’s cheaper and usually tastes much better!
11. Ask for local advice. Don’t be shy! Ask hostel staff or locals what things should *normally* cost to avoid “tourist prices.”
12. Walk and minimize transportation costs. Walk as much as you can. For long distances, use subways or buses and look for “day passes.” Read also: My 4-day Russia itinerary.
13. Take free walking tours. It’s the best way to learn about a city. Just remember to tip your guide at the end!
14. Cross the border by land. Buses and trains are often cheaper than planes, and the scenery is a bonus! Use Rome2Rio to compare costs.
15. Minimize your souvenirs. Postcards and photos are the best souvenirs. Don’t weigh your backpack down with things you don’t need!
At Kuala Lumpur City Gallery Sign | Dantravels.org
Which travel budget tip is your favorite? If I missed anything, share it in the comments below! Let’s show the world that traveling doesn’t have to be expensive.
✈️ BUDGET TRAVEL CHEAT SHEET
Screenshot this quick summary for your next adventure!
PRO-TIP
KEY ACTION
1. Flights & Stays
Book 2–4 months in advance. Use Kayak or Skyscanner.
2. Attractions
Pre-book main tickets online via Viator or GetYourGuide.
3. Luggage
Travel light! Stick to carry-on limits to avoid bag fees.
4. Connectivity
Get a local SIM for navigation; use Maps.me for offline use.
5. Money
Withdraw cash from local ATMs (avoid airport exchange!).
This post may contain affiliate links which means if you purchase something through that link, I will make a small commission at no additional cost to you. Think of it as buying a cup of coffee for me on someone else. Thanks & enjoy!
If you’re curious about which places are worth visiting when you only have two days in Yangon, then you’re in the right place. In this blog, I’ve put together the perfect 2-day Yangon itinerary featuring the top attractions in the city.
Hi there! First of all, I am Daniel — a solo backpacker from the Philippines. If you don’t know my story yet, feel free to read this article where I talked about how I quit my job in order to travel. This article was also featured on TripZilla Philippines .
I flew to Yangon, Myanmar on my 28th birthday, so this trip became extremely memorable for me. Unfortunately, I only had two days to explore the city!
Yangon, Myanmar’s largest city and formerly known as Rangoon, is about a 1½-hour flight from Bangkok, 3 hours from Singapore, and approximately 6½ hours from Dubai. The city is located in Lower Myanmar at the convergence of the Yangon and Bago Rivers.
Yangon is also conveniently close to three of Myanmar’s most popular destinations. It takes roughly 1½ hours by plane to reach Bagan (via Nyaung U Airport), Mandalay, and Inle Lake (via Heho Airport). This makes Yangon a perfect gateway for entering and leaving the country while still offering plenty of attractions and activities for travelers.
Language: Burmese Currency: Burmese Kyat (MMK) Airport: RGN Preferred mode of transportation: GrabTaxi Time Zone: GMT +6:30
Burmese men wearing their traditional LONGYI | Dantravels.org
HOW I GOT THERE
Finding a cheap flight to Yangon from Southeast Asia is relatively easy and affordable. I booked mine from Manila, Philippines with a connecting flight in Kuala Lumpur, Malaysia.
I suggest checking Kayak since they usually offer cheaper fares compared to other booking websites.
HOW TO GET AROUND
For travelers, the best way to get around Yangon is by taxi. These days, the easiest way to hail one is through the Grab app. There are local ride-hailing apps available, but Singapore-based Grab is much more reliable and works similarly to Uber.
Make sure to have the Grab app installed and purchase a local SIM card with mobile internet once you arrive in Yangon.
WHERE DID I STAY?
I arrived at Yangon International Airport (RGN) at around 8:00 AM after a 2½-hour flight from Kuala Lumpur. The first things I looked for were an ATM to withdraw Burmese Kyats and a SIM card with internet access to help me navigate the city.
After getting mobile data, I booked a Grab taxi going to my hostel in downtown Yangon.
Hostel rate: 272.17 PHP (5.4 USD) per night as of July 2019
Agga Youth Hostel in Yangon | Dantravels.orgMy room at Agga Youth Hostel in Yangon | Dantravels.orgView from my window at Agga Youth Hostel in Yangon | Dantravels.orgAgga Youth Hostel in Yangon | Dantravels.orgMy bed at Agga Youth Hostel in Yangon | Dantravels.orgShared Bathroom at Agga Youth Hostel in Yangon | Dantravels.org
You can book hotels in Yangon through Agoda or Booking.com. I personally prefer Booking.com because many accommodations offer free cancellation and pay-at-the-property options. There are plenty of choices ranging from budget hostels to luxury hotels.
If hotels are not your thing, try Airbnb. Staying in an Airbnb gives you a more local experience and often makes you feel more connected to the city or neighborhood you’re visiting. I’ve used Airbnb on several trips and really enjoyed the experience.
If you’re new to Airbnb, you can get up to 42 USD travel credit by signing up through this referral link .
2-DAY YANGON ITINERARY
DAY 1:
1st Stop: Shwedagon Pagoda
Stunning Shwedagon Pagoda is well worth a trip to visit! If you are visiting Yangon, it’s a must-see. Shwedagon Pagoda is large and looms over the city. It is considered the landmark of Yangon and even Myanmar as a whole. You really can’t miss it!
All shoes must be taken off before entering and your feet will get very dirty so take some wipes for afterwards (I was given free wipes so I guess that was included in the entrance fee).
Duration (getting there + visiting): 3 hours
Shwedagon Pagoda entrance fee: 10,000 Kyats
Shwedagon Pagoda opening hours: 4:00 AM – 10:00 PM
Shwedagon Pagoda in Yangon | Dantravels.org
2nd Stop: Sule Pagoda
The Sule Pagoda is right in the heart of Yangon. It’s at the intersection of two main thoroughfares, Maha Bandula and Sule Pagoda Road, specifically in the center of the traffic circle where these two major roads circle a roundabout. All shoes must be taken off before entering as well.
TIP: There will be a shoe-keeping price of 1,000 Kyats, so do yourself a favor and bring a plastic bag to put your shoes in. I paid an additional 1,000 Kyats for the shoe-keeping guy before entering haha. And if someone offers you a bouquet of flowers, just ignore them and head straight to the entrance. If you accept it, they’ll make you pay 1,000 Kyats like what happened to me.
Duration (getting there + visiting): 1 hour
Entrance fee: 4,000 Kyats
Opening hours: 6:00 AM – 10:00 PM
Sule Pagoda | Dantravels.org
3rd Stop: Yangon Circular Train
Hop aboard the circular train in Yangon for an authentic experience of the city and its suburbs. Traveling here gives you the chance to witness daily life in Yangon as it passes through suburban districts rarely visited by tourists. The nearest train station to my hostel is Lanmadaw station.
Duration (getting there + visiting): 2 hours
Train ticket price: 200 Kyats
Opening hours: 6:00 AM – 5:10 PM
Yangon Circular Train | Dantravels.org
DAY 2:
4th Stop: Reclining Buddha
Also known as Chaukhtatgyi Buddha, the Buddha itself was quite mesmerizing to look at. The Reclining Buddha image is decorated with very expressive colors, white face, red lips, blue eye shadow, golden robe, and red fingernails. You can take photos from a high platform located at the feet of the Buddha as well.
Duration (getting there + visiting): 1 hour
Opening hours: 6:00 AM until 8:00 PM
Entrance fee: I actually got here for FREE but some say the fee is 5 USD per person.
Reclining Buddha | Dantravels.org
5th Stop: Kandawgyi Park & Lake
Kandawgyi Park in Yangon is a very nice place to have a quiet walk in the shaded tropical gardens around the lake or spend a relaxed couple of hours. It will be quite easy to forget that right outside it is a busy street.
Kandawgyi Lake, also known as Royal Lake, is an artificial lake built by the British as a water reservoir. It offers views of the Royal barge in the lake as well as views of the nearby Shwedagon Pagoda.
There are snacks sold inside the park and even a lakeside restaurant, but feel free to bring your own snacks and do a picnic.
Duration (getting there + visiting): 2 hours
Entrance Fee: FREE
Kandawgyi Park | Dantravels.org
6th Stop: Botahtaung Pagoda
The Botataung Pagoda is a famous pagoda located in downtown Yangon near the Yangon River. There are many souvenir shops and interesting places alongside the pagoda.
I really love this place especially the riverside view. There are also several street food stalls around.
But during the time I visited the pagoda, it was under renovation so I didn’t bother entering. To appreciate the pagoda more, it should look like this without those construction poles.
Duration (getting there + visiting): 2 hours
Entrance fee: 2 USD per person
Botataung Pagoda under renovation | Dantravels.org
7th Stop: Yangon River
After Botataung Pagoda, I went for a walk along Strand Road to get a good view of the Yangon River near Nan Thida ferry terminal. There are some good restaurants here to fill your hunger after touring around.
Duration (getting there + visiting): 1 hour
Yangon River viewed from Nan Thida ferry terminal | Dantravels.org
8th Stop: Tooth Relic Pagoda
The Tooth Relic Pagoda, locally known as Swe Taw Myat Pagoda, was my last stop for this Yangon itinerary. The pagoda was constructed to enshrine a sacred Buddha tooth relic.
It was believed to be one of the teeth of Gautama Buddha who died some 2,500 years ago. Enshrined along with the original relic were two ivory copies, one of which is still enshrined in Swe Taw Myat today.
Duration (getting there + visiting): 1 hour
Tooth Relic Pagoda | Dantravels.org
What do you think of this 2-day Yangon itinerary?
I hope that you find this 2-DAY YANGON ITINERARY useful! If you have any questions, please feel free to ask in the comment section below.
Booking.com – I usually book my hostel accommodation through Booking.com. Room accommodation ranges from cheap hostels to luxury hotels. Book hostels through Booking.com as they have free cancellation or pay-at-the-hotel options.
Airbnb – Try Airbnb in finding comfy and cozy rooms for your Yangon itinerary! I have used Airbnb on some of my other trips and I loved it.
Have you tried Airbnb? Sign up with my link and you will get up to 42 USD (2,200 PHP) off your first stay.
Flights
KAYAK – All of my flight bookings are from KAYAK. Kayak is one of the world’s leading travel search engines and searches hundreds of travel sites.
I suggest you check KAYAK as they usually offer cheap fare rates compared to other booking sites.
Yangon and Bagan Package Tours
Viator – Viator is one of the world’s leading resources for researching, finding, and booking travel experiences worldwide.
Check Viator to find the best tour deals in Yangon and Bagan.
This post may contain affiliate links which means if you purchase something through that link, I will make a small commission at no additional cost to you. Think of it as buying a cup of coffee for me on someone else. Thanks & enjoy!
As someone who is so fond of geography, I have always been fascinated to visit the “tripoint” at the Golden Triangle where the borders of three countries — Thailand, Laos, and Myanmar — meet. I always wondered what it feels like being in three countries at once. That is why I decided to do this 1-Day Chiang Rai Itinerary tour.
Hi there! First of all, I am Daniel — a solo backpacker from the Philippines. If you don’t know my story yet, feel free to read this article where I talked about how I quit my job in order to travel. This article was also featured on TripZilla Philippines.
After celebrating my 28th birthday in Yangon, Myanmar, I flew to Chiang Rai, Thailand to finally see the Golden Triangle I had been dreaming of ticking off my bucket list! Sorry if I sound dramatic haha.
Chiang Rai is a city situated in northern Thailand, in the mountainous province of the same name. The city is near the borders of Laos and Myanmar (formerly Burma).
Language: Thai Currency: Thai Baht (THB) Airport: CEI Time Zone: GMT +7
HOW I GOT THERE:
Finding a cheap flight ticket to Chiang Rai from Southeast Asia is relatively easy (and cheap too!). I booked mine from Yangon to Chiang Rai with a connecting flight in Bangkok.
I suggest you check Kayak (click HERE) as they usually offer cheaper fare rates compared to other booking sites.
But the majority of tourists will probably travel by bus from Chiang Mai — the biggest city in Northern Thailand. It’s just three hours away so it’s even possible to do it on a day tour.
You can go via the Express or VIP bus. You can follow this link to purchase advance tickets.
WHERE DID I STAY?
I arrived at Chiang Rai International Airport (CEI) at around 6:30 PM. I exited through the left side and looked for the metered taxi stand. I gave them my hostel’s name and I was assigned a taxi. It cost me 160 THB to get to my hostel in downtown Chiang Rai.
Hostel room type: Bunk Bed in Mixed Dormitory Room
Mercy Hostel in Chiang Rai | Dantravels.orgMercy Hostel in Chiang Rai | Dantravels.orgMercy Hostel in Chiang Rai | Dantravels.orgMercy Hostel in Chiang Rai | Dantravels.orgMercy Hostel in Chiang Rai | Dantravels.org
You can book a room in Chiang Rai through Agoda or Booking.com. I usually book my accommodations through Booking.com because of their free cancellation and pay-at-the-hotel options.
If you’re new to Airbnb, you can get up to 42 USD free travel credit by signing up through this link.
CHIANG RAI ITINERARY – THE DAY TOUR
Since I was only staying for 2 nights in Chiang Rai, I made sure to maximize my time the next day. That’s why I booked a one-day tour to make the most of my visit around the city. The hostel staff arranged the tour for me.
Here are the tour details:
Tour cost: 1,000 THB
Tour itinerary: White Temple, Blue Temple, Black House, Long-Neck Village, Tea Plantation, Monkey Cave, Mae Sai, Golden Triangle, Opium Museum, and Chiang Saen
Tour inclusions: Lunch, English-speaking tour guide, transportation, and White Temple entrance ticket
Tour schedule: 8:00 AM to 7:00 PM
Considering all these places included in the itinerary, 1,000 THB was definitely worth it! Most of these attractions are outside the city center, so getting around on your own can be difficult especially if you are unfamiliar with Chiang Rai’s transportation system. Traditional transport such as tuk-tuks and samlors are available, along with taxis, buses, and motorcycles. For me, this one-day tour was a perfect deal.
1st Stop: The White Temple
This epic White Temple, also known as Wat Rong Khun, was the first stop on our day tour. It’s definitely one of the most famous attractions in Chiang Rai. The White Temple is a sparkling white modern temple filled with quirky and surreal details. It was absolutely breathtaking, and I was surprised by how much I loved it.
White Temple entrance ticket was included in the tour.
White Temple | Dantravels.org
2nd Stop: The Blue Temple
Also known as Wat Rong Seua Ten, the Blue Temple was only completed in 2016. I think that’s why it isn’t as famous yet compared to Chiang Rai’s other attractions, but I’m pretty sure that will change soon. Visiting the Blue Temple was actually one of my favorite moments in Chiang Rai.
Blue Temple | Dantravels.org
3rd Stop: The Black House
The Black House is actually a collection of painted wooden houses featuring artworks by Thai contemporary artists, most notably its designer, Thawan Duchanee.
Entrance fee: 80 THB (not included in the tour)
Black House | Dantravels.org
4th Stop: The Long-Neck Village
The mountains around Chiang Rai are home to several hill tribe villages. Many of the people living here are nomadic tribes originally from Myanmar, including the famous Karen long-neck tribe. Some of the women wear brass rings around their necks.
When you visit this place, aside from taking photos, try buying some of the products they sell in order to support the local community.
Entrance fee: 300 THB (not included in the tour)
Long Neck Village | Dantravels.org
5th Stop: Tea Plantation
Our next stop was a large tea plantation located about 40 km from Chiang Rai city. It is the largest tea plantation in the province and offers beautiful panoramic views in every direction. There’s also a café serving tea and food, plus a gift shop selling tea products.
Tea Plantation | Dantravels.org
6th Stop: The Monkey Cave
Also known as Wat Tham Pla or the Fish Tail Cave, this temple is filled with monkeys everywhere! They can be quite aggressive and are known to grab belongings from tourists, so be careful while visiting.
Monkey Cave | Dantravels.org
7th Stop: Lunch
We had lunch at around 2:00 PM and I was already starving by then. It was a buffet lunch arranged by the tour operator. Seeing all the delicious food definitely satisfied my hunger!
Lunch was included in the tour.
Our lunch at 2:00 PM — I was so hungry! | Dantravels.org
8th Stop: Mae Sai
In the photo below, I was standing right at the border between Thailand and Myanmar. According to our tour guide, a river underneath the area serves as the natural border between the two countries.
Mae Sai is a fascinating border town where tourists can shop for goods imported from nearby countries. Visitors can find cheap jewelry from Myanmar and antiques mainly from China.
Mae Sai Border | Dantravels.org
9th Stop: The Golden Triangle
The Golden Triangle is the meeting point of Thailand, Laos, and Myanmar, where the Mekong and Ruak Rivers intersect. Visiting this place was the highlight of my trip.
There is also a giant golden Buddha statue overlooking the Mekong River, and above it sits an ancient ruined temple.
Golden Triangle | Dantravels.org
10th Stop: The Opium Museum
Located beside the Golden Triangle, the Hall of Opium is a museum that showcases the history of the opium trade in the region. It also explains the negative effects of opium trafficking in Southeast Asia.
Entrance fee: 50 THB (not included in the tour)
Opium Museum | Dantravels.org
11th Stop: Chiang Saen
Just south of the Golden Triangle, Chiang Saen is one of the oldest cities in Thailand. Formerly known as Wiang Hiran Nakhon, it was once one of the major cities of the Lanna Kingdom before Chiang Rai was established by King Mengrai in 1262.
This was the final stop of our 1-Day Chiang Rai itinerary tour.
Chiang Saen | Dantravels.org
GROUPIE!
Before ending the tour, I took a group photo with my fellow travelers whom I spent the whole day with.
Group photo with my tour mates! | Dantravels.org
What do you think about this 1-day Chiang Rai itinerary?
I hope you found this 1-Day Chiang Rai itinerary useful! If you have questions, feel free to leave them in the comment section below.
I usually book my accommodations through Booking.com because they often offer free cancellation and pay-at-the-property options. From budget hostels to luxury hotels, there are plenty of choices available in Chiang Rai.
Airbnb is also a great option if you want a cozy place that feels more local and homey.
Have you tried Airbnb? Sign up using my referral link and get up to 42 USD (around 2,200 PHP) off your first stay.
Flights
I usually book flights through Kayak since it compares fares from hundreds of travel websites.
This post may contain affiliate links which means if you purchase something through that link, I will make a small commission at no additional cost to you. Think of it as buying a cup of coffee for me on someone else. Thanks & enjoy!
Russia, the largest country in the world, occupies one-tenth of all the land on earth. Thus for many travelers, it’s often difficult to decide where to start and where to go for such huge countries like Russia.
But no worries, to help you with your Russia itinerary, I’ll be sharing the list of places I’ve visited during my 4-day stay in Russia. I will also include the breakdown of cost during my trip for your reference.
Although I have only visited Moscow and St. Petersburg, starting off your journey in either of these two megacities will for sure bring the best of Russia in you!
Hi there! First of all, I am Daniel – a solo backpacker from the Philippines. If you don’t know my story yet, feel free to read this article.
NOTE: For Philippine Passport holders, visiting Russia requires a visa. If you are just on your way to getting your Russian visa, read my blog on how to get your Russian Tourist Visa HERE.
Route Details with Costs
Manila (MNL) to Dubai (DXB) via Cebu Pacific – 6,499 PHP
Dubai (DXB) to Istanbul (SAW) via Pegasus – 8,904 PHP
Istanbul (SAW) to Moscow (DME) via Pegasus – 6,072 PHP
Moscow to St. Petersburg via Russian Rail – 3,530 PHP
St Petersburg (LED) to Moscow (SVO) via Aeroflot – 4,084 PHP
Moscow (SVO) to Dubai (DXB) via Aeroflot – 10,914 PHP
Dubai (DXB) to Manila (MNL) via Cebu Pacific – 2,160 PHP
Passengers waiting for their flights at Dubai International Airport | Dantravels.org
NOTE: Philippine Passport holders transferring at Dubai International Airport (DXB) do not need a UAE visa as long as they remain within the airside transit area.
It was a 3-hour flight from Istanbul to Moscow. I arrived at Moscow Domodedovo Airport (DME) at around 3:30 PM. Russia was the 16th country I’ve visited.
TIP: Buying a local SIM card is highly recommended even for short stays. Google Maps and internet access are lifesavers while traveling.
Saint Basil’s Cathedral in Red Square | Dantravels.org
MY 4D/3N RUSSIA ITINERARY with COST BREAKDOWN
DAY 1 Photo Gallery
Moscow Domodedovo Airport (DME)Aerotrain going to downtown MoscowSaint Basil’s Cathedral in Red SquarePancake, Soup, Russian tea at Teremok
DAY 1 RUSSIA ITINERARY
Transport from Airport to Hostel using Aeroexpress Train and Metro.
Check in at Hostels Rus – Avtozavodskaya.
Tour around Red Square.
Visit Saint Basil Cathedral, Kremlin, Lenin Mausoleum, and GUM.
Walk around Bolshoy Moskvoretsky Bridge.
TIP: Buy a 3-day unlimited metro pass. It is worth it if you plan to move around Moscow often.
DAY 1 EXPENSES
SIM Card (MegaFon) – 1,000 RUB
Aeroexpress Train – 500 RUB
Metro Subway – 55 RUB
Food at Teremok – 220 RUB
3-day unlimited metro pass – 415 RUB
Pancake, soup, tea – 190 RUB
DAY 1 TOTAL: 2380 RUB = 38 USD = 1970 PHP
DAY 2 Photo Gallery
The GUMAt VDNKh with Valeriy2018 FIFA Stadium from Sparrow HillsThe Church of the AscensionTsaritsyno Palace & Museum-Reserve
DAY 2 RUSSIA ITINERARY
Return to Red Square early morning.
Visit GUM shopping center.
Climb Sparrow Hills.
Explore VDNKh amusement park.
Visit Kolomenskoye Museum-Reserve.
Explore Tsaritsyno Palace & Museum-Reserve.
See the Ruined Tower.
DAY 2 EXPENSES
Ice cream – 100 RUB
McDonald’s meal – 261 RUB
Chinese Restaurant food – 330 RUB
DAY 2 TOTAL: 691 RUB = 11 USD = 572 PHP
DAY 3 Photo Gallery
Leningradsky Railway StationMoscow Business DistrictInside the train bound to St. Petersburg
DAY 3 RUSSIA ITINERARY
Morning rest at the hostel.
Visit Moscow business district.
Take the night train to St. Petersburg.
NOTE: Night trains have bunk beds and are comfortable enough for sleeping.
DAY 3 EXPENSES
KFC Meal – 199 RUB
Bread – 50 RUB
Fanta – 50 RUB
Chicken with rice – 330 RUB
Toilet fee – 50 RUB
KFC burgers – 216 RUB
DAY 3 TOTAL: 895 RUB = 14.25 USD = 741 PHP
DAY 4 Photo Gallery
Hermitage MuseumPalace SquareSt Isaac CathedralChurch of the Spilled BloodPeterhof Complex
DAY 4 RUSSIA ITINERARY
Arrive in St. Petersburg.
Visit Admiralteyskaya Station.
Walk around downtown St. Petersburg.
Visit Hermitage Museum and Palace Square.
See Kazan Cathedral and St Isaac Cathedral.
Visit Peter and Paul Fortress.
See Cruiser Aurora.
Explore Peterhof Grand Palaces.
DAY 4 EXPENSES
Metro Subway – 45 RUB
KFC Meal – 283 RUB
Toilet Fee – 40 RUB
Bus Fare – 80 RUB
Airport Snacks – 158 RUB
Souvenirs – 70 RUB
DAY 4 TOTAL: 1,416 RUB = 62.6 USD = 3,265 PHP
BOOKING ESSENTIALS
Booking.com – Great for hotels and hostels with free cancellation options.
Airbnb – Great for cozy rooms and apartments.
Trip.com – Useful for cheap flight bookings.
Russian Railway – Book train tickets in advance.
Viator – Find guided tours and travel experiences.
This post may contain affiliate links which means if you purchase something through that link, I will make a small commission at no additional cost to you. Think of it as buying a cup of coffee for me on someone else. Thanks & enjoy!
When I got that cheap flight tickets of Manila-Dubai round-trip last year, I know that Dubai will never be my final destination. That’s why I never wasted my time booking another flight bound to another dream city of mine – Istanbul! Being the city that sits between Europe and Asia, Istanbul is a paradise for a geography geek like myself. And I’m sure you’ll also enjoy Istanbul as much as I did. To help you with your Turkey itinerary, I’ll be sharing my actual day-to-day itinerary in this blog including the breakdown of cost during my trip to Turkey. Aside from Istanbul, I also went to the city of Bursa, 150 km south of Istanbul.
NOTE: Before returning to the Philippines, I flew to Russia after Turkey and spent a few days in the Russian cities of Moscow and St. Petersburg. Feel free to read my other article about my 4-day itinerary in Russia with cost breakdown.
The stunning Bosporus Strait in Istanbul | Dantravels.org
Hi there! First of all, I am Daniel – a solo backpacker from the Philippines. If you don’t know my story yet, feel free to read this article where I talked about how I quit my job in order to travel. This article was also featured on TripZilla Philippines.
NOTE: For Philippine Passport holders, visiting Turkey requires a visa. If you are just on your way to getting your Turkish visa, read my blog on how to get your Turkish Tourist Visa (click HERE).
Here are my flight ticket details with costs for this Turkey itinerary:
Manila (MNL) to Dubai (DXB) via Cebu Pacific – 6,499 PHP
Dubai (DXB) to Istanbul (SAW) via Pegasus Airlines – 8,904 PHP
Istanbul (SAW) to Moscow (DME) via Pegasus Airlines – 6,072 PHP
Moscow (SVO) to Dubai (DXB) via Aeroflot – 10,914 PHP
Dubai (DXB) to Manila (MNL) via Cebu Pacific – 2,160 PHP
FLIGHT TICKETS TOTAL: 34,549 PHP = 665 USD
NOTE: For Philippine Passport holders who will go through flight transfer at Dubai International airport (DXB), you DO NOT need any sort of UAE visa as long as you stay within the airside area of the airport. Even if your next flight is on another terminal, you can transfer with ease using DXB’s terminal-to-terminal transport buses.
It was almost a 9-hour flight from Manila to Dubai. I arrived at Dubai International Airport (DXB) Terminal 1 at around 9:40 PM. I just need to transfer to DXB’s Terminal 2 for my next flight bound to Istanbul Sabiha Gökçen International Airport (SAW) at 4:20 AM (the next day). There is a dedicated transfer desk at Terminal 1 so I’ve transferred to Terminal 2 with ease by utilizing one of the airport’s transport buses. If you have check-in baggage with you, unfortunately there is a subjected fee for transferring check-in baggage. In my case, I only have a carry-on backpack with me and so the transfer was hassle-free.
Passengers waiting for their flights at Dubai International Airport | Dantravels.org
TURKEY 🇹🇷
Language: Turkish Currency: Turkish Lira (TRY, TL) Exchange rate: 1 USD = 5.72 TL Prefer mode of transportation: Tram / Subway / Trains Int’l Airports in this trip: Sabiha Gökçen (SAW) Time Zone: GMT + 3
After a restless night of flights and transfer, ISTANBUL has finally come to a reality! A city that straddles between two continents of Asia and Europe, definitely a dream come true seeing it with my own eyes!
I arrived at Istanbul Sabiha Gökçen airport at around 8:10 AM as per schedule. It was almost a 5-hour flight from DXB airport. The first thing I looked for at the airport was an ATM to withdraw cash and then looked for a sim card (for internet connection) right after. See Day 1 expenses below to see sim card cost.
TIP: Some backpackers do not appreciate buying a sim card. But I always recommend buying one even if you’re just staying for a few days. Googling every thing is a life saver!
DAY 1: The exact moment I crossed the bridge in Istanbul linking Europe & Asia | Dantravels.org
MY 4D/3N TURKEY ITINERARY with COST BREAKDOWN
DAY 1 Photo Gallery
Day 1: Havabus at Sabiha Goken Airport | Dantravels.orgDay 1: The Taksim Square | Dantravels.orgDay 1: What the Inside of an old tram looks like | Dantravels.orgDay 1: Istanbul Kart | Dantravels.orgDay 1: Galata Tower behind me | Dantravels.orgDAY 1: At Dikilitas | Dantravels.orgDay 1: Hagia Sophia behind me | Dantravels.orgDAY 1: Blue Mosque (Sultanahmet Mosque) | Dantravels.orgDay 1: At Istanbul University | Dantravels.orgDay 1: Stunning ceiling design at Suleymaniye Mosque | Dantravels.orgDay 1: At the Grand Bazaar | Dantravels.orgDay 1: Waiting for Ferry going to Uskudar | Dantravels.orgDay 1: Meet Zuhtu – my Turkish friend and guide. This is at Camlica Hill | Dantravels.orgDay 1: A glimpse at Istanbul’s Subway | Dantravels.org
DAY 1 TURKEY ITINERARY:
Transport from Airport to Hostel. The Sabiha Gökçen Airport is located on the Asian side and the journey can take around 90 minutes to downtown Istanbul. From the airport, I took the Havataş Bus going to Taksim Square. The bus operates from 4 AM to 1 AM. My hostel is about 6-10 min walk from Taksim Square or Taksim metro station.
Hostel name: Chambers of the Boheme (click HERE to book)
Hostel room type: Bunk Bed in Mixed Dormitory Room
Hostel rate: Refer to Day 1 expenses below.
TIP: When booking your hotel/hostel, look it up on Google Maps first and ensure that it is not too far from a subway/train station.
Tour around Istanbul with a Turkish friend. I was restless but definitely ready to see and explore Istanbul on my first day. I met Zuhtu (he’s Turkish) from Couchsurfing. He intended to tour me around the city when I arrived at my hostel. I was with him the whole day and he helped me explore Istanbul like a local. Zuhtu doesn’t speak English much and so I had to use Google Translate to communicate with him sometimes. If we still could not understand each other, we just both laugh it off!
Taksim Square. We started off the tour at Taksim Square which is a 6-minute walk from my hostel. It is a major tourist and leisure district famed for its restaurants, shops, and hotels.
Galata Tower. We took an old tram (also called nostaljik tramvay) from Taksim to Karaköy tram stop and then headed to the Galata Tower. The tower is one of Istanbul’s most iconic symbols.
NOTE: Zuhtu even bought me an Istanbul Kart, it is an all-around public transportation boarding pass in Istanbul. I just need to top it up once empty. The card costs 10 TL which already has a 4 TL load (so the card itself is only 6TL).
Dikilitas. We visited the Dikilitas park situated within Sultanahmet district. We took the metro train to get here from Sishane station.
Blue Mosque (Sultanahmet Mosque). From the heart of Sultanahmet district, this breath-taking building is one of the most majestic Ottoman mosques in all of Turkey!
Hagia Sophia. Just across the Blue Mosque, Hagia Sophia is regarded as the eighth wonder of the World, the Hagia Sophia (or Ayasofya) in Sultanahmet is surely one of Istanbul’s most impressive sights.
Istanbul University. Founded in 1453, this is the oldest university in Turkey! From Sultanahmet train station, we traveled to Beyazit train station to get here.
Suleymaniye Mosque. Another incredible mosque in Istanbul! From Istanbul University, we took a stroll toward Suleymaniye Mosque. The mosque is situated in some elevation and thus there’s a spot here where you can see a scenic view of the Bosphorus Strait! This strait forms part of the continental boundary between Europe and Asia.
Grand Bazaar. Our walking tour continued here at Grand Bazaar. This is one of the largest and oldest covered markets in the world. We had hamburgers here and it was Zuhtu’s treat! Afterward, we strolled along Eminönü Pier to catch the ferry going to Uskudar district. So we were technically crossing the Bosphorus Strait to get to the Asian side of Istanbul.
View of Istanbul from Camlica Hill. Zuhtu said he wanted to show me this amazing place on top of a hill where I could see the entire Istanbul! It’s in Camlica Hill. From Uskudar, we took a bus to Camlica and continued moving on foot until we reached the top of the hill. Being tired and restless that I was, I had no regrets. The place was truly beautiful and with a scenic night view of both the Asian and European parts of Istanbul in one scene! There are also restaurants and cafes at Camlica Hill. It was around 10:00 PM when we left the place.
Back home to Taksim Square. We both took a bus to get back to the European side of Istanbul and then took a metro train to get us home. I don’t remember which train station he got off but what I do remember is that Zuhtu was one of the nicest and most accommodating persons I’ve ever met. I got off at Taksim train station.
Hostel Photo Gallery
Chambers of the Boheme Hostel in Istanbul | Dantravels.orgChambers of the Boheme Hostel in Istanbul | Dantravels.orgChambers of the Boheme Hostel in Istanbul | Dantravels.orgChambers of the Boheme Hostel in Istanbul | Dantravels.orgChambers of the Boheme Hostel in Istanbul | Dantravels.orgChambers of the Boheme Hostel in Istanbul | Dantravels.org
Previous | Next
DAY 1 EXPENSES:
Sim card with internet (Turk Telekom) – 100 TL
Havabus ticket to Taksim Square – 15 TL
Bottled juice drink and bread – 6.15 TL
Room accommodation fee (3-night stay) – 133.5 TL
Food (rice and chicken and chocolate) – 16 TL
Top up Istanbul Kart – 10 TL
DAY 1 TOTAL: 280.65 TL = 49 USD
DAY 2 Photo Gallery
Day 2: Sultanahmet Train Station | Dantravels.orgDay 2: At Divanyulo street | Dantravels.orgDay 2: The Marco Polo Tours at Divanyolu street | Dantravels.orgDay 2: The Çemberlitaş Sütunu (Column of Constantine) | Dantravels.orgDay 2: The Blue Mosque at Sultanahmet | Dantravels.orgDay 2: The other side of Hagia Sophia | Dantravels.orgDay 2: Cart selling Simit | Dantravels.orgDay 2: The crowd at Eminönü Pier | Dantravels.orgDay 2: Man fishing at Galata Bridge (Karakoy-Eminonu Bridge) | Dantravels.orgDay 2: Ferry at Galata Bridge | Dantravels.orgDay 2: My 16.5-TRY dinner – Chicken , rice, salad, choco, water | Dantravels.org
Previous | Next
DAY 2 TURKEY ITINERARY:
Take a rest in the morning. I needed this after the tiring day yesterday!
Create a Do-it-Yourself Walk Tour in the afternoon. I wanted to re-explore Istanbul on my own so I created this simple DIY walking tour. Google Maps definitely helped me a lot where to locate places and deciding where to start. From Taksim train station, I headed to Sultanahmet area to again see the iconic Hagia Sophia and explore more of Sultanahmet and Eminönü.
Divanyolu street. After getting off Sultanahmet station, I took a stroll along this road.
Çemberlitaş Sütunu (Column of Constantine). This is also known as the Burnt Stone or the Burnt Pillar.
Sultanahmet Mosque (Blue Mosque). I really wouldn’t mind seeing this mosque again!
Hagia Sophia. And this one, too!
Topkapi Palace Museum. This palace is just a few blocks from Hagia Sophia.
Istanbul Archeology Museum
Museum of Ancient Orient
Gulhane Park
Column of the Goths
Eminönü Pier. Right after Sultanahmet area, I moved to Eminonu Pier.
Galata Bridge – Just 10 minutes from the Pier, I took a walk across Galata bridge.
Day 3: Inside the tour bus going to Bursa | Dantravels.orgDay 3: This Ferry heading to Bursa Pier is loaded with our tour bus | Dantravels.orgDay 3: The Bursa sign at the Green Mosque | Dantravels.org
Previous | Next
DAY 3 TURKEY ITINERARY:
Bursa Day Tour. Bursa is regarded as the first capital city of the Ottoman Empire.
NOTE: We arrived back to Istanbul at 10:00 PM
DAY 3 EXPENSES:
Simit (bread) – 1.5 TL
Bottled water – 1 TL
Coffee & Bread – 10 TL
Toilet fee – 1 TL
Open Cable Car ride – 30 TL
Ice cream – 5 TL
Two Bottled water – 3 TL
NOTE: Lunch is included in the tour.
DAY 3 TOTAL: 51.5 TL = 9 USD
DAY 4 Photo Gallery
Day 4: I love this Nohutlu Pilav! | Dantravels.orgDay 4: My boarding pass to Moscow | Dantravels.org
Previous | Next
DAY 4 TURKEY ITINERARY:
Fly to Moscow. I left downtown Istanbul at around 7:00 AM to catch my flight to Moscow.
DAY 4 EXPENSES:
Food (2 x fried rice with chicken strip or Nohutlu Pilav) – 10 TL
Havabus ticket to Airport – 15 TL
Souvenirs (keychains) – 55 TL
DAY 4 TOTAL: 80 TL = 14 USD
BOOKING ESSENTIALS
Hotel / Hostel
Booking.com. I usually book my hostel accommodation at booking.com.
Airbnb. Try Airbnb in finding comfy and cozy rooms!
Flights
TRIP. All of my flight bookings are all from TRIP.
Istanbul Package Tours
Viator. Viator is the world’s leading resource for researching, finding and booking the best travel experiences worldwide.
Bursa Tour – I booked at Marco Polo Tourism & Travel agency located at Divanyolu Street, Istanbul.
The trip was absolutely quick! I’m sure you’d think that a three-and-a-half-day stay in Turkey is not enough. You’re right, but I did enjoy every second of it. No doubt.
It would be worth mentioning also that visiting Istanbul ticks the ‘Visit Europe continent’ in my travel bucket list because I was technically on the European soils!
If you’re just planning to visit Istanbul, go ahead and make it a reality! I hope that by the help of this Turkey itinerary blog will make your travel easy and convenient. Safe travels!
This post may contain affiliate links which means if you purchase something through that link, I will make a small commission at no additional cost to you. Think of it as buying a cup of coffee for me. Thanks & enjoy!
“Isn’t it expensive to go to South America?” — you probably are asking yourself this question now. To simply answer it: yes, it is. I find it very expensive, but it doesn’t mean you can’t save money before or during your trip. If you plan in advance, you will definitely save a lot!
In this blog, I’ll show you the breakdown of my expenses before and during my trip to South America, particularly in four countries I visited — Brazil, Peru, Colombia, and Ecuador. You may use this as a guide to gauge your finances for your own South America trip.
A person like me who got fascinated with geography and languages at such a young age always dreamed of setting foot on every continent. South America has always been my favorite continent among the seven. I always dreamed of traveling there even though it is halfway around the world from where I live.
Hi there! First of all, I am Daniel — a solo backpacker from the Philippines. If you don’t know my story yet, feel free to read this article where I talked about how I quit my job in order to travel. This article was also featured on TripZilla Philippines.
So how did I plan it? How did I manage to visit 4 countries in only 14 days? Yep — only 14 days! That was my 2-week Christmas holiday break, and it became the grandest solo backpacking adventure of my life (so far).
NOTE: For Philippine passport holders, visiting Brazil, Peru, Colombia, and Ecuador does not require a visa. These countries are visa-free for Filipinos!
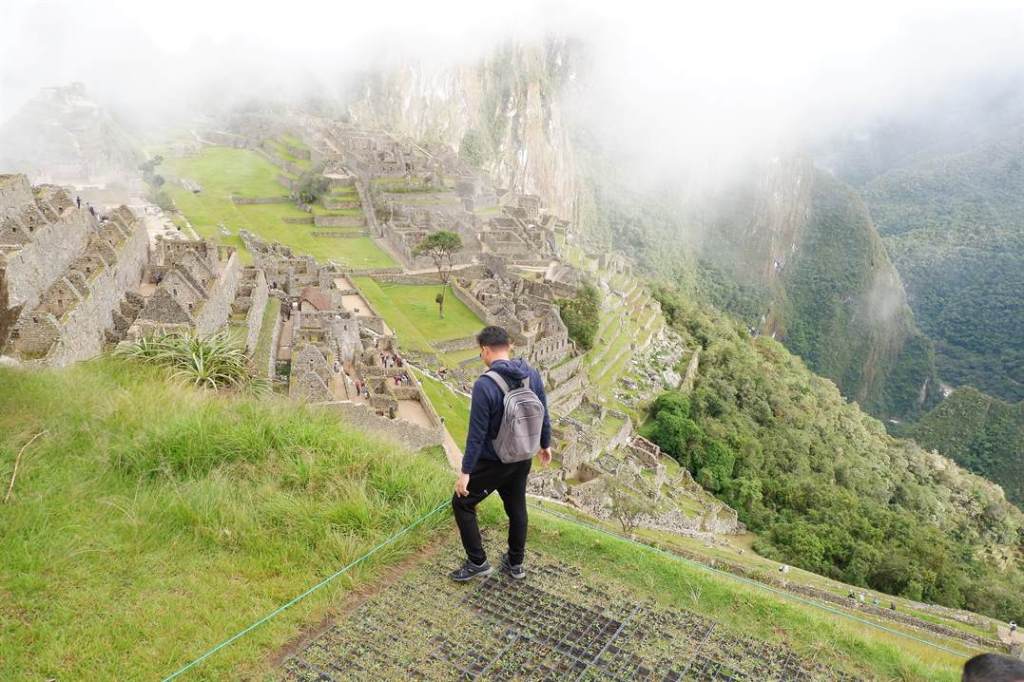
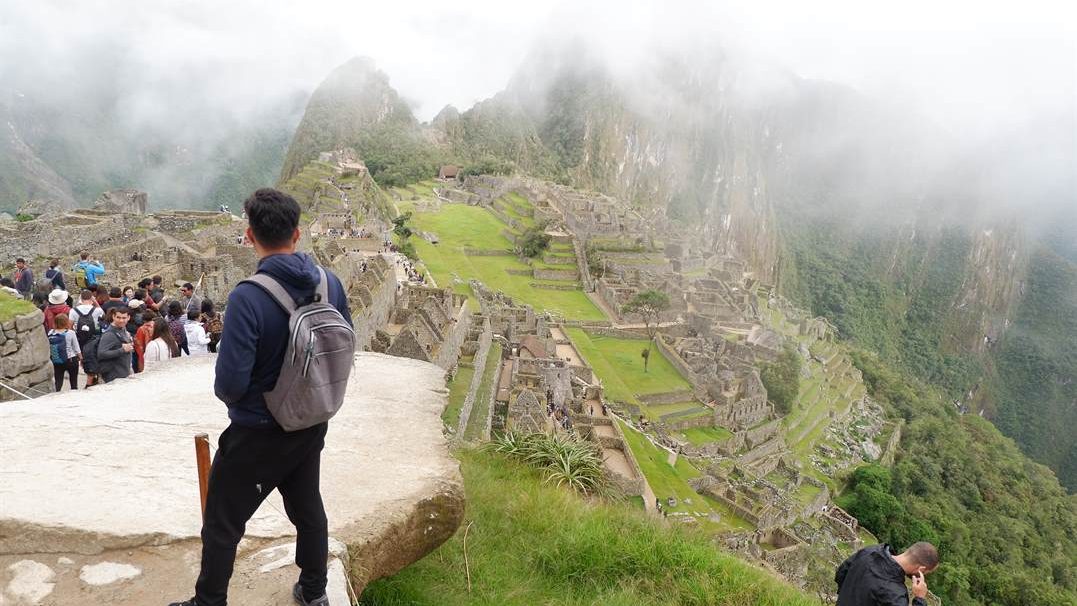
Ruins of Machu Picchu in Peru
BEFORE THE TRIP: TIMELINE WITH COST BREAKDOWN
1. FLIGHTS
NOTE: For flights, I often use Trip.com and Kayak to search for cheap flights in South America.
March 31, 2018 – 927.80 USD Booked a round-trip flight from Manila to São Paulo via Ethiopian Airlines (seat sale).
April 19, 2018 – 301.40 USD Flight from Rio de Janeiro to Lima via Avianca.
May 31, 2018 – 94.25 USD Flight from Lima to Bogotá via VivaAir.
SUBTOTAL: 2,173.60 USD
2. FINAL ROUTES IN SOUTH AMERICA
December 22, 2018 to January 5, 2019 (actual travel date)
Manila – Sao Paulo (Layover at Hong Kong and Addis Ababa)
Sao Paulo – Rio De Janeiro
Rio De Janeiro – Lima
Lima – Cusco
Cusco – Lima
Lima – Bogota
Bogota – Quito
Quito – Sao Paulo
Sao Paulo – Manila (Layover at Addis Ababa and Hong Kong)
3. HOSTEL / ROOM ACCOMMODATIONS
April 19, 2018
18.90 USD – 2 Nights in Cusco, Peru. Booked via Booking.com.
TIP: If you intend to visit Machu Picchu and hike Huayna Picchu, book your ticket 3–6 months in advance since only 200 hikers are allowed daily. My credit card wasn’t accepted on the official website, so I asked my Cusco hostel owner to help purchase my ticket.
November 20, 2018
24.33 USD – 2 Nights in Sao Paulo, Brazil (Airbnb)
November 21, 2018
36.40 USD – 2 Nights in Rio De Janeiro, Brazil (Airbnb)
28.36 USD – 2 Nights in Lima, Peru (Airbnb)
12.00 USD – 1 Night in Cusco, Peru (Booking.com)
12.60 USD – 2 Nights in Machu Picchu Pueblo (Aguas Calientes), Peru (Booking.com)
December 12, 2018
18.92 USD – 1 Night in Bogota, Colombia (Booking.com)
SUBTOTAL: 151.51 USD
4. TRAIN TICKETS
November 20, 2018
79.00 USD – Train ticket from Cusco to Machu Picchu Pueblo via IncaRail.
December 4, 2018
76.00 USD – Train ticket from Machu Picchu Pueblo back to Cusco.
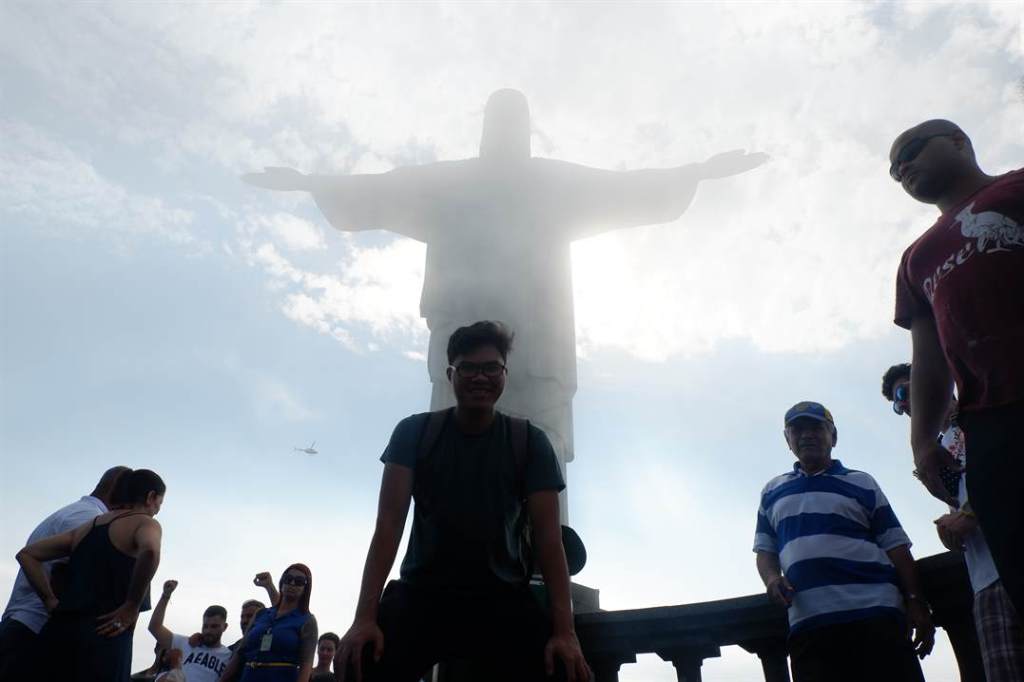
Day 1: Paulista Avenue in Sao PauloDay 2: My room via AirBnB in Rio De JaneiroDay 2: Copacabana Beach in Rio De JaneiroDay 2: Cristo Redentor in Rio De JaneiroDay 3: Pedra do Telegrafo near Rio De JaneiroDay 3: Haha! Figure it out how this happened in Pedra do TelegrafoDay 3: Lunch with my hiking buddy from Brazil
DAY 1:
BRL 156 – Regular Taxi: Guarulhos (GRU) Airport to Paulista Avenue, Sao Paulo
BRL 64 – Uber Taxi: Paulista Avenue to GRU Airport
TIP: You should integrate your credit/debit card as your primary payment method when using the Uber app so you won’t have to worry about paying in cash. Your Uber app will also adapt to the local currency of your location.
NOTE: My flight from Manila to Addis Ababa got delayed. As a result, I arrived in Sao Paulo with a one-day delay. I even canceled my 2-night room accommodation in SP. Also, I wasn’t feeling well the day I arrived in SP, so I didn’t do much except roam around Paulista Avenue.
DAY 2:
BRL 16 – Fried Chicken & French fries at KFC (GRU Airport)
BRL 7 – Cup of Choco at Baked Potato (GRU Airport)
BRL 50 – Sim card (GRU Airport)
BRL 10 – Top up for Internet use (GRU Airport)
BRL 52 – Uber Taxi: Rio De Janeiro (GIG) Airport to Copacabana (Airbnb apartment)
BRL 42 – Uber Taxi: Apartment to Cristo Redentor Entrance Building
BRL 43 – Entrance fee at Cristo Redentor Monument
BRL 10 – Van from Cristo Redentor to Bus stop
BRL 13 – Bus from Bus stop to Copacabana (Airbnb apartment)
BRL 19 – Food (Chicken, Rice, Fries)
DAY 3:
BRL 32.4 – Food (Chicken, Rice, Salad, Fries)
BRL 25 – Share of Gas (Car with a friend to Pedra do Telegrafo)
NOTE: A Brazilian friend took me to Pedra do Telegrafo this day. It was an awesome hike!
Day 4: Plaza de Armas (Lima Square) in LimaDay 4: My favorite Chaufa con Pollo & PotatoDay 4: My room in Lima via AirbnbDay 5: Somewhere in Lima with a good friendDay 6: Cusco Cathedral at Plaza Mayor in Cusco
DAY 4:
PEN 195 – Sim Card with Internet (Lima Airport)
PEN 37.5 – Uber Taxi: Jorge Chavez (LIM) Airport to Airbnb Apartment in Lima
PEN 2 – Bread
PEN 1.5 – Bottled Juice
PEN 12.5 – Uber Taxi from Apartment to Lima Square
PEN 9.5 – Uber Taxi somewhere in Lima to Apartment
NOTE: You probably will notice that I had been eating ‘Chaufa con Pollo‘ in my stay in South America. It means Fried Rice with Chicken. Well, as an Asian, I love rice! Since I am not so familiar with their food or how it tastes, I prefer going for anything with RICE.
PEN 25 – Regular Taxi: Cusco (CUZ) Airport to La Casa De Ingrid Hostel
PEN 5.05 – Uber Taxi: Hostel to Plaza Mayor
PEN 20 – Sightseeing bus tour around Cusco City
PEN 0.2 – Toilet fee
PEN 1 – Bread
PEN 7 – Food (Chicken, Rice, Potato)
DAY 7:
PEN 4.92 – Uber Taxi: Hostel to Plaza de Armas (then walk to Incarail office)
PEN 25 – Food (Chaufa con Pollo) with Bottled water at Machu Picchu Pueblo
NOTE: I was in transit to Machu Picchu Pueblo (a.k.a. Aguas Calientes) this day. Good thing the train ticket includes food for lunch and snacks for passengers.
DAY 8:
PEN 3 – Bottled water
PEN 40 – Bus ticket: Pueblo to Machu Picchu ruins
PEN 50 – Tour guide fee
PEN 2 – Toilet fee
PEN 40 – Bus ticket: Machu Picchu ruins to Pueblo
PEN 6 – Bottled Water
PEN 25 – Some Hamburger
PEN 48 – Food (Chaufa con Pollo)
TIP: Food is very expensive in Machu Picchu Pueblo. I recommend bringing or packing food if you’re on a tight budget.
DAY 9:
PEN 22 – Food (Chaufa con pollo)
PEN 21 – Food (Chaufa con pollo)
PEN 4.14 – Uber Taxi: Cusco drop-off to La Casa De Ingrid Hostel
NOTE: Later that day, I was in transit from Machu Picchu Pueblo back to my hostel in Cusco City.
DAY 10:
PEN 1 – Toilet fee at Rainbow Mountain
PEN 3 – Coffee at Rainbow Mountain
PEN 6 – Photo Op with natives at the Rainbow Mountain summit
PEN 1 – Toilet fee at Rainbow Mountain
NOTE: Breakfast and lunch were included in the Rainbow Mountain Tour.
DAY 11:
PEN 3.4 – Bottled Water and Doritos
PEN 16.59 – Uber Taxi to Cusco (CUZ) Airport
PEN 839.5 (USD 250) – Flight from Cusco to Lima (due to canceled flight)
PEN 16.5 – Coke and Doritos Snacks
NOTE: My flight Cusco–Lima via LC Peru Airlines was canceled. I only discovered this when I arrived at the airport (I suspected it earlier because I couldn’t complete web check-in). I had to book a new flight via LATAM Airlines to catch my Lima–Bogota flight via VivaAir.
TIP: For VivaAir flights, print your boarding pass between 72 to 2 hours before departure; otherwise there will be an extra airport check-in fee. More details HERE.
Day 11: Flight from Lima to BogotaDay 11: Hotel accommodation at Hotel San Francisco in BogotaDay 12: Simon Bolivar monument near the Bolivar MuseumDay 12: Hike at Monserrati in BogotaDay 12: Having some “Tamal” food with my Colombian friend at Monserrate, BogotaDay 12: My funny friend who toured me in the city of BogotaDay 12: At Plaza de Bolivar in BogotaDay 12: Somewhere in the district of La Candelaria in Bogota
DAY 11:
COP 25,498 – Uber Taxi: El Dorado (BOG) Airport to Hotel San Francisco de Asis
DAY 12:
COP 50,000 – Extra fee for room extension until 8:00 PM
COP 6,000 – Ticket fee at Bolivar Museum
COP 6,000 – Bottled Water
COP 6,000 – Food: Tamal (share with a friend)
COP 11,100 – Taxi: Somewhere near Monserrate to Plaza Bolivar
COP 2,600 – Bottled water
COP 26,400 – Uber Taxi: Hotel to BOG Airport
SUBTOTAL: COP 133,598 = USD 41.13
ECUADOR 🇪🇨
Language: Spanish Currency: US Dollars (USD) Prefer mode of transportation: Uber Taxi Int’l Airport: UIO
Day 13: Mitad del Mundo in QuitoDay 13: The monument of Mitad del Mundo (Middle of the World) in QuitoDay 13: Basilica del Voto Nacional in QuitoDay 13: Plaza Grande in Quito
DAY 13:
USD 27 – Uber Taxi: Mariscal Sucre (UIO) Airport to Mitad Del Mundo
USD 3.5 – Food (Arroz con Pollo)
USD 0.75 – Soda Apple Drink
USD 5 – Entrance fee at Mitad Del Mundo monument
USD 0.75 – Soda drink
USD 13.51 – Taxi to Hostel
USD 12.8 – Booking fee for my Hostel in Quito
USD 2.25 – Food (Arroz con Pollo) with soup
USD 1 – Doritos snack and Water
USD 26.6 – Uber Taxi: Hostel to UIO Airport
USD 2.5 – Bottled Juice at UIO Airport
USD 4 – Food (Empanada con Pollo) at UIO Airport
NOTE: I ended up booking a room in Quito as carrying bags all day would be very tiring (I was already very tired and lacking sleep).
SUBTOTAL: USD 99.66
BRAZIL 🇧🇷
Language: Portuguese Currency: Brazilian Real (BRL) Exchange rate: 1 USD = 3.9030 BRL Prefer mode of transportation: Uber Taxi
Day 14: Getting ready to go home! Always the saddest part.Day 14: My roommate in Hostel Vitoria who drove me to GRU Airport for free. In exchange, I gave him a Philippine keychain.
BRL 0 – Taxi: Hostel to GRU Airport (free c/o my hostel roommate!)
BRL 17 – Starbucks Frap Caramel (for wifi haha)
BRL 18 – Starbucks Frap Caramel (for wifi again)
NOTE: I booked a hostel near GRU Airport just to get some good rest prior to leaving Brazil.
SUBTOTAL: BRL 126.49 = USD 32.41
And here is my overall expenses! Drum roll please!!!
TOTAL: USD 3,369.16
Phew!!! There you have it! I thought I couldn’t finish it today!
Though I went beyond my travel budget, for me it was totally worth it. The experience was PRICELESS! The next time I visit South America, I will definitely take it slow (I know, I felt like I was rushing the whole 14-day trip).
I hope that by the guide and tips I’ve laid out, you’d find them informative. If you have any questions, feel free to leave a comment below. I’d be happy to answer your queries to the best of my knowledge.
This post may contain affiliate links which means if you purchase something through that link, I will make a small commission at no additional cost to you. Think of it as buying a cup of coffee for me on someone else. Thanks & enjoy!
Get your US Tourist B1/B2 Visa ready because you’re going to see what the United States has to offer! Though I understand US visa is probably one of the hardest visas in the world to get but it is all worth it. In this post, I’ll be giving you a step-by-step guide, a list of the requirements, my experience throughout the whole application process, interview questions, and other tips to help you get your US tourist visa!
Photo by Patrick Tomasso on Unsplash | Dantravels.org
But again, just like in other visa application blogs I’ve written, no one can give you the guarantee of your US tourist visa’s approval – not me, not even a lawyer or a travel agent. If anyone does, is most likely a scammer!
I know you must have heard tons of horror stories from people regarding their denied US visa applications. Because of the huge number of Filipino illegal immigrants, the US Government is very strict about its immigration laws.
It’s alright to feel nervous. I was nervous, too! But for now, let’s set aside those negative thoughts. Let’s be positive so that that positive energy will radiate to the people around you.. even to the interviewer! =)
Anyway, enough of that and let’s get started!
US VISA B1/B2 FOR TOURISTS
The B1/B2 visitors visa is for people traveling to the United States temporarily for business (B1) or for pleasure or medical treatment (B2)
B1 visa is for attending business conventions and educational conferences
B2 visa is for tourism, visiting friends or relatives, medical treatment
To be granted a US tourist visa, you must be able to prove that:
your visit is only temporary
you have enough money to cover all your expenses during your stay
you have binding ties that ensure your return to your country
WHEN AND WHERE TO APPLY
WHEN: Application shall be made at least 2 months prior to your intended departure. But since I was on a hurry, I did it all in a month! =) Here is my application timeline:
Day 1: Read Blogs
Day 5: Book Hostel Accommodations (I need this information prior to submitting the Application form online).
Day 6: Get myself an ID picture both digital and hardcopy
Day 8: Pay for the Visa Fee
Day 9: Submit Application Form Online (I am rushing, I know!)
Day 9: Schedule Interview Appointment. Note that I chose the earliest available date which is 21 days away!
Day 30: Day of Interview. On this day, you’ll immediately know whether you’re approved or not.
WHERE: Application and personal appearance interview will take place at the U.S. Embassy in the Philippines at 1201 Roxas Boulevard Manila, Philippines 1000. Please be at the Embassy gate 30 minutes prior to your interview
GET YOUR US TOURIST VISA IN 5 EASY STEPS
STEP 1: PAY THE VISA FEE
There are 2 ways to pay US Visa Application Fee:
Online via BPI website or Bancnet website
Directly at the BPI Bank Branches
In my case, I chose to pay it directly to the BPI Bank Branches.
Go to the visa info page of the US Embassy website. As of April 2019, the visa fee is USD160. This is the costliest visa fee I’ve ever paid!
Then go to this page. Download and print your $160-deposit slip. Or click HERE to download directly the slip.
US Tourist Visa Cash at Bank Payment Option | Dantravels.org
NOTE: There is an expiration date on the deposit slip. Ensure that you pay it before it expires!
US Tourist Visa Bank Deposit Slip | Dantravels.org
NOTE: Visa Fee are non-refundable & non-transferable. After you have paid the visa application fee, keep the BANK receipt for your records. It cannot be replaced if it is lost. You will not be able to schedule an appointment without your receipt number.
STEP 2: FILL UP THE VISA APPLICATION (DS-160) FORM
If you are a solo backpacker like me, you need to book first your room accommodation. You will need this information to answer the form of where you’ll be staying.
TIP: I usually book my hostel accommodation at booking.com. Thus, I recommend you guys trying it as well. Room accommodation ranges from cheap hostels to luxury hotels. Book hostels through booking.com as they have free cancellation or pay-at-the-hotel option.
Use my link to book your hostel and you’ll get 10% of your booking back after your stay. Click this link to get that discount.
Or try Airbnb in finding comfy and cozy rooms! I have used Airbnb on some of my other trips and I loved it!
Have you tried Airbnb? Sign up with my link and you will get up to 42 USD (2,200 Php) off your first stay. Click this link to get that discount.
To start filling up your own form, click this link (DS-160 Form). You can access a DS-160 form sample in this link as your reference.
NOTE: Prepare also your 2″x2″ digital photo. This will be uploaded on your application form.
US Tourist Visa DS-160 Form | Dantravels.org
TIP: Be brutally honest when filling up the application form. The interviewer will base his/her questions on your filled up form. So when he/she caught you lying from something that you wrote in the form, you’re dead! =(
The confirmation number generated after filling up the form is needed to set up appointment. Shown below is my confirmation page, please print this as you’ll be needing this during the day of your appointment.
Confirmation Page | Dantravels.org
STEP 3. SCHEDULE APPOINTMENT
After making payment (step 1) and completing the DS-160 Form (step 2), you can now schedule your appointment. Prepare these 3 info: Passport Number, Paid Receipt Number, and Confirmation Number. Go to this SITE to schedule your appointment.
US Visa Appointment Site | Dantravels.org
Once done, save and print you appointment letter. The appointment letter should look like this – see below.
STEP 4. PREPARE OTHER SUPPORTING DOCUMENTS
Once you’re done setting up your appointment online and while waiting for your appointment day, you need to prepare supporting documents. In order to support your answer during the interview, the interviewer will most likely ask for proof of documents. Here are the set of documents I’ve prepared:
Old Passport – To prove your travel history. Your travel history will most likely be asked during your interview like ‘Have you traveled before?, Where and When?’.
Hostel Booking – I usually book my hostel accommodation at booking.com. They have free cancellation options.
Have you tried Airbnb? Sign up with my link and you will get up to 42 USD (2,200 PHP) off your first stay. Click this link to get that discount.
Itinerary of planned tourism activities
I can provide you a copy of mine if you like. Just leave a reply on the comment section below.
Latest Income Tax Return (ITR), Certificate of Employment, Payslips, Bank Passbook / Bank Certificate.
Travel Insurance – I highly recommend getting travel insurance from World Nomads.
STEP 5: GO TO THE EMBASSY AND KILL THE INTERVIEW!
Visit the U.S. Embassy on the date and time of your interview. Bring a printed copy of your Appointment confirmation, DS-160 confirmation page, One recent 2″x2″ photo ID, and all passports. NOTE: Applications without all of these items will not be accepted.
There are also things NOT allowed inside the Embassy such as mobile phones. Interview proper is next. I created a separated blog post from experience during the interview. Click HERE to read.
After the interview, you’ll know immediately if your visa is approved or denied. By the way, I was approved and got my 10-year multiple entry US visa after 3 days! So I wish you all the best! =)
My US Visa | Dantravels.org
SUMMARY:
Visa Type: B1/B2 (Business/Tourism)
Visa Validity: 10 Years
Entry type: Multiple Entry
Visa Fee: USD160.00
RECOMMENDED PACKAGE TOURS
I highly recommend booking tours through Viator which is perfect for your U.S. itinerary:
My interview happened this morning (March 19th). My schedule was for 9:45 AM, and by 9:30 AM, I was already in the waiting hall. At 9:55 AM, we were directed inside for the three stages of the application:
Pre-screening
Fingerprint Scanning
The Interview
The most interesting part is the INTERVIEW. I kept telling myself, “You got this, Daniel!” As I moved closer to the windows, a Filipino couple let me go ahead of them. I later realized they were avoiding the interviewer on the leftmost side—she was loud, dominant, and had just rejected the lady in front of her. That’s when I got really nervous!
THE INTERVIEW TRANSCRIPT
ME: Good morning, Ma’am. (I handed over my passport)
INTERVIEWER: Good morning. (Looking at her computer) What will you do in Los Angeles?
ME: Hollywood… Hollywood Walk of Fame… (I went blank for a second) Ro-rodeo Drive, Venice Canals—the famous ones.
INTERVIEWER: (Sees my Turkish visa) Oh, you went to Turkey. What did you do there?
ME: I went backpacking, Ma’am. I have been to 21 countries before.
INTERVIEWER: How do you fund your travels?
ME: I have a job here in the Philippines, Ma’am.
INTERVIEWER: What kind of company?
ME: I work as a Mechanical Engineer for an engineering firm.
INTERVIEWER: But what does your company actually do?
ME: (Blank again!) We buy equipment… basically, we’re a contractor and a middleman between the client and the vendor to build power plants. It’s in the Oil and Gas industry.
INTERVIEWER: Alright. What other countries have you been to?
ME: Recently, I went to South America—
INTERVIEWER: (Cuts me off) Yeah, you have a Peru stamp. Where did you go in Peru?
ME: I went to Lima, Cusco, and Machu Picchu.
INTERVIEWER: What college degree did you finish?
ME: Mechanical Engineering at Sorsogon State College.
INTERVIEWER: SORso-what?
ME: SORSOGON State College.
INTERVIEWER: When did you graduate?
ME: April 2011.
INTERVIEWER: How do you travel so much despite your work?
ME: I normally file leave for 4 days to a week. For South America, I used 2 weeks because I sacrificed my Christmas vacation for it.
INTERVIEWER: Who do you live with? Where is your family?
ME: I live alone in a rented room. My family is in my hometown, Sorsogon. It’s about 600km from here.
INTERVIEWER: Backpacking in Los Angeles. Interesting. How do you do backpacking?
ME: It’s a low-cost style of travel, for example, staying at hostels.
INTERVIEWER: Do you have relatives in the US?
ME: No, Ma’am.
INTERVIEWER:Your visa is approved. You’ll have it in one week.
ME: Thank you so much!
*Phewww*
Yep! She did not ask for any documents. The interview was 5-8 minutes long I think. It went fast. But I must admit the first minute of the interview, I was nervous and shaky.
I know you’re nervous, too. And it’s okay. But just like myself, you’re gonna rock this!!! Just be true to your intentions but also make sure you established your rootedness to the Philippines. You need to convey to them that you will return after your touristic trip. That is very important. Like in my case, I have to come back to work after my trip.
💡 TOP 3 TIPS TO NAIL YOUR INTERVIEW
Be Brutally Honest & Consistent: The interviewer already has your DS-160 data on their screen. If you wrote “backpacking,” stick to it! Don’t try to sound like a luxury traveler if you aren’t one. Like I did, it’s okay to admit you’re staying in hostels—they value consistency over “rich” stories.
Prove Your “Rootedness”: This is the most important part! You need to show them you have every reason to come back to the Philippines. Mention your job, your family in the province (like my 600km connection to Sorsogon), or your rental commitments. They need to know you aren’t going there to stay illegally.
Keep Your Composure (Even if you blank out!): I went blank twice during my interview—once about the places in L.A. and once about my own job description! It happens. Just stay calm, smile, and explain it simply. You don’t need a perfect “script”; you just need to be a real person.
Bonus Tip: Don’t let the “loud” interviewers at the other windows scare you. Focus on your own window and your own story!
Feel free to read a separate blog I made on How To Apply A US Visa With Your Philippine Passport HERE. It is a step-by-step guide to apply for your US Visa.
If you have any questions, feel free to leave a reply below. I will respond as soon as I can to help you somehow. That’s a promise.
This post may contain affiliate links which means if you purchase something through that link, I will make a small commission at no additional cost to you. Think of it as buying a cup of coffee for me on someone else. Thanks & enjoy!
Visiting Australia is one of the most memorable trips of my life. The Bondi beach, the Opera House, the scenic Harbor bridge area, the 12 Apostles, etc. Without a doubt, Australia is definitely worth visiting! If you’re here looking for a guide on how to apply for your Australian Tourist Visa or what commonly known as the ‘Visitor Visa’ (subclass 600), then you’re in the right place.
But before I give you the details, I’d like to start off by saying that no one can give you the guarantee of your Australian visa’s approval – not me, not even a lawyer or a travel agent. If anyone does, is most likely a scammer.
As a travel blogger, what I can offer you here is just a guide with helpful tips to increase your chances of getting that Australian tourist visa. =)
WAYS TO GET YOUR AUSTRALIAN TOURIST VISA
Now, there are two ways to get your Australian tourist visa:
via VFS Global
via ImmiAccount (Australia’s Department of Home Affairs’s online services).
VFS Global is a third party agency that handles visa application for Australia and other countries. However, I do not find applying to VFS Global convenient as you will be paying their Service Fee on top of the actual visa fee. You also need to submit printed copies of your documents.
In this blog, I will only be particular on applying directly ONLINE via ImmiAccount. If your visa is approved, your visa will be sent to you via email as a letter-sized paper. It can either be 3-month or 1-year valid. I got mine with 1-year validity and with multiple entry as well.
Anyway, enough of that and let’s get started!
WHEN TO APPLY via IMMIACCOUNT
I suggest you apply at least 6 weeks before your intended flight. The processing time could be up to 4 weeks after submittal! Some have gotten their results as early as 2 days (wow!). I got mine 16 days after submitting my application.
GET YOUR AUSTRALIAN TOURIST VISA IN 5 EASY STEPS
STEP 1: CREATE AN IMMIACCOUNT
Go to this link. Click the ‘Create ImmiAccount’ button at the left bottom corner to start creating your account.
STEP 2: CREATE NEW APPLICATION
Once you have created your account and you’re logged in, simply click NEW APPLICATION, and then look for VISITOR VISA (600).
It will direct you to the online form application. You need answer it truthfully. Put N/A if the item is NOT applicable to you.
STEP 3: UPLOAD THE REQUIRED DOCUMENTS
Next stage of the application is attaching and uploading the documents. There are two sections – REQUIRED and RECOMMENDED. Sometimes, the required and recommended documents can vary from one applicant to another. So you gotta really pay attention to what is required and recommended for you.
REQUIRED:
1. Photo – A passport size photo, save it as jpg format.
2. Travel Document – This is basically just a scanned page of your passport’s bio page. Save it as pdf format.
3. Evidence of applicant’s previous travels – scanned pages of your passport with stamps to show your travel history; include also your old passport if you have one. Save it as pdf format.
RECOMMENDED:
4. Family register and composition form – We Filipinos do not have this one but it is recommended to attach the NSO birth certificate.
You can request an original copy of this through online via PSA website. I got mine home-delivered after three (3) working days. Click HERE for the link.
5. Evidence of planned tourism activities in Australia – I included my day-to-day itinerary, confirmed flight tickets, and hostel bookings.
I can also share my day-to-day itinerary template, just leave a comment below and I can send it via email.
TIP: I usually book my hostel accommodation at booking.com .
Use my link to book your hostel and you’ll get 10% of your booking back after your stay. Click this link to get that discount.
Or try Airbnb in finding comfy and cozy rooms!
Have you tried Airbnb? Sign up with my link and you will get up to 42 USD off your first stay. Click this link .
NOTE: I also included travel insurance.
Go to this link to get your World Nomads travel insurance.
6. Evidence of financial status and funding for visit – attach Bank Certificates, passbooks, ITR, insurances, investments, etc.
7. Evidence of current employment or self employment – attach your COE, payslips, ID, business permit, SEC or DTI registration.
8. Exceptional reasons for extended stay in Australia – ignore this if you’re not staying more than 12 months.
TIP: Use CAMSCANNER app if you don’t own a scanner.
STEP 4: PAY THE VISA FEE
Review your application form and attached documents thoroughly. Then pay the visa fee of AUD 140 via Credit Card or Paypal.
STEP 5: WAIT AND PRAY!
Once you’re done with uploading and payment, it is time for the waiting game. Result of your visa application will be emailed to you.
MY EXPERIENCE:
Waiting for my visa got me so frustrated. Imagine I have to wait up to a month without certainty whether it is approved or not.
On the 16th day from the day I submitted my application online, I finally received an email visa notification.
My application status is GRANTED!
SUMMARY:
Visa Type: Visitor Visa (600) Visa Validity: 1 Year Entry Type: Multiple Entry Visa Fee: 140 AUD
RECOMMENDED PACKAGE TOURS
In case you’re also looking for package tours in Australia, I highly recommend booking tours through Viator .








 Dan Travels